Archives

Big Magic Cooking + Fig & Bacon Pizza Recipe

September 21, 2016

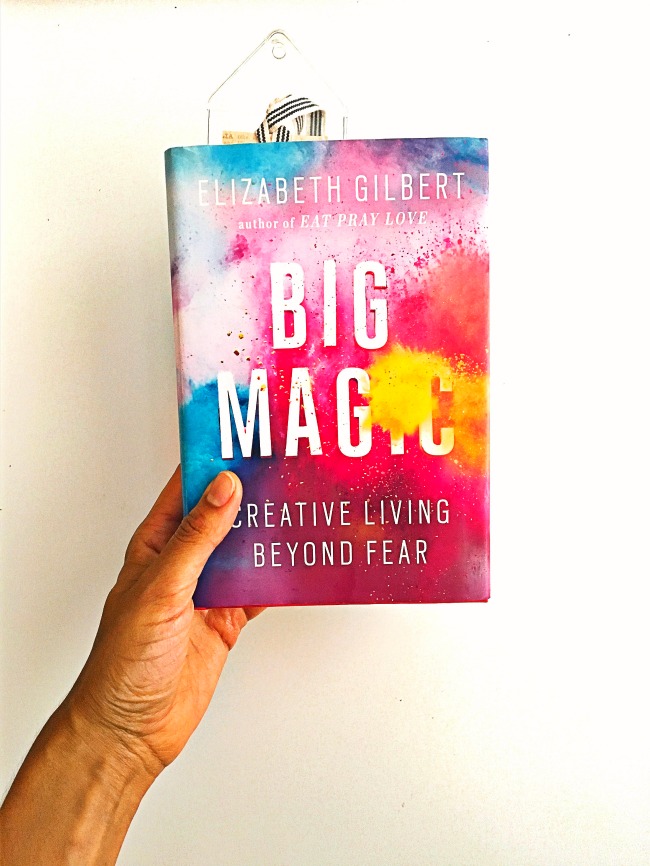
Big Magic Elizabeth Gilbert

No time to chit chat? Skip straight to the recipe here.

I have a slight infatuation with motivational books. Whenever I am down, or in a funk, want to learn something new, or create a new habit, my knee jerk reaction is to get a book on it. Inevitably, it will always make me feel better, clearer and more in control – like I have a plan.

Oh. You’re judging me. I can feel it. But that’s okay. I figure, there are worse addictions to have. Don’t worry. I have no plans of self-motivating you guys. So just bear with me.

PaleoPizzaCrustDoughMix

Currently, I’m on my second go round of “Big Magic,” by "Eat, Pray, Love" superstar Elizabeth Gilbert. It’s composed of little mini lessons on how to live a creative life. One of my favorite excerpts reads:

Creativity is sacred, and it is not sacred.
What we make matters enormously, and it doesn’t matter at all.
We toil alone, and we are accompanied by spirits.
We are terrified, and we are brave.
Art is a crushing chore and a wonderful privilege.
Only when we are at our most playful can divinity finally get serious with us.
Make space for all these paradoxes to be equally true inside your soul, and I promise – you can make anything.

Deep, right?

Actually, the first time I read it I didn’t think so. I thought it was a little too fluffy for me. And honestly, at that point, I thought I didn’t have time for a creative life. And if I did, I wasn’t really creative enough to consider myself an “artist.”

Paleo Pizza Crust Dough Big Magic Cooking

My art, after all, isn’t poetry or oil paintings, lettering or instruments. My art is healthy food. Cooking it, researching it, eating it, sharing it, and seeing how good it makes me feel – inside and out.

Here’s the irony. The WHOLE book is all about squashing this kind of assumption. The thought that we all have to be crazy, amazing, volatile “artists” to be creative. When really, human beings, by nature, are creative beings.

Some of us just choose to express it more than others. And those who don’t, have a million excuses why. Each chapter of “Big Magic” is dedicated to combatting those excuses.

Paleo PIzza Crust Big Magic Cooking

If you are a type A, perfectionist like me, you need to read this book. It's like your permission slip to mess up, go crazy, be irresponsible and ugly and gramatically incorrect.

Reading it made me worry less about being the first, the best, and the original. And focus more on just being unapologetically myself. It made me giddy and excited to spend time with my art. Or as Gilbert calls it, “have an affair with your art.” But of all the lessons, there is one that really stuck with me.

It’s the lesson she called “Motives.” In it, she states,

“You are not required to save the world with your creativity. Your art not only doesn’t have to be original…it also doesn’t have to be important.”

I love this.

So Gilbert. You’re telling me that, when I cook, I don’t have to cure diseases? Heal guts? Get all of America to stop eating processed food?

Paleo Pizza Fig and Bacon

Wow. Freeing.

In her opinion, people don’t want to be “helped” or “saved” by your art. That’s not what art is for. It’s a personal expression of yourself.

As soon as I finished the book, I was immediately inspired to create.

Handcuffs are off. Nobody is watching. This is just for me. Do your thing, Stacey.
(Okay. I realized that by talking to myself I inched at least one dot past motivational book-reader. Sorry. Won’t happen again).

So I made something totally and completely indulgent, unnecessary and unhelpful with the most extravagant ingredients I could think of – just for the hell of it.

Here it is. My art.

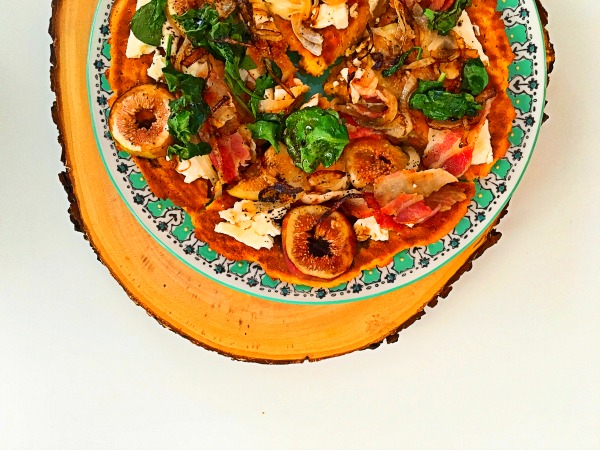
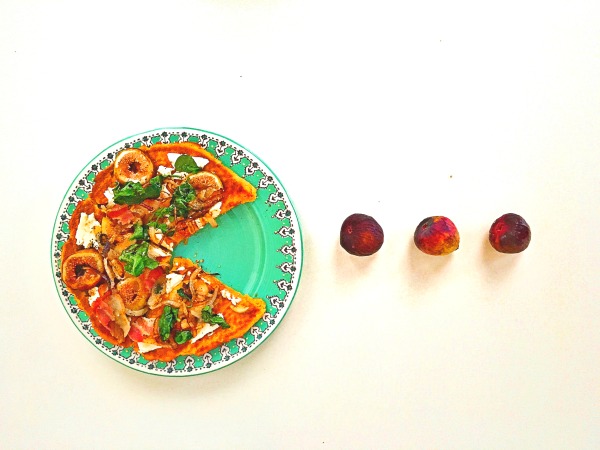
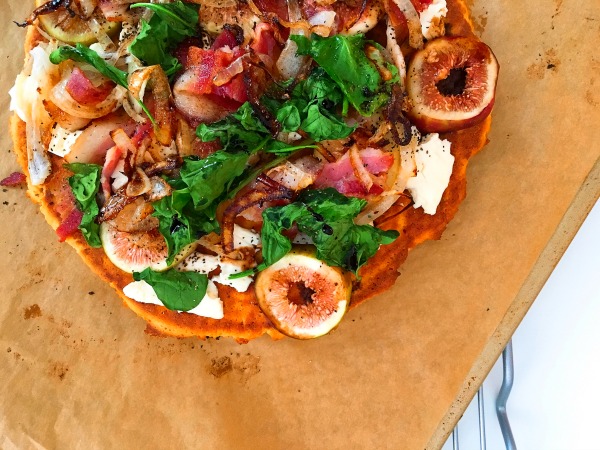
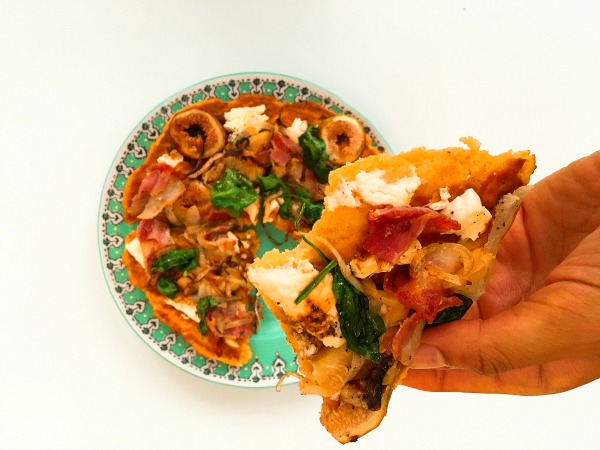
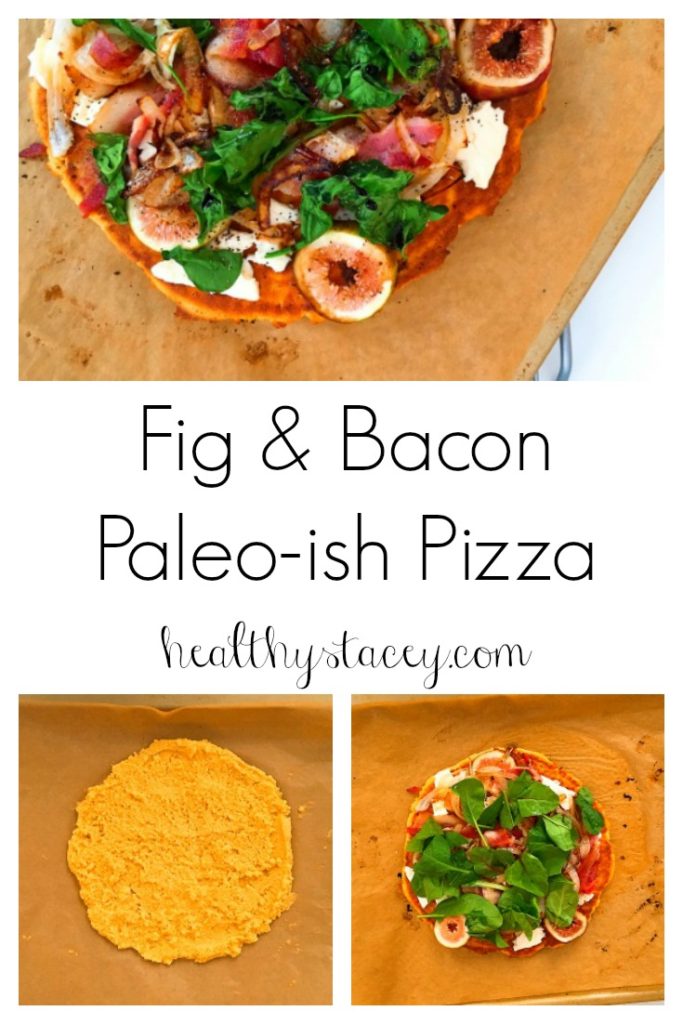
Paleo-ish Fig and Bacon Pizza.

Paleo Pizza Fig and Bacon Big Magic Cooking

Paleo Pizza Fig and Bacon Big Magic Cooking

Paleo Big Magic Pizza

It's full of umami and rich fruit flavor, with a caramelly base, an herby touch and a crispy finish. It's made from gluten and grain-free ingredients (coconut and arrowroot flour crust), and topped with indulgent organic toppings. I broke the "Paleo rules" and used feta because I felt like living on the dangerous side. I probably overcooked my bacon and under-melted my cheese, but none of that mattered. It was damn delicious and absolutely beautiful in my eyes. And that's all that matters, right?

Much Love,

HealthyStaceySignature

Fig and Bacon Pizza Recipe

Paleo Pizza Fig and Bacon Big Magic Cooking

Pizza crust recipe adopted from the book, “Everyday Paleo Around the World: Italian Cuisine” by Sarah Frogoso

Yeast Mixture:

  • ¼ cup warm water
  • 2 teaspoons raw honey
  • 2 teaspoons active dry yeast

Dry ingredients:

  • ¾ cup almond flour
  • 3 tablespoons coconut flour
  • 2/3 cup arrowroot flour
  • pinch of sea salt

Wet Ingredients:

  • 1 egg
  • 2 teaspoons extra virgin olive oil
  • 1 teaspoon raw apple cider vinegar

Toppings:

  • 4 strips of pasture-raised bacon
  • ½ onion, thinly sliced
  • 4-5 figs, sliced to about ¼ inch thick
  • Handful of organic Arugula, chopped up
  • Grass-fed feta cheese, thinly sliced
  • Optional: Balsamic vinegar

Pizza Crust Directions:

  1. Preheat oven to 425
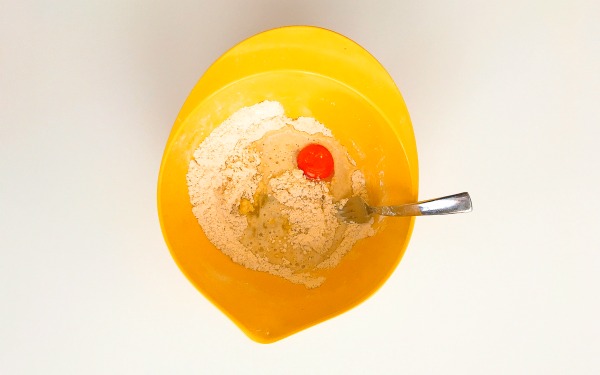
  2. Put the yeast ingredients into a bowl and mix together. Let them sit for about 5 minutes to activate and foam a bit.
  3. Place the dry ingredients in a second bowl and whisk to combine.
  4. Add the yeast mixture and the wet ingredients into the dry ingredients. Mix well with an electronic hand mixer.
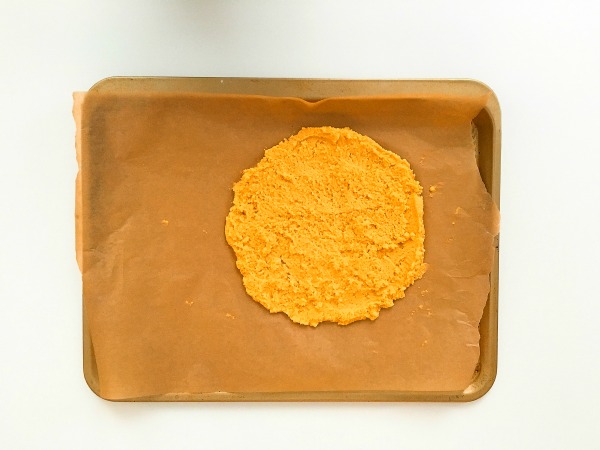
  5. Scoop the mixture onto a pan lined with parchment paper.
  6. Use a rubber spatula to spread into an even circle.
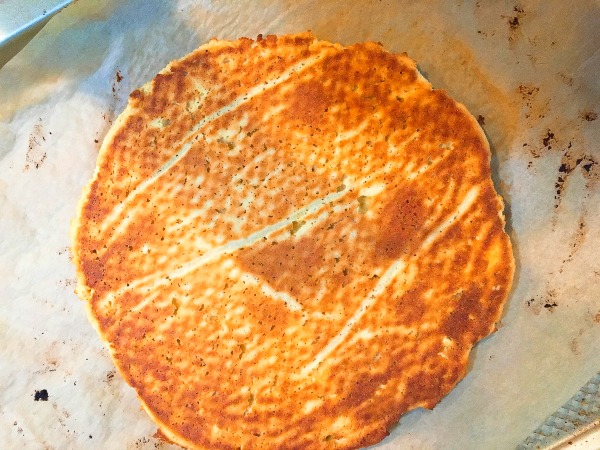
  7. Stick your pizza crust in the oven and bake for 9-10 minutes.

Topping Directions:

  1. Turn a skillet to medium high heat and lay your bacon on the skillet. Don’t cook until crispy or burnt. As you are also going to put this back in the oven on the pizza. 5 minutes-ish should be good.
  2. Place the bacon on a paper-towel lined plate, reserving the fat.
  3. Use the fat to cook your thinly sliced onions. Again, don’t overdo it as you will be putting these back in the oven with the crust.
  4. Slice your figs and chop up your arugula.

Putting it all together Directions:

  1. Remove crust from the oven and flip over with a spatula.
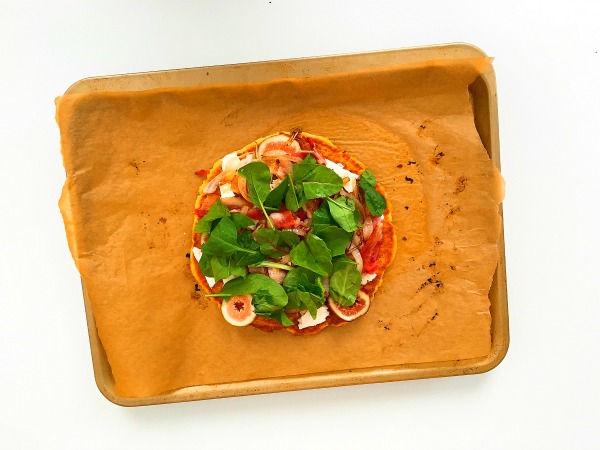
  2. Add your toppings like so: 1) Lay feta in one layer across crust (note: I did not add enough feta myself so I am telling you to make a layer so you do not repeat my mistake), 2) Lay strips of bacon over feta, 3) Lay slices of figs over bacon, 4) Sprinkle chopped arugula evenly across the top
  3. Put back in oven and cook for another 5-10 minutes.
  4. Take out, drizzle a little balsamic vinegar across the top and totally and completely indulge.
  5. Now. Go make your own art.

Paleo Pizza Fig and Bacon


p.s. Save this baby for later and pin it. Oh! And while you're there, I would really really appreciate the follow.

Paleo fig and bacon pizza pin

Paleo Pizza Fig and Bacon Big Magic Cooking
Paleo-ish Fig and Bacon Pizza
Print Recipe
Servings Prep Time
2 people 20 minutes
Cook Time
15 minutes
Servings Prep Time
2 people 20 minutes
Cook Time
15 minutes
Paleo Pizza Fig and Bacon Big Magic Cooking
Paleo-ish Fig and Bacon Pizza
Print Recipe
Servings Prep Time
2 people 20 minutes
Cook Time
15 minutes
Servings Prep Time
2 people 20 minutes
Cook Time
15 minutes
Ingredients
Servings: people
Instructions
  1. Preheat oven to 425
  2. Put the yeast ingredients into a bowl and mix together. Let them sit for about 5 minutes to activate and foam a bit.
  3. Place the dry ingredients in a second bowl and whisk to combine.
  4. Add the yeast mixture and the wet ingredients into the dry ingredients. Mix well with an electronic hand mixer.
  5. Scoop the mixture onto a pan lined with parchment paper.
  6. Use a rubber spatula to spread into an even circle.
  7. Stick your pizza crust in the oven and bake for 9-10 minutes.
  8. Turn a skillet to medium high heat and lay your bacon on the skillet. Don’t cook until crispy or burnt. As you are also going to put this back in the oven on the pizza. 5 minutes-ish should be good.
  9. Place the bacon on a paper-towel lined plate, reserving the fat.
  10. Use the fat to cook your thinly sliced onions. Again, don’t overdo it as you will be putting these back in the oven with the crust.
  11. Slice your figs and chop up your arugula.
  12. Remove crust from the oven and flip over with a spatula.
  13. Add your toppings like so: 1) Lay feta in one layer across crust (note: I did not add enough feta myself so I am telling you to make a layer so you do not repeat my mistake), 2) Lay strips of bacon over feta, 3) Lay slices of figs over bacon, 4) Sprinkle chopped arugula evenly across the top
  14. Put back in oven and cook for another 5-10 minutes.
  15. Take out, drizzle a little balsamic vinegar across the top and totally and completely indulge.
Share this Recipe
Powered byWP Ultimate Recipe

Eat The Rainbow Paleo Salad

August 17, 2016
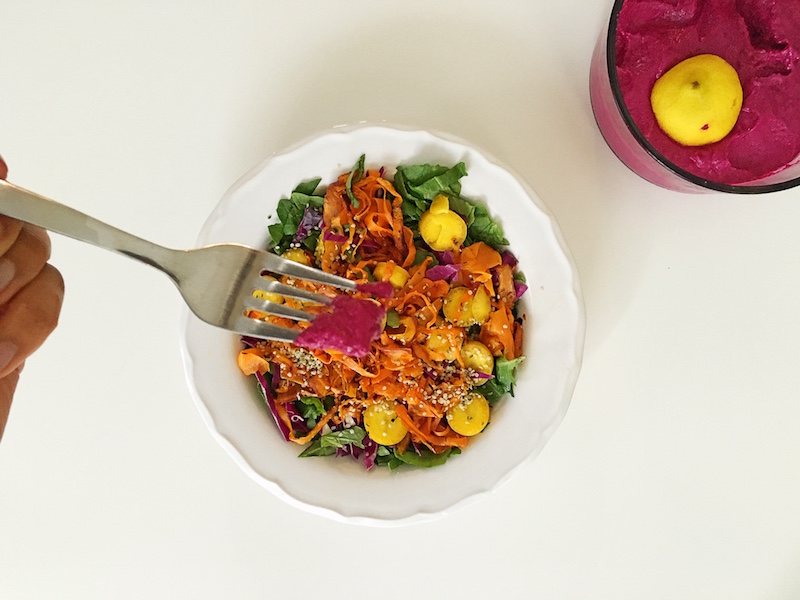
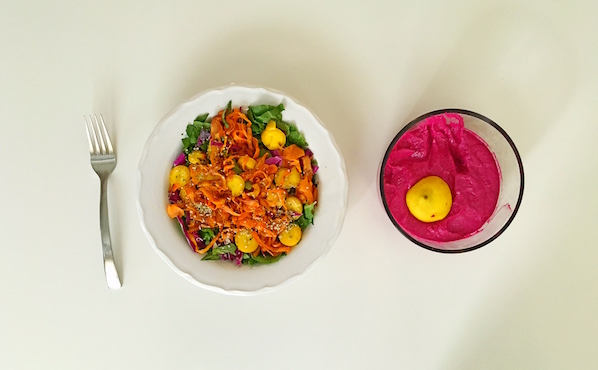
Rainbow paleo salad with fork

Rainbow paleo salad with fork

I know what you’re thinking. Are you seriously going to write a recipe for a salad? Yes. I seriously am. Because I take my salads very seriously. And I really do not understand why they are so underrated as a meal. They’re either the obligatory side dish or a necessary evil in dieting hell.

WHY?

I think it’s because people are making them the wrong way.

What are you putting in your salads? Lettuce. Tomatoes. Cucumber. Ranch. Ugh. That is SO 10 years ago. Where's the color? Where's the variety? Where's the WHOLE REASON we eat salads? To give us one big dose of highly nutritious ingredients all at once. Duh!

Salads – done right – can be showstoppers. In one bite, you can have crunchy, creamy, crispy and kale-y goodness. You can bring ingredients together that normally never associate with each other – for one big party in a bowl. Mango and avocado. Kale and pomegranate. Almond butter and charred broccoli.

Saute a few carrot shreds in coconut oil, caramelize some onions in ghee, add some well-seasoned chicken, juicy ground beef or even a tin of tuna on top, and you’ve got yourself one of the best entrées on the menu, my friends. (Note: I do not mean combine all these ingredients together. That's just silly).

Becasue I am concerned for your relationship with this vital meal, today, I share with you…

The BEST salad I ever made.

No joke. Search this entire blog and I’ve never said that before because it’s a bold claim.

This baby is warm yet cool, crunchy and creamy, melts in your mouth, but with a refreshing finish. And best part, it’s SO full of nutrients. You know how I know why? Because it’s RAINBOW COLORED!

Random flashback moment:

Rainbow Brite flashback.

ANYWAYS.

Where was I? Colors, right. Different nutrients give different colors to the foods they are in. And get this. It's all on purpose. Mother nature planned it that way. GENIUS!

Plants can't get up and walk around, right? So the way they literally spread their seed is by attracting animals and organisms to them with their good looks and vibrant colors. Animal likes what he sees. Animal eats. Animal hops, crawls, runs, or flies away. Animal poops out seeds somewhere else. And tada! A whole new pretty plant. So it's in their favor to stand out and look attractive.

But wait! There's more.

In addition to the pigments looking good, they also can protect the plant from UV damage, enable photosynthesis, and even act as antioxidants for the plants. The better the protection they provide, the longer they live. We humans, in turn, cash in on these benefits when we eat the plants ourselves.

Which brings me back to this beautiful salad. Let's see what we got here…

Red Cabbage
The blue tint in red cabbage (anthocyanins) –> keeps your mind sharp.

Green Kale
The deep green in kale (indoles and isothiocyanates)–> increases the production of enzymes that clear toxins from the body.

Orange Carrots and Sweet Potatoes
The orange in carrots and sweet potatoes (beta carotene) –> keeps your bones strong, your eyes healthy and boosts your immune system.

Crimson in Beets
The dark crimson in beets (Betacyanins) –> works in conjunction with vitamin C and manganese to offer benefits for eye health and overall nerve tissue health in addition to functioning as anti-inflammatory compounds.

Boom.

Forget the weird, unpronouncable words. Just eat the colors! Eat all of them. Red, orange, yellow, green blue, purple. Look out for them at the grocery store. Try weird veggies just because they're colorful. ROYGBV it up!

They're not just good for you, they're just plain GOOD.

You ready for this? I thought so.

Rainbow paleo salad

Ingredients:

  • 2 Heirloom Carrots
  • 1 Small Sweet Potato
  • 1-2 Tablespoons Coconut Oil
  • Bowlful of Kale
  • Red Cabbage, chopped
  • Hemp Seeds
  • 1 Tablespoon Beet Dip – See here for beet dip recipe.

Dressing Ingredients:

  • 2 tablespoons Apple Cider Vinegar
  • 1/4 cup Extra Virgin Olive Oil
  • Salt and Pepper, to taste

Directions:

  1. Shred one carrot; chop the other carrot. Set aside.
  2. Shred the sweet potato using a vegetable peeler. Don't kill yourself trying to shred the whole thing up. Just get as far down as is comfortable and use the rest of the potato to chop up and saute later if you'd like.
  3. Heat coconut oil on pan and toss sweet potato shreds on. Saute until slightly crispy – 5 minutes-ish. Remove from pan to a side plate.
  4. Add more coconut oil to the pan and toss on carrot shreds. Saute until slightly crispy – 3 minutes-ish. Add shreds to sweet potato plate.
  5. Chop up kale so that it’s in nice bite-sized pieces. Put in salad bowl.
  6. Mix in red cabbage and chopped carrots.
  7. Top with sweet potato and carrot shreds.
  8. Scoop beet dip on top. Note, it's not TOTALLY necessary if you don't have the time to make it, but I highly recommend it. It's kind of what sends this salad over the edge. Might I suggest, too, that you just use sliced cooked beets as an addition if you don't want to make the dip.
  9. Sprinkle with hemp seeds.

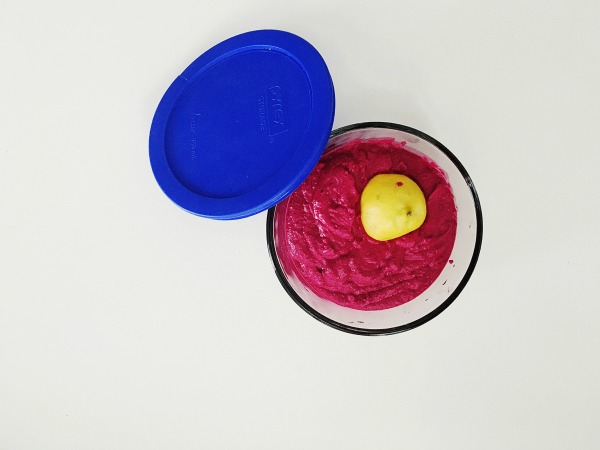
Paleo Beet Dip with a lemon wedge


Much Love,

http://www.healthystacey.com/wp-content/uploads/2015/07/HealthyStaceySignature.jpg

P.S. Make it easy on yourself and Pin this baby!

 Eat The Rainbow Salad Pin

Rainbow paleo salad
Eat The Rainbow Paleo Salad
Print Recipe
Rainbow paleo salad
Eat The Rainbow Paleo Salad
Print Recipe
Ingredients
ACV Dressing
Servings:
Instructions
  1. Shred one carrot; chop the other carrot.
  2. Shred the sweet potato using a vegetable peeler. Don't kill yourself trying to shred the whole thing up. Just get as far down as is comfortable and use the rest of the potato to chop up and saute later if you'd like.
  3. Heat coconut oil on pan and toss sweet potato shreds on. Saute until slightly crispy – 5 minutes-ish. Remove from pan to a side plate.
  4. Add more coconut oil to the pan and toss on carrot shreds. Saute until slightly crispy – 3 minutes-ish. Add shreds to sweet potato plate.
  5. Chop up kale so that it’s in nice bite-sized pieces. Put in salad bowl.
  6. Mix in red cabbage and chopped carrots.
  7. Top with sweet potato and carrot shreds.
  8. Scoop beet dip on top. Note, it's not TOTALLY necessary if you don't have the time to make it, but I highly recommend it. It's kind of what sends this salad over the edge. Might I suggest, too, that you just use sliced cooked beets as an addition if you don't want to make the dip.
  9. Sprinkle with hemp seeds.
  10. Pour ACV dressing on top and aggressively mix it all together.
Share this Recipe
Powered byWP Ultimate Recipe

How To Spiralize Vegetables + Zucchsghetti with Avocado Alfredo Recipe

July 19, 2016

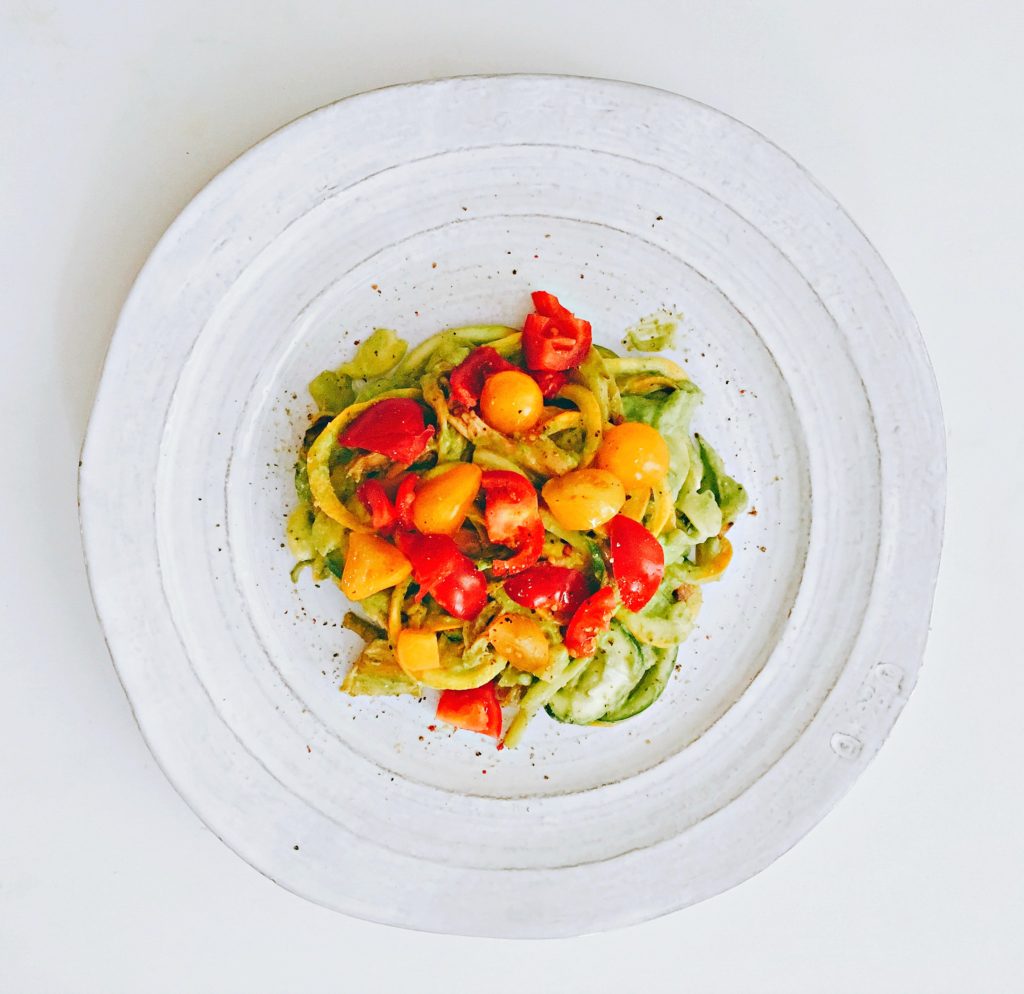
Zucchsghetti with Avocado Alfredo – Paleo, Vegan, High in Omega-3

Zucchini Noodles dressed with avocado sauce and cherry tomatoes, gluten-free and grain-free for paleo and vegan diets

This recipe is for all of you who out there who don't think you can be decadent on a Paleo diet. Creamy, rich and lick-the-blender satisfying, with this sauce, you won't believe that you're eating an entire bowl of vegetables – including high in omega-3 gems like avocados and hemp seeds. Best part is, it's not even that hard to make! I'd say on a scale of 1 to 10, it's about a Tuesday. Not a Monday where you're still trying to recover from over-eating and over-drinking and you barely have enough energy to order take-out. But a Tuesday. You're getting back in the swing of things, but still aren't looking for anything with a lot of effort.

INGREDIENTS:

  • 1 zucchini
  • 2 yellow squash (or vice versa)
  • 1 cup of cherry tomatoes
  • 1 small onion
  • 1 tablespoon of coconut oil – I love Dr. Bronner's

ALFREDO INGREDIENTS:

Avocado Pasta Sauce Ingredients for a Paleo Pasta

  • 2 Avocados
  • ½ cup of fresh basil
  • ½ cup of spinach
  • 2 cloves of garlic
  • 2 tablespoons freshly squeezed lemon juice
  • 1/3 cup olive oil
  • 1 tablespoon hemp seeds – I use Navitas Natural
  • Salt and Pepper to taste

DIRECTIONS:

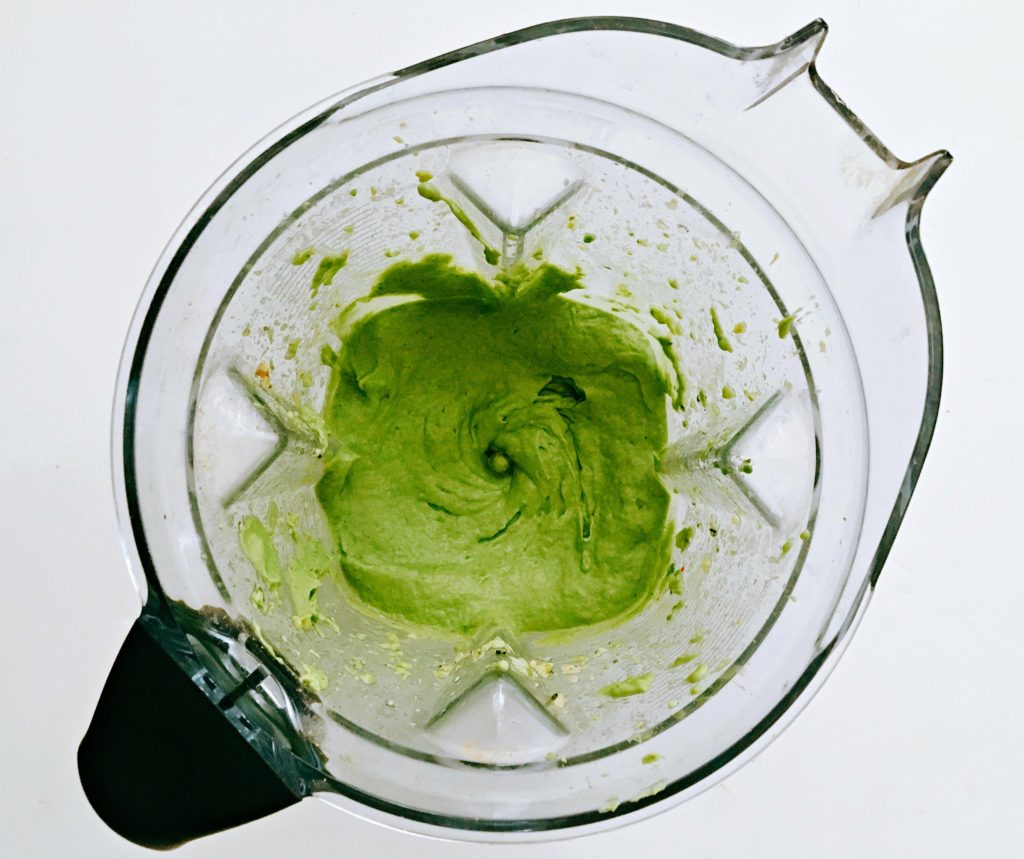
  1. Toss all alfredo ingredients into your high powered blender or food processor EXCEPT the Extra Virgin Olive Oil.
  2. Power on and slowly pour in the Extra Virgin Olive Oil. Blend until creamy, and taste as you go (add in more S&P, lemon juice, red chili pepper, whatever floats your boat). Set aside till needed.
    Note: I added a tiny bit of water to get the ingredients moving around and blending better.
  3. Cut your zucchini and squashes in half.
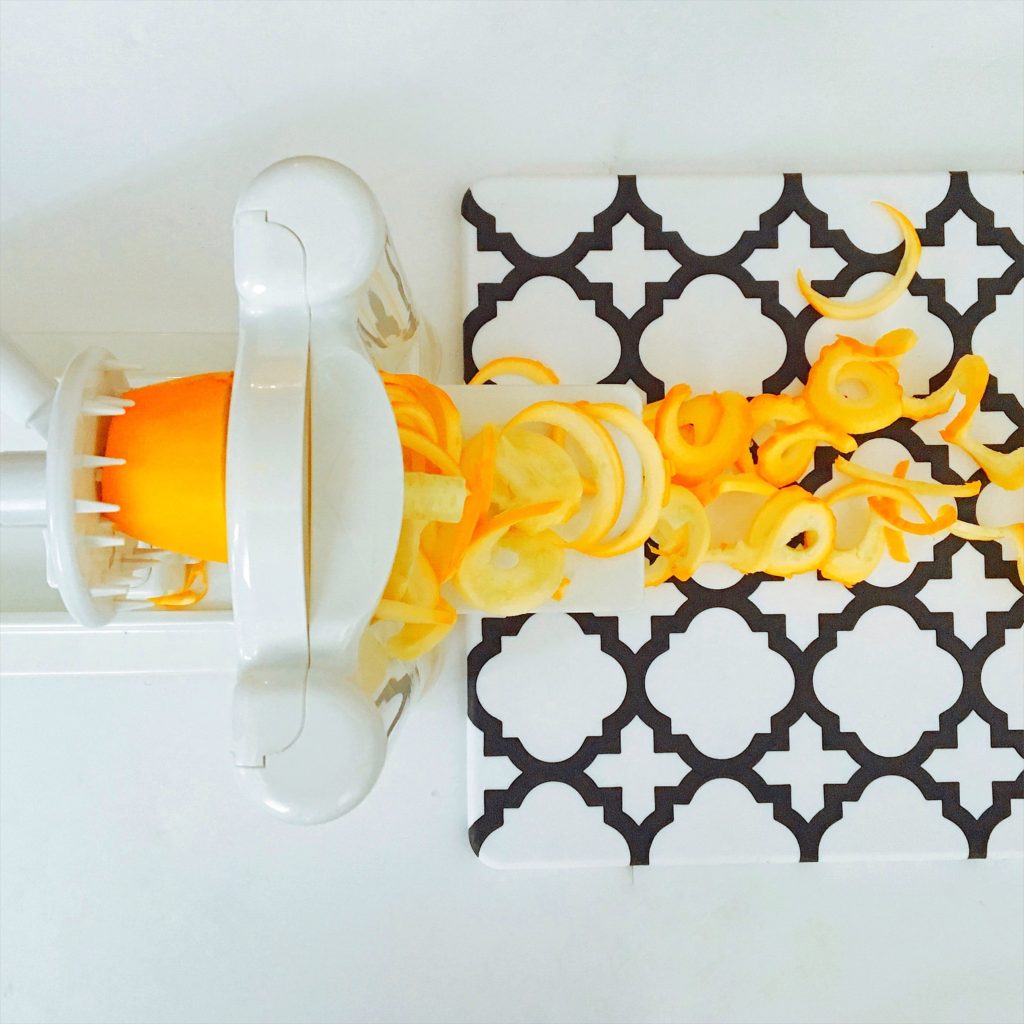
  4. Stick each one into your spiralizer and turn until you have a full plate of noodles.
  5. Dump noodles onto a paper towel and put another paper towel on top and blot dry. Set aside till needed.
  6. Slice onion into thin strips and saute in coconut oil for 5 minutes-ish, until the onions are soft and caramelized.
  7. Add in plate of noodles and cook for 2 minutes on low to medium heat.
  8. Turn off heat and spoon HALF of sauce over noodles in pan.
    You can add in more if you’d like, but I purposely doubled the Avocado Alfredo recipe so that you can use some for later. It’s always easier to make sauces with more ingredients rather than less so that your blender can “grab” onto all of it.
  9. Plate the noodles, and sprinkle tomatoes on for garnish, along with Salt and Pepper. Serve.

Belissimo!


Paderno Spiralizer with yellow squash

I got my spiralizer in March of 2014. The day it arrived, I was like a kid at Christmas. Williams Sonoma basically just told me that I can eat pasta again for the first time since I went gluten-free. Or really what they were sending me was the key to a whole other food group that I never knew existed until it arrived in my hands. The food group? Paleo Pasta. Zucchini, Squash, Sweet Potatoes, Carrots, Parsnips, Kohlrabi – any vegetable large enough to fit into my Paderno was fair game. The pasta-bilities were endless (see what I did there?).

Now with more than two years of experience under my belt, I’d like to think I can teach you a thing or two about using the spiralizer to make vegetable noodles. Per the request of my dear friend Maggie (Hi Mags!), I've created a guide. And per the request of my wonderfully intelligent mum, I put the recipe at the top just in case you had no desire to hear me babble on about my life experiences with my sprializer. But for all of you traditionalists out there, I also nestled it safely at the bottom in a printable and pinnable format.

Five Lessons for an Awesome Spiralized Veggie

Lesson 1: Only use vegetables as large, or larger than, the circumference of your spiralizer’s spiky thing. (Note the technical language)
The vegetable needs to be able to completely carve into the shredder, otherwise it will get caught, or spit out piddly little half moons. This is especially true with carrots since they are skinny. But when you get a good one, carrot-sghetti is one of my favorites. So keep an eye out for carrots with a lot of girth (yeah, I said it).

Zucchini and Squash

Lesson 2: Center your vegetable.
I cut my vegetables in half before I put them to the spirazlier. It allows for more control during the process. Most importantly, I make sure the vegetable is completely centered on the circle blade thingy. This allows for long and beautiful noodles and avoids half moons.

How to spiralize a squash

Lesson 3: Cook your noodles LIGHTLY, if at all.
Reminder: these are not real noodles. They are vegetables largely consisting of water. And, sometimes, when you slice a vegetable really thin, cooking it is just going to make it soggy and watery. Cucumber, in my opinion, should never be cooked because of its high water content. Zucchini and squash could still be just as good raw, just a little crunchier. A carrot, cucumber “pasta salad” dressed with tahini dressing would be awesome – no cooking required.

IF you’d still like your noodles warm, but not cooked, do this:

  1. Cook your meatballs/chicken/ground beef/mushrooms/onions/whatever
  2. Add your sauce and let it simmer
  3. Turn off the heat and add your noodles and toss together in the pan with the meat and the sauce

Essentially you are very lightly cooking the noodles in the warmth of the sauce, but not enough to make it soggy.

When you do cook your noodles, do so gently. There is no need to blast them with heat, cover the pan with a lid, or cook them for long periods of time.

Typical Cooking Times for Vegetable Noodles:

  • Zucchini – 2 minutes on low to medium
  • Squash – 2 minutes on low to medium
  • Carrots – 2 – 3 minutes (higher heat will make them crispier, which isn’t a bad thing in my opinion)
  • Sweet Potato – 5-7 minutes on medium heat

Avocado Sauce Ingredients

Lesson 4: Pat your vegetable noodles dry after spiralizing.
I resisted this one for a while because I tend to be a fast, hungry cooker who doesn’t want to slow the process down for anything that I don’t HAVE to do. But drying off my noodles has made a big difference in my final pasta dish. The less moisture they have, the better they cook and the better they absorb any yummy sauce that you make for them. All you need to do is:

  1. Put a paper towel on a plate and your noodles on top
  2. Put another paper towel on top and blot dry
  3. If they’re REALLY watery (i.e. cucumbers), do a second blotting with new paper towels

Spiralized vegetables dry with paper towel

Lesson 5: The spiralizer isn’t ALWAYS the answer.
If your vegetable is too skinny or your spiralizer isn’t strong enough OR YOU DON'T OWN ONE, never underestimate the power of the vegetable shredder (the old school paleo pasta maker). Take your shredder to a carrot or a sweet potato and you’ll get stick straight veggie noodles. They may not be as noodly looking, but they still taste great. ESPECIALLY when you saute them in coconut oil and spices.

Zucchini Noodles dressed with avocado sauce and cherry tomatoes, gluten-free and grain-free for paleo and vegan diets
Zucchsghetti with Avocado Alfredo
Print Recipe
This recipe is for all of you who out there who don't think you can be decadent on a Paleo diet. Creamy, rich and lick-the-blender satisfying, you won't believe that you're eating an entire bowl of vegetables - including high in omega-3 ingrdients like avocados and hemp seeds. Best part is, it's not even that hard to make! I'd say on a scale of 1 to 10, it's about a Tuesday. Not a Monday where you're still trying to recover from over-eating and over-drinking and you barely have enough energy to order take-out. But a Tuesday. You're getting back in the swing of things, but still aren't looking for anything with a lot of effort.
Servings Prep Time
2 people 20 minutes
Cook Time
7 minutes
Servings Prep Time
2 people 20 minutes
Cook Time
7 minutes
Ingredients
Zucchsghetti Noodles
Avocado Alfredo
Servings: people
Instructions
  1. Toss all Avocado Alfredo ingredients into your high powered blender or food processor EXCEPT the Extra Virgin Olive Oil.
  2. Power on and slowly pour in the Extra Virgin Olive Oil. Blend until creamy, and taste as you go (add in more S&P, lemon juice, red chili pepper, whatever floats your boat). Note: I added a tiny bit of water to get the ingredients moving around and blending better.
  3. Cut your zucchini and squashes in half.
  4. Stick each one into your spiralizer and turn until you have a full plate of noodles.
  5. Dump noodles onto a paper towel and put another paper towel on top and blot dry.
  6. Slice onion into thin strips and saute on pan for 5 minutes-ish, until the onions are caramelized and a little browned.
  7. Add in noodles and cook for 2 minutes on low to medium heat.
  8. Turn off heat and spoon HALF of sauce over the noodles in the pan. NOTE: You can add in more if you’d like, but I purposely doubled the Avocado Alfredo recipe so that you can use some for later. It’s always easier to make sauces with more ingredients rather than less so that your blender can “grab” onto all of it.
  9. Plate the noodles, and sprinkle tomatoes on for garnish, along with Salt and Pepper. Serve.
Share this Recipe
Powered byWP Ultimate Recipe