Recipes

Healthy Mommy, Recipes

Finding Time For My Masterpiece + Banana Pancake Recipe

February 26, 2021

With every nap, with every bedtime, and with every moment that my children actually find a way to entertain themselves, my immediate thought is: What marvelous thing can I create with this time?

A pitch for a piece in The New York Times?

The first chapter of my novel?

A well-crafted, thought-provoking blog post?

As I walk downstairs with my head in the clouds, I try to avoid eye contact with the piles. You know the ones. Piles of laundry, piles of dishes, piles of food particles under the highchair, piles of bills and paperwork, piles of toys.

I know they need to be done, but I convince myself that a job that should take an entire day to complete can be done in a matter of minutes. Essentially, I half-ass them, doing parts of one, and parts of another on my way to the office where I will create my masterpiece. More often than not, though, I never arrive at the office. I get tied up in the piles, even with my best attempts to let them slide off my back, as if they didn't bother me, as if they were not nearly as important as creating something that will stimulate my mind and bring me joy.

Does anybody else think like this? Do othrer moms imagine all the things they are going to do with their “free time” and then realize, there is no such thing as time that is free? It all comes with a price. If you’re doing one thing, you’re not doing another. And when you’re a mom, there’s always something to do.

I think the problem is that I still have not fully grasped or accepted what it means to be a stay-at-home mom. Before my first-born, I romanticized what full-time mommy-hood would look like….

Snuggles in bed, looking lovingly into their eyes while they nuzzled up to be the small spoon to my big spoon, immediately followed by tickle fights, with infectious and nonstop baby giggles. Every day would be scheduled with playdates and story times at the library, during which I would chat with other moms and stare adoringly at my child while they figured out the world around them — smile on their face the whole time, of course. And then during nap time, I would become the published writer I was always meant to be. What else would there be to do?

Now, of course I understand that I was so very naive. Green. Stupid. Completely and utterly clueless.

It is nothing like the life I had imagined.

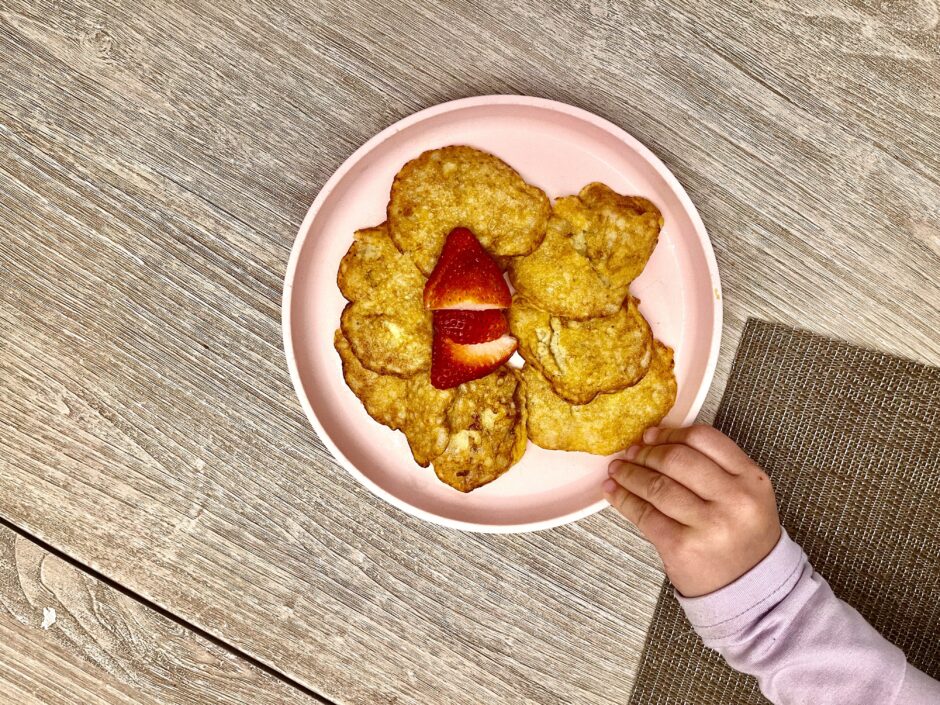
It’s waking up at un-Godly hours, 2 to 3 to 5 times a night. It’s doing your darnedest to keep your kids healthy by whipping up banana and egg “pancakes” (recipe below) only to have your 3-year-old claim that they are “BURNT!” and refuse to eat them, while your 10 month old squeezes her pouch all over her freshly-washed hair. It’s picking up toys and not-toys at all times of the day. And no matter how well you clean any given space, it will immediately be destroyed again only moments after. It’s being a full-time bodyguard to your baby, since every move she makes towards your toddler results in screaming, lunging at, kicking, or shoving towards baby.

When nap time finally arrives, you realize that you absolutely have to get a nap yourself to be able to muscle through the rest of the day, thereby forgoing your first chance at working on your masterpiece. That’s okay, there’s still the afternoon nap, you tell yourself.

When afternoon nap time hits, you’ve been emptied. Emptied of energy, intelligent thoughts, and discipline to prioritize something as frivolous as writing when there’s so much else to be done (i.e. the aforementioned piles). When I do muster up the energy to actually sit at my husband’s desk with my laptop, I just stare at the blank screen and think…nothing. I have nothing. Nothing to say. Nothing to give. I’ve given it all away. And nothing is filling me back up.

So inevitably, I find myself doing more logical, responsible things like reading through the 2,276 reviews on iPhone protection screens or researching how much it will cost to replace the lazy Suzan shelf that broke and smashed my very pungent balsamic vinaigrette inside said lazy Suzan.

The closest I’m able to get to my masterpiece is listening to others who are in the midst of creating theirs. Podcasts, audiobooks, masterclasses featuring Mom Bosses and creative world-beaters. They love to tell me how other women are out there writing novels, starting their own clothing lines or nutritionist businesses — and they’re all doing it with everything I have on my plate and more!

Maybe if I just listen to enough of these go-getters instead of actually doing the work myself, their creative powers will rub off on me and I, too, will create something or found something or speak about creating or founding something brilliant. Yeah. That’s what I’ll do. I’ll just wait until brilliance comes to me. In the meantime, I better get back to the piles.

Love,

HealthyStaceySignature

p.s. If you would like to make healthy paleo pancakes for your ungrateful children, I have left the recipe below. It's a staple in my chaotic home. Unless, of course, I burn them. You're welcome. 


Paleo Banana Pancakes – Easy, Kid-Friendly (Depending on your kid), and Filling

Ingredients:

  • 1 banana
  • 1 egg
  • 1 egg white
  • Pinch of salt
  • 1 tsp. Cooking oil (Ghee, Olive Oil, Coconut Oil)


Directions:

  1. Preheat non-stick pan on stovetop at medium heat
  2. Mash banana until it's a banana paste, with little to no lumps
  3. Add mashed banana, egg, and egg white to bowl and whisk
  4. Add in pinch of salt
  5. Add ghee or olive oil to pan
  6. Spoon dollops of banana/egg mixture onto pan one by one, making silver dollar-sized pancakes around the circumference of the pan
  7. Lower the heat to medium-low and keep an eye on the pancakes so they don't burn. I would estimate about 3-4 minutes per side but that depends on your stove and your pan. The best way to check if they're ready is to attempt to flip them over with a spatula. If they hold together, they're ready. If they are still too gooey and fall apart in your attempt, they are not ready.
  8. Let cook on flip side for another 3-4 minutes on low. They should be golden brown on each side when they're done. It may take a couple of flips back and forth to get them there.
  9. Optional: If you're kids are being very good or you want to bribe good behavior in exchange for a special treat, add in dark chocolate chips after the second flip. Do NOT overdo this, otherwise it will no longer be special and will be expected, leading you to serve them chocolate chips every morning when you're original intention was to get them to eat a healthy hearty breakfast. 


Recipes

Paleo-ish Beet Dip Recipe

August 2, 2016

Let's start with what you came for…The Paleo-ish Beet Dip Recipe 🙂

Paleo Beet Dip with a lemon wedge

I created this beautiful Paleo-ish beet dip just for you, my friends. Inspired by a recipe from a fellow Chicago blogger, Emily Paster of West of the Loop, it was originally created to be made in big batches for swapping and sharing at Food Swaps. I made a few tweaks – a smaller serving size for my own personal pleasure, a few more nutty additions, and a couple ingredient replacements to make it more paleo-friendly. And tada! This gem was born. Dip veggies in it, scoop it over salads or just eat it by the spoonful. It's ALL good. Read the post to find out why.

Ingredients:

  • 5 small to medium sized beets
  • 1 cup Siggi’s Strained Whole Milk Yogurt, Plain
  • 1/4 cup almond butter
  • 1/4 cup tahini
  • 2-3 tablespoons lemon juice
  • 1/2 teaspoon za'atar
  • 1/4 cup hemp seeds
  • 1/4 cup walnuts
  • 2 garlic cloves
  • Salt & Pepper to taste

Directions:

  1. Roast beets per the following steps OR just buy them from the store – this brand is great and is available at Whole Foods and Mariano's.
  2. Preheat oven to 400 degrees.
  3. Chop leaves off of beets, but leave the bottoms and the stems as this will preserve some of the juicy juice.
  4. Wash beets thoroughly and DON’T DRY – you’ll want some moisture on them for roasting.
  5. Wrap beets in aluminum foil (I wrapped them individually this time, but I’ve also done them all at once).
  6. Put them on a baking sheet in their aluminum foil for 60 minutes-ish. Check on them about 30 minutes in to turn them over. You may want to splash a bit more water on them if they’re looking dry.
  7. They are done when a fork goes through the middle of them easily and smoothly. If it doesn’t, roast another 10 minutes and check again.
  8. Once complete, let them cool off. Then, cut off their ends. Take a paper towel to them, and gently rub over the skin. It should come off easily. But no matter what, it will be messy. Wear an apron or bathe in beautiful purpley colors. Whatever floats your boat.
  9. Plop your beets into your food processor along with the rest of the ingredients.
  10. Pulverize in your food processor until smooth.
  11. Taste test! Taste test! Taste test! Everybody has different likes and dislikes and I tried my darndest to give you the exact measurements I used, but so much of my process is a little bit more of this and that until it tastes perfect TO ME. I loved the nutty flavor so I added a bit more almond butter and rounded it off with walnuts to really bring it home. But you may prefer it more tart, in which case you might want to up the yogurt and the lemon juice.

Roasting beets for paleo beet dip

I made a new friend last week. It’s name? Beet Dip. And I can’t get enough.

The match maker was Emily Paster of West of the Loop. I got the pleasure of attending an intimate book launching party for her book, Food Swap: Specialty Recipes for Bartering, Sharing & Giving. Not only did she encourage everybody there to try their own Food Swap,  but she demonstrated a few recipes ideal for the homemade community trade.

Enter, the beet dip.

All the ingredients for a Paleo beet dip

This creamy, dreamy, bright Nickelodeon-purple concoction – made with one of the most nutrient-rich vegetables out there. I HAD to have it, tweak it, and make it my own…

Beets? Good. Za'atar? Good. Tahini? Goooood. But what if I added some hemp seeds for an Omega-3 boost? And maybe a dash of almond butter to make it even more decadent. Yes. Uh huh. A little of this. A little of that.

BAM. I had it. Paleo-ish Beet Dip was born.

Paleo Beet Dip in Food Processor

I now call this gem "dish lipstick” because it has been dressing all of my meals up and making them a little more….well, sexy. Yeah, I said it. It's sexy beet dip. Making salads more sensual, crackers more seductive, and chicken breasts more suggestive – one spoonful at a time.

Ahem. Anyways.

As always, when I make a recipe here, it's not just how to make it, but WHY to make it.

Paleo salad with paleo beet dip on top

BEETS:

  • Let's jump right into the fun stuff – beets have been shown to be an aphrodisiac or a sexual booster. This is thanks to the mineral Boron, which has been shown to increase the production of sexual hormones.
  • Because of their high folate content, they are ideal for pregnant women.
  • Eating beet root has been shown to decrease cardiovascular diseases in multiple ways.
  • Betains contained in beet juice stimulate the function of the liver.
  • Researchers have also noticed that oxygen uptake is greatly increased by people who drink beet juice. One study showed that the uptake increased by up to 16% which is extremely impressive – more than a person can achieve by exercise training.
  • Nerve and muscle function, immune-boosting, bone, liver, kidney and pancrease health – the list goes on, but let's leave some room for the other guys, shall we?

Beets wrapped up in aluminum foil

WHOLE MILK YOGURT:

  • Comes from cows who have grazed in pasture year-round vs. eating a processed diet.
  • Grass feeding improves the quality of yogurt and makes it richer in omega-3 fats and CLA, a beneficial fatty acid (you cannot get the same levels from nonfat or lowfat yogurt).
  • Remember, fat is good. When you choose lowfat or nonfat products, they are no longer whole foods. They are half-foods, replaced with sugars or fake sugars to make up for the lack of flavor. And no, whole milk will not make you fat. In fact, it may help you lose weight because whole fat foods digest slowly into the bloodstream, keeping you satisfied longer and feeding your body properly so that it can digest its food.

HEMP SEEDS:

  • In the standard American diet, it can be difficult to get the right amount of Omega-3 in our diets.
  • Omega-6 is easier to come by, and is found in most processed foods.
  • We want to shoot for a ratio of 3:1 of Omega-6 to Omega-3, but the current US diet ranges from 10:1 all the way to 20:1 (!)
  • Guess what? Hemp has the perfect 3:1 ratio! Which contributes to its abiltiy to…
  • Improve digestion
  • Balance hormones
  • and Improve metabolism

WALNUTS:

  • Yet another Omega-3 powerhouse
  • Also very rich in antioxidants including manganese and copper
  • Have been shown to improve reproductive health in males (read: fertility food!)
  • May support brain health because of its neuroprotective compounds including vitamin E, folate, melatonin, Omega-3 and antioxidants.

Paleo Beet Dip with a lemon wedge

Alright kids. That's all she wrote. Question for you…

What is your favorite dip/marinade/butter/sauce to put on EVERYTHING?

Much Love,

HealthyStaceySignature

p.s. Like the Beet Dip? Pin me!

Paleo Beet Dip


SOURCES:

  1. http://articles.mercola.com/sites/articles/archive/2014/01/25/beets-health-benefits.aspx
  2. http://www.whfoods.com/genpage.php?tname=foodspice&dbid=124
  3. http://articles.mercola.com/sites/articles/archive/2014/05/19/7-walnuts-benefits.aspx
Paleo beet dip with sumac and seseame seeds topping
Paleo-ish Beet Dip
Print Recipe
I created this beautiful Paleo-ish beet dip just for you, my friends. Inspired by a recipe from a fellow Chicago blogger, Emily Paster of West of the Loop, it was originally created to be made in big batches for swapping and sharing at Food Swaps. I made a few tweaks – a smaller serving size for my own personal pleasure, a few more nutty additions, and a couple ingredient replacements to make it more paleo-friendly. And tada! This gem was born. Dip veggies in it, scoop it over salads or just eat it by the spoonful. It's ALL good.
Servings Prep Time
4 cups 5 minutes
Cook Time
1 hour
Servings Prep Time
4 cups 5 minutes
Cook Time
1 hour
Ingredients
Servings: cups
Instructions
  1. Roast beets per the following steps OR just buy them from the store – The Love Beets Brand is great and is available at Whole Foods and Mariano's.
  2. Preheat oven to 400 degrees.
  3. Chop leaves off of beets (and save for later - they are VERY GOOD for you), but leave the bottoms and the stems as this will preserve some of the juicy juice.
  4. Wash beets thoroughly and DON’T DRY – you’ll want some moisture on them for roasting.
  5. Wrap beets in aluminum foil (I wrapped them individually this time, but I’ve also done them all at once).
  6. Put them on a baking sheet in their aluminum foil for 60 minutes-ish. Check on them about 30 minutes in to turn them over. You may want to splash a bit more water on them if they’re looking dry.
  7. They are done when a fork goes through the middle of them easily and smoothly. If it doesn’t, roast another 10 minutes and check again.
  8. Once complete, let them cool off. Then, cut off their ends. Take a paper towel to them, and gently rub over the skin. It should come off easily. But no matter what, it will be messy. Wear an apron or bathe in beautiful purpley colors. Whatever floats your boat.
  9. Plop your beets into your food processor along with the rest of the ingredients.
  10. Pulverize in your food processor until smooth. Taste test! Taste test! Taste test! Everybody has different likes and dislikes and I tried my darndest to give you the exact measurements I used, but so much of my process is a little bit more of this and that until it tastes perfect TO ME. I loved the nutty flavor so I added a bit more almond butter and rounded it off with walnuts to really bring it home. But you may prefer it more tart, in which case you might want to up the yogurt and the lemon juice.
Share this Recipe
Powered byWP Ultimate Recipe
Recipes

Top 4 Bone Broth Benefits + Bone Broth Breakfast Drink Recipe

July 7, 2016


BoneBrothBenefitsDrinking bone broth has major health benefits. Like, crazy, amazing how-have-I-never-tried-this-before health benefits. But I gotta tell you, in the beginning, I really didn't want to hop on the broth bandwagon.

I try very hard to make paleo approachable for myself, and for you, my readers. Because if something is too hard or out of reach, I'm not going to keep doing it, you're not going to keep doing it, and we all lose. My guess is that when you hear bone broth, you think laborious, extreme, and a little odd, right? 

Here were my initial thoughts: SIMMER BONES?! WHA? WHY? THAT WILL TAKE LIKE A MILLION YEARS.

But I'm also one of these people that will try anything. And sometimes, when I try it, I can't get enough of it. Can you guess what happened next?

Well, I'm sitting here writing a blog post about my fantastic experience with it, so you can imagine, it went well.

As always, let’s start with the why.

Why are we drinking bones?
There are a ton of nutrients in bones, marrow, skin, feet, tendons and ligaments that we can’t get by eating the meat. But you CAN simmer the bones and bits in a crock pot for a couple of days to get these babies to release their healing compounds.

What are their healing compounds?
Proline
Glycine
Glutamine
Minerals in forms that your body can easily absorb, i.e. Calcium, Magnesium, Phosphorus, Silicon, Sulphur

Okay, okay. WHAT CAN IT DO FOR ME?

Reduce Joint Pain and Inflammation
It almost makes TOO much sense. Drinking broth from healthy bones will help strengthen your own bones. Duh! All of that cartilage that you’ve lost over the years – either through general wear and tear or from hard-core soccer/basketball/volleyball/insert high-impact-sport-here injuries, can benefit greatly from readily absorbable collagen and gelatin. (Kari Ferguson, you soccer stud – if you are reading this, I am talking to you 🙂 )

Make Your Stomach Happy
Eating “healthy food” can only help you if your body can absorb it properly. Otherwise, you’re not getting near the amount of nutrients from that kale salad or salmon and asparagus dinner that you should be getting. Bone broth is very easy for your body to digest and absorb. Why? Because it has collagen in it. Which plays really nice with your GI tract and your colon. So the more you drink bone broth, the more it heals the digestive tract, and the better it can take in nutrients from other food.

Prettier Skin, Hair and Nails
You’ve heard of collagen before. You know. The stuff that helps reduce wrinkles, decrease puffiness, and helps grow nails and hair. You can buy it in little fancy jars for a lot of money or you can go to a plastic surgeon to get it injected in your face. OR you can drink it in bone broth.

Immune System Booster
Remember up there when I said it was good for your digestion? For that same reason, it’s an awesome supporter of the immune system. When your food isn’t digested properly (happens more often than you think), undigested particles from food leak into the bloodstream where the immune system detects them. It freaks out and starts attacking healthy tissue and inflames the body. Good gut health = good immune system = less colds, flu and overall sicknesses.

That's not it. There is more. Lots more. Because everything listed above affects other areas of the body. Your stomach is connected to your brain is connected to your emotions. You fix one thing, you fix another. But I thought I'd stop there for today so we can get on to the good stuff.

BoneBrothBenefits_Recipe

My Experience with Bone Broth
The first time I made it, it was really a result of just cooking a whole chicken and the bones were already in my Crock Pot. So I Googled the heck out of it, obsessed over whether I was doing it right, over-thought it, as usual, but eventually ended up with 4 jars of gelatin-like broth for my freezer. I didn't really know what to do with it yet, so I do what I always do when I'm overwhelmed, I put it in my freezer.

Well, a rainy day came. A dull, hungover, stomach-ache, swollen gland, kind of day. Ya. Ugh. I remembered the broth in the freezer and decided to go for it. Every symptom that it has been shown to help, I had. So down the hatch it went, and the results were pretty amazing.

  • My throat immediately felt soothed for the first time that day.
  • My sinuses finally gave it a rest from their inflamed state.
  • I slept like a baby that night.
  • After day two of broth-drinking, my digestion was finally back to normal and that cold that I thought was coming, never arrived.

*Note: I drank about 5 cups over the two days because I wasn't feeling well. This is more than you'd need on a regular basis.

From that moment on, I used it as my emergency medicine. Only if I was sick was it worth making it.

Low and behold, a few weeks later, I felt like I'd been hit by a truck. This time, not because I was sick, but because my muscles were uber sore from a particularly hard workout that included lots of hand stand push ups and pull ups. Broth is supposed to be good for joint pain and muscle aches, right? YUP.

  • It was like I had put muscle relaxer on all the sore parts, but better.
  • I was better the next day, when usually after a workout like that, my muscles are sore for at least two days.

Now, I've crossed over. I am officially a regular morning broth drinker. I figure, why not be preventive? This stuff is AWESOME. Attack the cold, stomach ache or joint ache before they've even really started. A totally in-tact digestive system. Stronger nails and longer hair. Plus, it's also shown to be one of the foods that are ideal for fertility. And you all know how I love my Fertility Food :). What's not to like? And the best part is, it's not nearly as difficult as everybody makes it out to be.

I've spelled it out for you in 9 steps below and given you my tips and notes along the way. But please do one thing for me? If you decide to make it, do it the simplest way possible just to try it. If you want to get more complicated after that, go for it. But all you really need is bones + water + 24-48 hours. Set it on low on your Crock Pot and walk away. Seriously. It's NOT THAT COMPLICATED.

BoneBrothBenefits

Things I’ve Learned After My 17th Try of Making Broth

  1. Most people will tell you to skim the stuff off as you go. You can do this if you want to, but why skim as I go if I’m just going to strain it all out at the end anyway? Seems like unnecessary work to me.
  2. I made making the broth part of my bi-weekly routine. Every other week, I make a big batch (using the recipe below), so I never have to scramble to make it when I really need it. I keep most of it in the freezer so I don't feel forced to use it immediately, and keep one jar in the refrigerator so it's defrosted and ready to drink.
  3. You DON’T have to cook an animal to get the bones. Just go to the freezer section near produce or your local butcher and ask for leftover bones. They always have bones. And they will always sell them to you for cheap. I do recommend sticking to places like Whole Foods or a butcher you can trust to have healthy, grass-fed, GMO-free animals. Remember, the animal you eat matters. If it was healthy, it’s bones will be healthy.
  4. That said, as you cook, make sure to save your bones as you go! I keep them in a freezer bag and just add to it every time we cook chicken drumsticks or steak.
  5. In order to keep the jars from exploding in the freezer (this happened to me multiple times until my husband kindly explained to me the concept of physics), you don’t want to fill the jars all the way to the top. You also don’t want to close the jar top all the way when you first put it in there (you can go back later and screw it tighter). Because liquid expands as it freezes, it WILL expand the glass until it can’t hold it anymore. Eesh.

Alrighty boys and girls. Now it's time to actually show you how to make this golden tonic. But I'm not just going to leave you with a broth how-to. I'm going to leave you with a recipe for how you can actually enjoy it as your morning drink (AFTER coffee, of course).

You ready for the recipe? Let’s do it.

Like what you read today? See those cute little social shapes underneath this post? They're for sharing! Click one to post to Facebook, Pinterest, Twitter, or comment right here on the blog. I would love to hear from you.

Can't get enough of all this healthy stuff? Then sign up for the newsletter where it says "Enter Your Email" at the top of this page. Too much of a commitment? That's cool. I also have a sweet Facebook page, deep-thoughted Twitter page, food-pornish Instagram handle, and recipe-filled Pinterest page.

Much Love,

HealthyStaceySignature

SOURCES:

Why Broth is Beautiful: Essential Roles for Proline, Glycine and Gelatin


BoneBrothBenefits_Recipe
Bone Broth + Breakfast Broth Recipe
Print Recipe
I invented this Breakfast Broth recipe after realizing that I wanted to incorporate Bone Broth into my morning routine. However, I needed to make the gelatin-like substance a little more appetizing first thing in the morning. So I added some pizazz and came up with this beauty. A little spicy, a little sweet, super satiating, and of course, ridiculously good for you.
Ingredients
  • 2 Pounds Bones Beef, Chicken, Whatever you can get your hands on
  • 2 Tablespoons Apple Cider Vinegar
  • Crock Pot-Full Of Water Enough to cover the bones
Sweet & Spicy Breakfast Broth
Servings:
Instructions
  1. Put bones in your Crock Pot
  2. Pour Apple Cider Vinegar over the bones
  3. Fill up pot with enough water to just cover the bones
  4. Put Crock Pot on low for 48 hours
  5. Strain the broth through a strainer or a funnel
  6. Pour into jars, leaving 1-2 inches of space at the top
  7. Put jars in the refrigerator for a few hours or overnight
  8. Scoop the fat off the top of the jars
  9. Put in freezer until you are ready to use (I keep one jar in my fridge at a time that's defrosted and ready to go)
Breakfast Bone Broth Recipe
  1. Scoop 1 cup of bone broth into a mug
    BoneBrothBenefits_Recipe
  2. Add a spoonful of coconut oil
  3. Sprinkle in turmeric, cayenne, pepper and sea salt
  4. Heat in microwave for 1 minute and 20 seconds
  5. Add in a tablespoon of Vital Proteins collagen and raw honey
  6. Stir it up and sip it up!
Share this Recipe
Powered byWP Ultimate Recipe
Recipes

Hormone Balancing Meatballs

June 28, 2016

Paleo Hormone Balancing meatballs

I love meatballs. And when I love something, I obsess over it for a good month-ish…

There were the meatballs for breakfast.

Lamb meatballs with sweet potato pasta.

And who could forget the Fertility Feast meatballs?

Meatball-making reminds me of cookie-baking. You roll up all of these fantastic ingredients into tiny little balls, put them on a baking sheet, and fill your kitchen with all the smells, until it's time to pull them out and try one bite of the juicy, herby, spicy, meaty cookie. But unlike cookies, I don’t believe you have to follow an exact recipe. That’s the beauty of cooking after all. A pinch of this, a handful of that – as long as it’s all things you like, it will most likely be delicious.

Besides being addicting, these particular meatballs have so many health benefits, it’s ridiculous. The reason? Because they have liver. Yes, liver. WAIT! WAIT! Before you freak out and close this page, please do two things for me: 1) Read the benefits below. And 2) See how I’m going to make it really easy for you to incorporate the liver into your diet through this awesome recipe.

Hormone Balancing Meatballs

Ridiculous Benefits Of My Liver Meatballs:

LIVER is one of the most nutrient-dense foods. Period.

Greater than 65% of daily requirement of folate for 30-something women.

High in B12, B6, zinc and iron, which helps with…

  • Depression
  • Thyroid issues
  • Low energy

The highest source of vitamin A, which improves…

  • Thyroid function. It supports thyroid deficiencies so it's perfect for anyone with hypothyroid.
  • Liver health and detoxification.
  • Absorption of Vitamin A. We can’t get ANYWHERE close to this amount of Vitamin A from vegetables – not only because vegetable don't have as much, but becasue the body has to convert it to retinol first in order to use it. Unfortuantely, the veggie conversion rate is not good – especially for people with thyroid issues. But with liver, it's already converted and ready to use!

Anti-Fatigue factor:

  • In a famous study done by Benjamin K. Ershoff, PhD, liver consumption prevented rats from exhaustion, even after swimming for 2 straight hours.
  • Could have implications for human consumption; many people report feeling energized after eating it.

WALNUTS are high in Omega-3 which has been shown to:

  • Balance depression, anxiety and mood swings associated with hormonal imbalances
  • Reduce inflammation and balance insulin

COCONUT OIL is a medium chain fatty acid which:

  • Is essential for hormone production
  • Keeps inflammation levels low
  • Boosts your metabolism
  • Promotes weight loss

My personal experience with these liver meatballs:

  • Incredibly satiating – I've tried liver in many different ways and THIS baby finally made me enjoy them.
  • Improved digestion
  • More energy
  • GREAT for fertility

Paleo Hormone Balancing Meatballs

Ridiculously Easy Way To Make It Delicious:

  • So that you don’t actually taste the liver, we’re going to mix it together with grass-fed ground beef and lots of seasonings and ingredients.
  • So that you don’t have to touch the liver (too much), I’m going to ask that you ask your local butcher to grind it for you. And if you ask really nicely, they might grind it together with the beef. (Shoutout to Anthony at Local Foods for being the sweetest, most accommodating butcher ever 🙂 )
  • So that you don’t have to deal with liver often, we’re going to make one BIG batch now so you can freeze them later and have a ready-to-go, highly nutritious dinner any night of the week.

Okay, enough talk. Are you ready to put all your fears aside and try liver???

   Paleo Hormone Balancing Meatballs Ingredients

Hormone Balancing Basil Meatballs
Print Recipe
Servings Prep Time
45 Meatballs 30 minutes
Cook Time
10 minutes
Servings Prep Time
45 Meatballs 30 minutes
Cook Time
10 minutes
Hormone Balancing Basil Meatballs
Print Recipe
Servings Prep Time
45 Meatballs 30 minutes
Cook Time
10 minutes
Servings Prep Time
45 Meatballs 30 minutes
Cook Time
10 minutes
Ingredients
Servings: Meatballs
Instructions
  1. Preheat oven to 400 degrees and set out three baking sheets with parchment paper.
  2. Melt 1 teaspoon of coconut oil on the sauté pan and toss in onion; sauté for 5 minutes-ish.
  3. While that's cooking, chop up garlic cloves, basil leaves and walnuts; Set aside.
  4. Set aside cooked onions and let cool to room temperature.
  5. Whisk eggs in a bowl.
  6. Stir in garlic, basil, walnuts, nutritional yeast, coconut flour and red chili pepper flakes.
  7. Pour mixture into beef and liver; Pour onions in separately.
  8. Get your hands in there and mix it all together.
  9. Roll mixture into 1 inch balls and place on parchment paper.
  10. Stick in oven for 10 minutes.
  11. Bonus: Once cooled, stick in freezer ON THE PAN to flash freeze your meatballs. Doing so will keep them in meatball shape so you can stuff them in freezer bags and have them on hand whenever you need them. Believe me, nothing is better than coming home to an empty fridge, and then remembering that you have delicious pre-made meatballs waiting for you in the freezer.
  12. TO RE-HEAT: Warm in pan with a bit of coconut oil, bone broth and/or spaghetti sauce for approximately 10 minutes.
Share this Recipe
Powered byWP Ultimate Recipe