Archives

Eat The Rainbow Paleo Salad

August 17, 2016
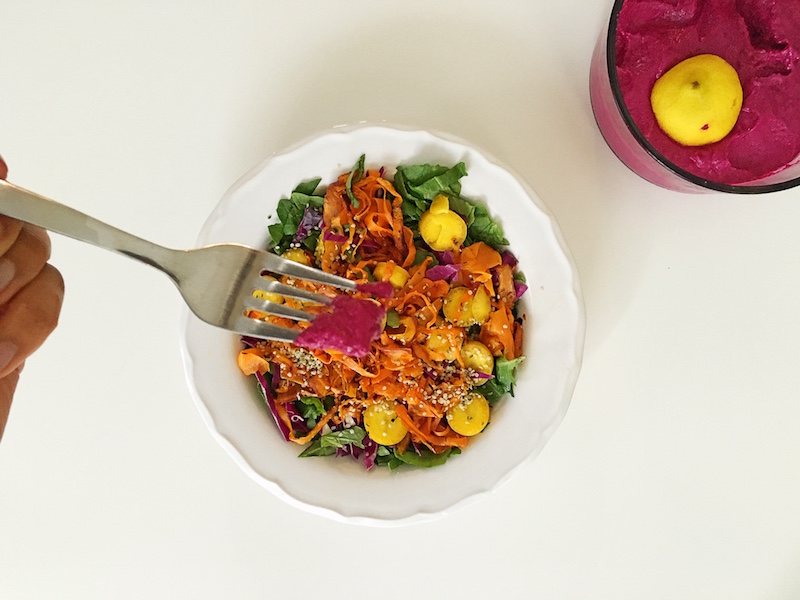
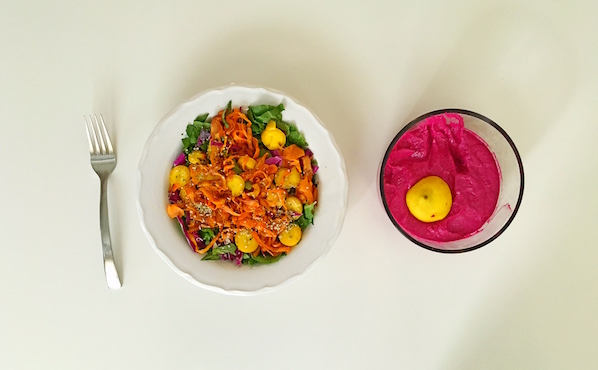
Rainbow paleo salad with fork

Rainbow paleo salad with fork

I know what you’re thinking. Are you seriously going to write a recipe for a salad? Yes. I seriously am. Because I take my salads very seriously. And I really do not understand why they are so underrated as a meal. They’re either the obligatory side dish or a necessary evil in dieting hell.

WHY?

I think it’s because people are making them the wrong way.

What are you putting in your salads? Lettuce. Tomatoes. Cucumber. Ranch. Ugh. That is SO 10 years ago. Where's the color? Where's the variety? Where's the WHOLE REASON we eat salads? To give us one big dose of highly nutritious ingredients all at once. Duh!

Salads – done right – can be showstoppers. In one bite, you can have crunchy, creamy, crispy and kale-y goodness. You can bring ingredients together that normally never associate with each other – for one big party in a bowl. Mango and avocado. Kale and pomegranate. Almond butter and charred broccoli.

Saute a few carrot shreds in coconut oil, caramelize some onions in ghee, add some well-seasoned chicken, juicy ground beef or even a tin of tuna on top, and you’ve got yourself one of the best entrées on the menu, my friends. (Note: I do not mean combine all these ingredients together. That's just silly).

Becasue I am concerned for your relationship with this vital meal, today, I share with you…

The BEST salad I ever made.

No joke. Search this entire blog and I’ve never said that before because it’s a bold claim.

This baby is warm yet cool, crunchy and creamy, melts in your mouth, but with a refreshing finish. And best part, it’s SO full of nutrients. You know how I know why? Because it’s RAINBOW COLORED!

Random flashback moment:

Rainbow Brite flashback.

ANYWAYS.

Where was I? Colors, right. Different nutrients give different colors to the foods they are in. And get this. It's all on purpose. Mother nature planned it that way. GENIUS!

Plants can't get up and walk around, right? So the way they literally spread their seed is by attracting animals and organisms to them with their good looks and vibrant colors. Animal likes what he sees. Animal eats. Animal hops, crawls, runs, or flies away. Animal poops out seeds somewhere else. And tada! A whole new pretty plant. So it's in their favor to stand out and look attractive.

But wait! There's more.

In addition to the pigments looking good, they also can protect the plant from UV damage, enable photosynthesis, and even act as antioxidants for the plants. The better the protection they provide, the longer they live. We humans, in turn, cash in on these benefits when we eat the plants ourselves.

Which brings me back to this beautiful salad. Let's see what we got here…

Red Cabbage
The blue tint in red cabbage (anthocyanins) –> keeps your mind sharp.

Green Kale
The deep green in kale (indoles and isothiocyanates)–> increases the production of enzymes that clear toxins from the body.

Orange Carrots and Sweet Potatoes
The orange in carrots and sweet potatoes (beta carotene) –> keeps your bones strong, your eyes healthy and boosts your immune system.

Crimson in Beets
The dark crimson in beets (Betacyanins) –> works in conjunction with vitamin C and manganese to offer benefits for eye health and overall nerve tissue health in addition to functioning as anti-inflammatory compounds.

Boom.

Forget the weird, unpronouncable words. Just eat the colors! Eat all of them. Red, orange, yellow, green blue, purple. Look out for them at the grocery store. Try weird veggies just because they're colorful. ROYGBV it up!

They're not just good for you, they're just plain GOOD.

You ready for this? I thought so.

Rainbow paleo salad

Ingredients:

  • 2 Heirloom Carrots
  • 1 Small Sweet Potato
  • 1-2 Tablespoons Coconut Oil
  • Bowlful of Kale
  • Red Cabbage, chopped
  • Hemp Seeds
  • 1 Tablespoon Beet Dip – See here for beet dip recipe.

Dressing Ingredients:

  • 2 tablespoons Apple Cider Vinegar
  • 1/4 cup Extra Virgin Olive Oil
  • Salt and Pepper, to taste

Directions:

  1. Shred one carrot; chop the other carrot. Set aside.
  2. Shred the sweet potato using a vegetable peeler. Don't kill yourself trying to shred the whole thing up. Just get as far down as is comfortable and use the rest of the potato to chop up and saute later if you'd like.
  3. Heat coconut oil on pan and toss sweet potato shreds on. Saute until slightly crispy – 5 minutes-ish. Remove from pan to a side plate.
  4. Add more coconut oil to the pan and toss on carrot shreds. Saute until slightly crispy – 3 minutes-ish. Add shreds to sweet potato plate.
  5. Chop up kale so that it’s in nice bite-sized pieces. Put in salad bowl.
  6. Mix in red cabbage and chopped carrots.
  7. Top with sweet potato and carrot shreds.
  8. Scoop beet dip on top. Note, it's not TOTALLY necessary if you don't have the time to make it, but I highly recommend it. It's kind of what sends this salad over the edge. Might I suggest, too, that you just use sliced cooked beets as an addition if you don't want to make the dip.
  9. Sprinkle with hemp seeds.

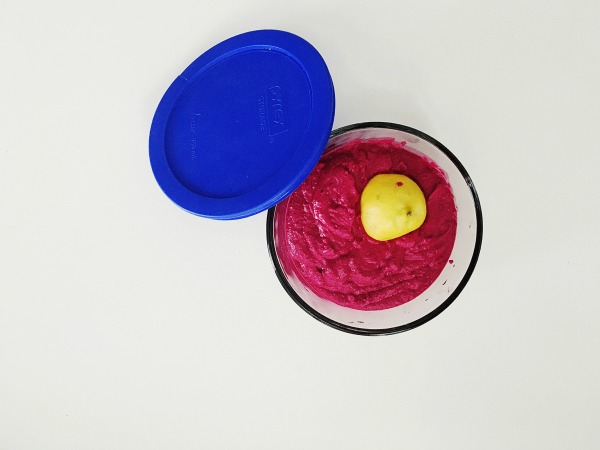
Paleo Beet Dip with a lemon wedge


Much Love,

http://www.healthystacey.com/wp-content/uploads/2015/07/HealthyStaceySignature.jpg

P.S. Make it easy on yourself and Pin this baby!

 Eat The Rainbow Salad Pin

Rainbow paleo salad
Eat The Rainbow Paleo Salad
Print Recipe
Rainbow paleo salad
Eat The Rainbow Paleo Salad
Print Recipe
Ingredients
ACV Dressing
Servings:
Instructions
  1. Shred one carrot; chop the other carrot.
  2. Shred the sweet potato using a vegetable peeler. Don't kill yourself trying to shred the whole thing up. Just get as far down as is comfortable and use the rest of the potato to chop up and saute later if you'd like.
  3. Heat coconut oil on pan and toss sweet potato shreds on. Saute until slightly crispy – 5 minutes-ish. Remove from pan to a side plate.
  4. Add more coconut oil to the pan and toss on carrot shreds. Saute until slightly crispy – 3 minutes-ish. Add shreds to sweet potato plate.
  5. Chop up kale so that it’s in nice bite-sized pieces. Put in salad bowl.
  6. Mix in red cabbage and chopped carrots.
  7. Top with sweet potato and carrot shreds.
  8. Scoop beet dip on top. Note, it's not TOTALLY necessary if you don't have the time to make it, but I highly recommend it. It's kind of what sends this salad over the edge. Might I suggest, too, that you just use sliced cooked beets as an addition if you don't want to make the dip.
  9. Sprinkle with hemp seeds.
  10. Pour ACV dressing on top and aggressively mix it all together.
Share this Recipe
Powered byWP Ultimate Recipe

Dinner Rut + Parchment Pocket Salmon Recipe

July 27, 2016

Salmon in Parchment Paper with Green Sauce

Dinner Rut Parchment Pocket Salmon

Inspired by Nom Nom Paleo's Fiona's Phenomenal Fish Packet

This recipe was the solution to my dinner rut. I had cooked the same salmon and asparagus nearly every Sunday night for the past 137 weeks (or something like that) and I needed a change. Thank God for the genius of Nom Nom Paleo (Michelle Tam). She opened me up to the idea of cooking in a pocket. It's what the French call, "en Papillote." Not just with salmon, but pretty much anything that you would bake in the oven. Chicken, tuna, Brussels sprouts. It IS the perfect solution to all of your tired recipes. You like where I'm going with this? Good. Read the rest of the blog post after you finished drooling over this Salmon. Thank you, Michelle Tam. You are truly the queen of the Paleo recipe.

Sauce Ingredients:
*Makes enough for four servings so save some for later!

  • 1 medium sweet onion, chopped
  • 1¼ cups packed basil leaves
  • 1 cup packed parsley leaves
  • ¼ cup packed mint leaves
  • ¼ cup worcestershire sauce
  • 3 peeled garlic cloves
  • ¼ teaspoon freshly ground black pepper
  • 1 teaspoon red pepper flakes
  • 1 teaspoon coconut nectar

Pocket Ingredients:

  • 2 medium carrots, peeled and ends trimmed
  • 2 medium zucchini, ends trimmed
  • Back of the Yards seasoning OR Salt & Pepper
  • 2 salmon filets
  • ¼ cup green marinade (see above)
  • 2 limes
  • 1 tablespoon coconut oil, melted
  • Freshly ground black pepper
  • 12 cherry tomatoes, halved 

Directions:

  1. Preheat the oven to 450°F and put your rack in the middle.
  2. Spiralize your zucchini and carrot (or if you don't have a spiralizer, shred them or simply slice them into disks). Put them aside in a bowl.
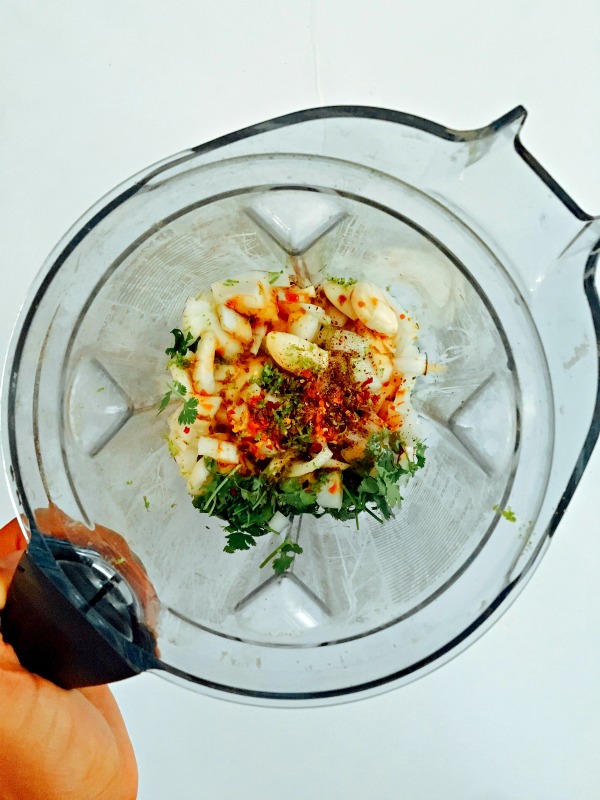
  3. Blend all ingredients in a high speed blender until smooth and bright green. Reserve a 1/4 cup for this recipe and put the rest in your refrigerator for later in the week when you want to use the same marinade for chicken.
  4. Rip off 2 pieces of parchment paper and fold each piece in half. Draw half a heart on each piece of paper, so that when you cut them, they look like full hearts! We're going back to Elementary School here, people.
  5. Open up the parchment heart and lay it flat.
  6. Split your veggies between the two pieces of parchment paper, putting a small pile on one side of the heart.
  7. Place your salmon filet, skin side down, on top of the veggies.
  8. Spread about a tablespoon of the sauce on the filet.
  9. Squeeze half a lime on the fish. Drizzle with 1/2 tablespoon of melted ghee or coconut oil.
  10. Repeat with other parchment heart and filet.
  11. Fold the other half of each parchment heart on top of the fish and tightly crimp the edges together, starting at the top center of the heart and working your way down. You want to tightly crimp the edges by turning them under. This is actually a lot easier than it sounds. You'll see when you try it.
  12. Place the packets on a rimmed baking sheet.
  13. Cook in the oven for 7 minutes, then pull out to check the temperature with a thermometer so you don't have to cut into your beautiful little pocket. Fish should be about 135 degrees if you like it flaky. Put it back in if it needs more time.
  14. Cut open the packet with scissors as soon as they're done cooking and toss on cute toppings like cherry tomatoes or an herb garnish.
  15. Serve it up to a very impressed crowd.

The Dinnner Rut

I asked you all on Facebook what your "Dinner Rut" Dish is. And this is what you said:

  • Chicken, Rice and Broccoli
  • Chicken with Lawry’s Sauce and a bag of steamed veggies
  • Tuna steak w. brussels sprouts or asparagus
  • Salmon + asparagus or veggie egg omelet + sweet potato hash + bacon
  • Frozen pizza
  • Quinoa and grilled chicken garbage salad! Whatever veggies we have in the fridge
  • Quinoa, broccoli and a piece of fish. Over and over and over again.
  • Good old spaghetti Bolognese. You can’t beat it. Or Shepard pie.
  • Roasted Brussels sprouts + grilled chicken + brown rice
  • Spicy Veggie hodgepodge stir fry with long grain brown rice
  • Tacos!
  • Alfredo ziti bake with shrimp and spinach
  • Ribeye topped w/goat cheese, parsley, and balsamic glaze, side of asparagus
  • Turkey burgers and sweet potato fries… or tacos!
  • Stuffed peppers!
  • Grilled Chicken w/ rice and green beans.
  • Grilled chicken, steamed broccoli, roasted potatoes
  • Whole wheat pasta + parm + lots of garlic + red pep flakes + canned tuna packed in oil + spinach
  • Omelet and multi-grain toast

I am shocked. I mean. I’m not even mad. I’m IMPRESSED.

I don’t know if I have particularly healthy friends, or you all were just trying to impress me when you responded because most of these dishes sound FANTASTIC.

Roasted Brussels sprouts? Stuffed peppers? Ribeye with goat cheese? Why am I even food blogging to you people?? These are your RUT dishes? You obviously are seasoned cooks. Well, except maybe Frozen Pizza guy. Just kidding, Bob. Totally kidding.

Funny thing is, we (home cookers) still roll our eyes at our “regulars” (as my Mother in Law calls them) because we’ve made them a million times. But to other people, our regulars sound new and exciting and mouthwatering.

Why do we get so fed up with them then? (Fed up. Ha. See what I did there?) Because we THINK we need to whip up something extraordinary. You know, after we got up early, went to the gym, trekked to work, ate over our keyboards, trekked back home (with take home work in tow), threw a load in the laundry in the washing machine and unloaded the dishwasher. Oh. And I’m not even addressing all the added tasks for those of you who have kiddos.

So here’s what I think. I think you give yourself a big pat on the back for being awesome. You made dinner you crazy over-achiever you!!!

Heck yes. You are some kind of wonderful.

But this IS a food blog. So I guess I have to give you actual advice on how to cook things, huh. Here’s what I got.

Green Sauce ingredients for Salmon in Parchment Paper

Four Ways to Switch Up Dinner

ONE. I just gave you a whole LIST of new ideas. They may be other people’s rut dishes, but they’re brand new to you. Got recipe questions? (What's in those stuffed peppers??) Just comment below so we can all do a little recipe rut swapping. You know what they say. One man's trash is another man's dinner. Oh. That came out weird. Nevermind.

Paleo green sauce

TWO. Find a new seasoning mix or marinade. You could cook the exact same chicken every night, but when you dash it with a GOOD seasoning mix or marinate it in a really flavorful sauce, it can taste completely different. You're in luck because the recipe above (and below) just happens to have an awesome marinade included. And it's set to make you four times more than you'll need for this recipe. You know what that means? You can use this marinade in OTHER recipes throughout the week or freeze it in ice cube trays for later. I used the same Green Sauce just a few days later as a chicken marinade.

My go-to seasoning is from The Spice House Chicago called Back of the Yards Seasoning. It's got peppers, garlic, shallots. And it tastes good on EVERYTHING. I'm not joking.

But if you're feeling adventurous and would like to make your own seasoning mix, this particular mix is one of my absolute favorites. Especially for your oh-so-popular grilled chicken dishes.

Jim Carrey Smokin' Seasoning:

  • 1 tablespoon chipotle powder
  • 1 tablespoon smoked paprika
  • 1 tablespoon onion powder
  • 1/2 tablespoon cinnamon
  • 1 tablespoon sea salt
  • 1/2 tablespoon black pepper

THREE. Try a new vegetable. You guys love your Brussels sprouts and broccoli because you’re comfortable with it. But have you ever considered trying one of those ugly looking vegetables in the produce section? You know. The ones with twigs and roots protruding out of them? In my experience, the uglier they are, the tastier they are. Especially when you roast them in the oven, drizzled in coconut oil and generously seasoned with Salt and Pepper.

Here are three ugly vegetable recipes that I know and love:

The Rutabaga Roast Recipe

Parsnippity and Sunchoky Fries Recipe

Kohlrabi Fries Recipe (this one is only on my Instagram for now, but I have big plans for it here on the blog)

FOUR. Switch up your cooking methods. Always steam your veggies? Try roasting or stir-frying. Do you think the only way to make chicken is baking it in the oven? It’s not. There’s braising it, broiling it, deep-frying it, grilling it, pan-frying it, roasting it, stewing it. And did you know that there are other parts to the chicken besides the breast?? (Okay, that came off condescending. I'll slow my roll.) There's the leg quarters and thighs, the drumsticks, the wings, split breast, and the whole chicken.

In today's recipe, that's exactly what I did. I highly encourage you to try "En Papillote" cooking. It's accessible. It's versatile (salmon, tuna, chicken, veggies, whatever!). And it's delicious.  Confused? It’s all in the recipe.  

Preparing salmon in a packet


Paleo in Parchment Paper on the balcony
Parchment Packet Salmon Recipe
Print Recipe
This recipe was the solution to my dinner rut. I had cooked the same salmon and asparagus nearly every Sunday night for the past 137 weeks (or something like that) and I needed a change. Thank God for the genius of Nom Nom Paleo (Michelle Tam). She opened me up to the idea of cooking in a pocket. It's what the French call, "en Papillote." Not just with salmon, but pretty much anything that you would bake in the oven. Chicken, tuna, Brussels sprouts. It IS the perfect solution to all of your tired recipes. You like where I'm going with this? Good. Read the rest of the blog post after you finished drooling over this Salmon. Thank you, Michelle Tam. You are truly the queen of the Paleo recipe.
Servings Prep Time
2 people 15 minutes
Cook Time
7-10 minutes
Servings Prep Time
2 people 15 minutes
Cook Time
7-10 minutes
Ingredients
Sauce Ingredients
Food Ingredients
Servings: people
Instructions
  1. Preheat the oven to 450°F and put your rack in the middle.
  2. Spiralize your veggies or simply slice them into disks. Put them aside in a bowl. Season them with Back of the Yards Seasoning, or just salt, pepper and garlic powder if you don't have BOY.
  3. Blend all ingredients in a high speed blender until smooth and bright green. Reserve a 1/4 cup for this recipe and put the rest in your refrigerator for later in the week when you want to use the same marinade for chicken.
  4. Rip off 2 pieces of parchment paper and fold each piece in half. Draw half a heart on each piece of paper, so that when you cut them, they look like full hearts! We're going back to Elementary School here, people.
  5. Open up the parchment heart and lay it flat.
  6. Split your veggies between the two pieces of parchment paper, putting a small pile on one of the crease of the heart.
  7. Place your salmon filet, skin side down, on top of the veggies.
  8. Spread about a tablespoon of the sauce on the filet.
  9. Squeeze half a lime on the fish. Drizzle with 1/2 tablespoon of melted ghee or coconut oil. Repeat with other parchment heart and filet.
  10. Fold the other half of each parchment heart on top of the fish and tightly crimp the edges together, starting at the top center of the heart and working your way down. You want to tightly crimp the edges by turning them under. I know it sounds hard. But really, it's pretty intuitive once you start doing it.
  11. Place the packets on a rimmed baking sheet.
  12. Cook in the oven for 7 minutes, then pull out to check the temperature. Fish should be about 135 degrees if you like it perfectly flaky.
  13. Cut open the packet with scissors as soon as they're done cooking and toss on cute toppings like cherry tomatoes or an herb garnish.
  14. Serve it up to a very impressed crowd.
Share this Recipe
Powered byWP Ultimate Recipe

How To Spiralize Vegetables + Zucchsghetti with Avocado Alfredo Recipe

July 19, 2016

Zucchsghetti with Avocado Alfredo – Paleo, Vegan, High in Omega-3

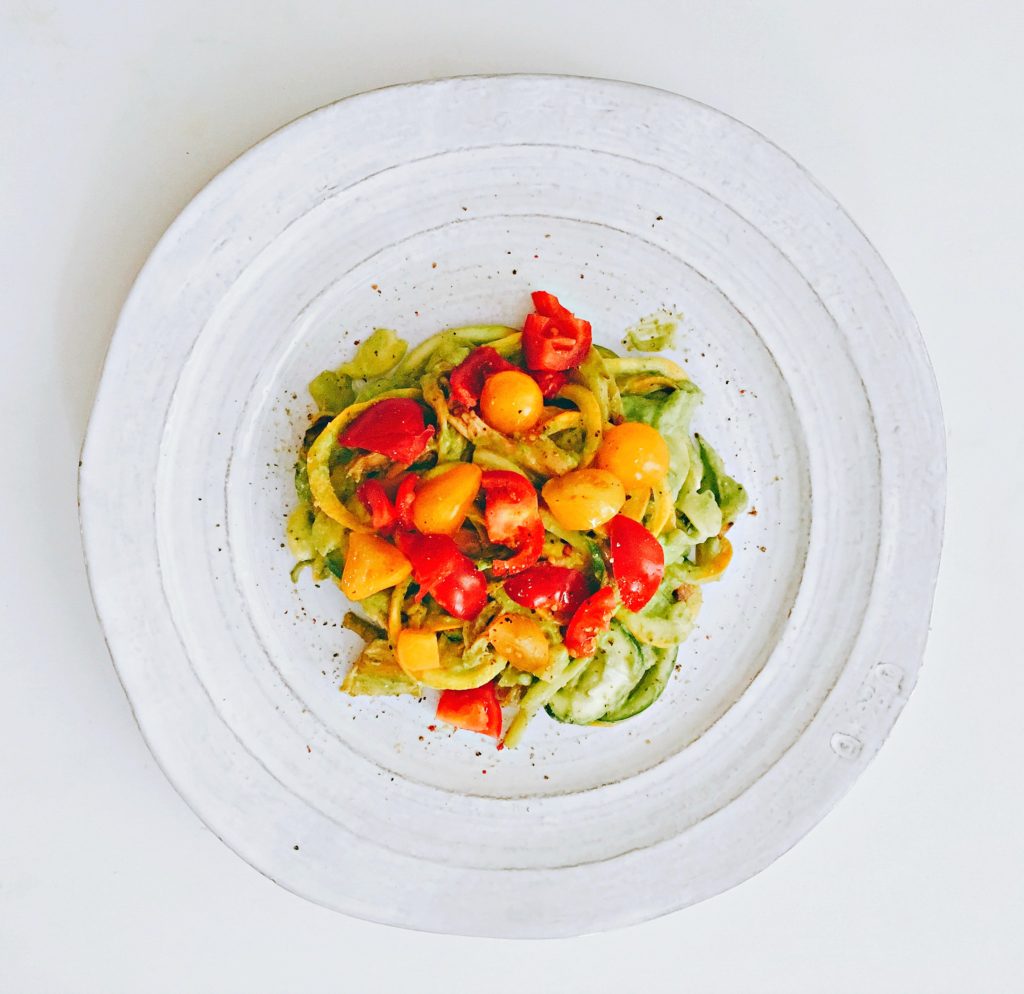
Zucchini Noodles dressed with avocado sauce and cherry tomatoes, gluten-free and grain-free for paleo and vegan diets

This recipe is for all of you who out there who don't think you can be decadent on a Paleo diet. Creamy, rich and lick-the-blender satisfying, with this sauce, you won't believe that you're eating an entire bowl of vegetables – including high in omega-3 gems like avocados and hemp seeds. Best part is, it's not even that hard to make! I'd say on a scale of 1 to 10, it's about a Tuesday. Not a Monday where you're still trying to recover from over-eating and over-drinking and you barely have enough energy to order take-out. But a Tuesday. You're getting back in the swing of things, but still aren't looking for anything with a lot of effort.

INGREDIENTS:

  • 1 zucchini
  • 2 yellow squash (or vice versa)
  • 1 cup of cherry tomatoes
  • 1 small onion
  • 1 tablespoon of coconut oil – I love Dr. Bronner's

ALFREDO INGREDIENTS:

Avocado Pasta Sauce Ingredients for a Paleo Pasta

  • 2 Avocados
  • ½ cup of fresh basil
  • ½ cup of spinach
  • 2 cloves of garlic
  • 2 tablespoons freshly squeezed lemon juice
  • 1/3 cup olive oil
  • 1 tablespoon hemp seeds – I use Navitas Natural
  • Salt and Pepper to taste

DIRECTIONS:

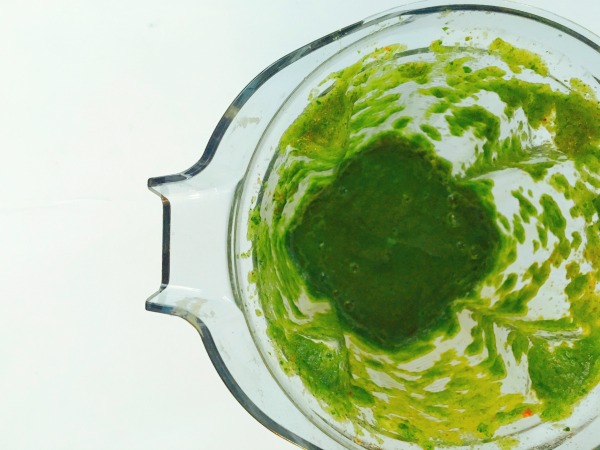
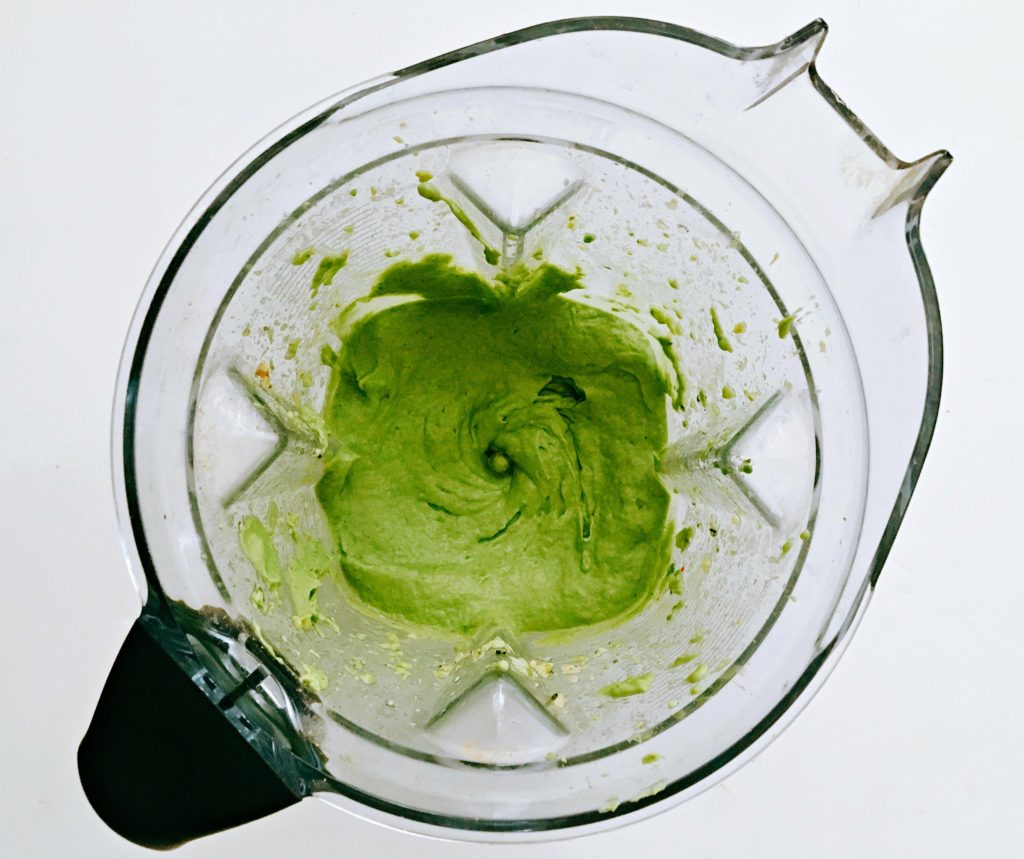
  1. Toss all alfredo ingredients into your high powered blender or food processor EXCEPT the Extra Virgin Olive Oil.
  2. Power on and slowly pour in the Extra Virgin Olive Oil. Blend until creamy, and taste as you go (add in more S&P, lemon juice, red chili pepper, whatever floats your boat). Set aside till needed.
    Note: I added a tiny bit of water to get the ingredients moving around and blending better.
  3. Cut your zucchini and squashes in half.
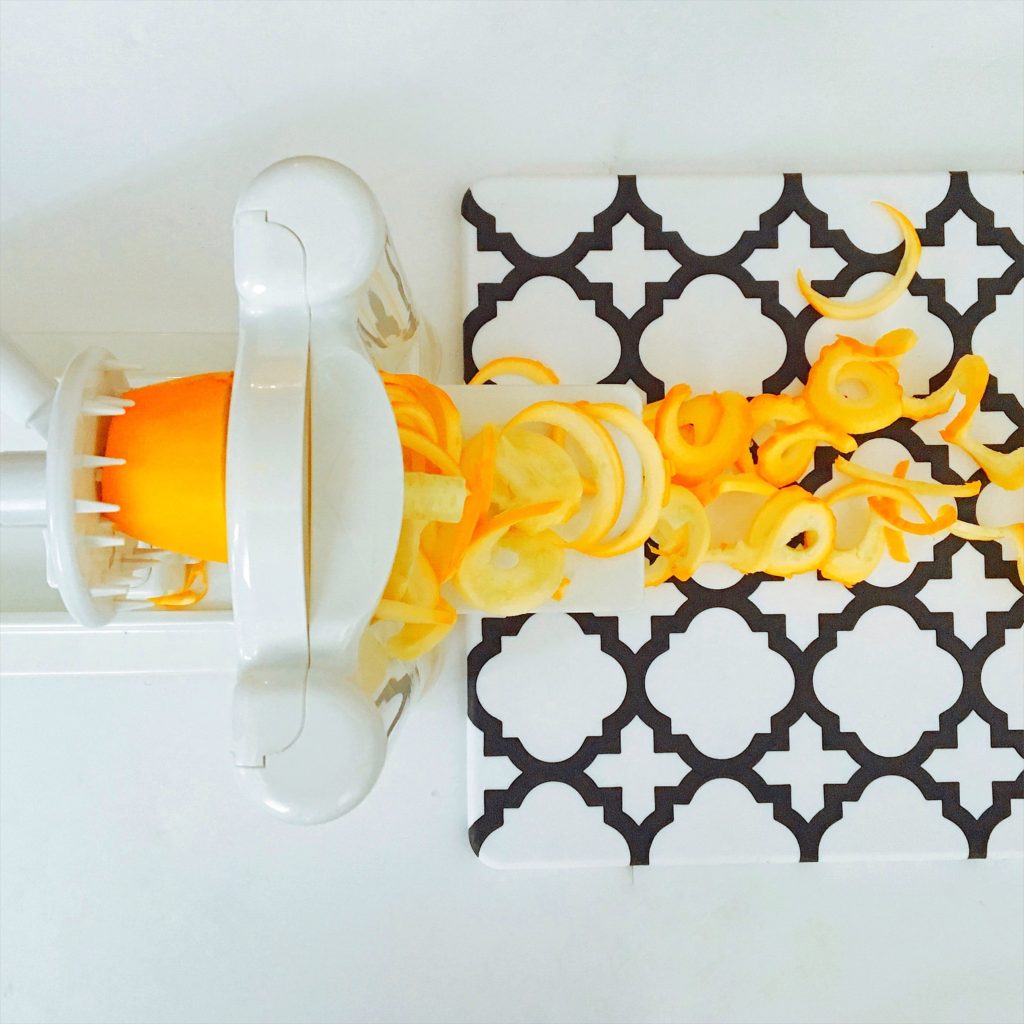
  4. Stick each one into your spiralizer and turn until you have a full plate of noodles.
  5. Dump noodles onto a paper towel and put another paper towel on top and blot dry. Set aside till needed.
  6. Slice onion into thin strips and saute in coconut oil for 5 minutes-ish, until the onions are soft and caramelized.
  7. Add in plate of noodles and cook for 2 minutes on low to medium heat.
  8. Turn off heat and spoon HALF of sauce over noodles in pan.
    You can add in more if you’d like, but I purposely doubled the Avocado Alfredo recipe so that you can use some for later. It’s always easier to make sauces with more ingredients rather than less so that your blender can “grab” onto all of it.
  9. Plate the noodles, and sprinkle tomatoes on for garnish, along with Salt and Pepper. Serve.

Belissimo!


Paderno Spiralizer with yellow squash

I got my spiralizer in March of 2014. The day it arrived, I was like a kid at Christmas. Williams Sonoma basically just told me that I can eat pasta again for the first time since I went gluten-free. Or really what they were sending me was the key to a whole other food group that I never knew existed until it arrived in my hands. The food group? Paleo Pasta. Zucchini, Squash, Sweet Potatoes, Carrots, Parsnips, Kohlrabi – any vegetable large enough to fit into my Paderno was fair game. The pasta-bilities were endless (see what I did there?).

Now with more than two years of experience under my belt, I’d like to think I can teach you a thing or two about using the spiralizer to make vegetable noodles. Per the request of my dear friend Maggie (Hi Mags!), I've created a guide. And per the request of my wonderfully intelligent mum, I put the recipe at the top just in case you had no desire to hear me babble on about my life experiences with my sprializer. But for all of you traditionalists out there, I also nestled it safely at the bottom in a printable and pinnable format.

Five Lessons for an Awesome Spiralized Veggie

Lesson 1: Only use vegetables as large, or larger than, the circumference of your spiralizer’s spiky thing. (Note the technical language)
The vegetable needs to be able to completely carve into the shredder, otherwise it will get caught, or spit out piddly little half moons. This is especially true with carrots since they are skinny. But when you get a good one, carrot-sghetti is one of my favorites. So keep an eye out for carrots with a lot of girth (yeah, I said it).

Zucchini and Squash

Lesson 2: Center your vegetable.
I cut my vegetables in half before I put them to the spirazlier. It allows for more control during the process. Most importantly, I make sure the vegetable is completely centered on the circle blade thingy. This allows for long and beautiful noodles and avoids half moons.

How to spiralize a squash

Lesson 3: Cook your noodles LIGHTLY, if at all.
Reminder: these are not real noodles. They are vegetables largely consisting of water. And, sometimes, when you slice a vegetable really thin, cooking it is just going to make it soggy and watery. Cucumber, in my opinion, should never be cooked because of its high water content. Zucchini and squash could still be just as good raw, just a little crunchier. A carrot, cucumber “pasta salad” dressed with tahini dressing would be awesome – no cooking required.

IF you’d still like your noodles warm, but not cooked, do this:

  1. Cook your meatballs/chicken/ground beef/mushrooms/onions/whatever
  2. Add your sauce and let it simmer
  3. Turn off the heat and add your noodles and toss together in the pan with the meat and the sauce

Essentially you are very lightly cooking the noodles in the warmth of the sauce, but not enough to make it soggy.

When you do cook your noodles, do so gently. There is no need to blast them with heat, cover the pan with a lid, or cook them for long periods of time.

Typical Cooking Times for Vegetable Noodles:

  • Zucchini – 2 minutes on low to medium
  • Squash – 2 minutes on low to medium
  • Carrots – 2 – 3 minutes (higher heat will make them crispier, which isn’t a bad thing in my opinion)
  • Sweet Potato – 5-7 minutes on medium heat

Avocado Sauce Ingredients

Lesson 4: Pat your vegetable noodles dry after spiralizing.
I resisted this one for a while because I tend to be a fast, hungry cooker who doesn’t want to slow the process down for anything that I don’t HAVE to do. But drying off my noodles has made a big difference in my final pasta dish. The less moisture they have, the better they cook and the better they absorb any yummy sauce that you make for them. All you need to do is:

  1. Put a paper towel on a plate and your noodles on top
  2. Put another paper towel on top and blot dry
  3. If they’re REALLY watery (i.e. cucumbers), do a second blotting with new paper towels

Spiralized vegetables dry with paper towel

Lesson 5: The spiralizer isn’t ALWAYS the answer.
If your vegetable is too skinny or your spiralizer isn’t strong enough OR YOU DON'T OWN ONE, never underestimate the power of the vegetable shredder (the old school paleo pasta maker). Take your shredder to a carrot or a sweet potato and you’ll get stick straight veggie noodles. They may not be as noodly looking, but they still taste great. ESPECIALLY when you saute them in coconut oil and spices.

Zucchini Noodles dressed with avocado sauce and cherry tomatoes, gluten-free and grain-free for paleo and vegan diets
Zucchsghetti with Avocado Alfredo
Print Recipe
This recipe is for all of you who out there who don't think you can be decadent on a Paleo diet. Creamy, rich and lick-the-blender satisfying, you won't believe that you're eating an entire bowl of vegetables - including high in omega-3 ingrdients like avocados and hemp seeds. Best part is, it's not even that hard to make! I'd say on a scale of 1 to 10, it's about a Tuesday. Not a Monday where you're still trying to recover from over-eating and over-drinking and you barely have enough energy to order take-out. But a Tuesday. You're getting back in the swing of things, but still aren't looking for anything with a lot of effort.
Servings Prep Time
2 people 20 minutes
Cook Time
7 minutes
Servings Prep Time
2 people 20 minutes
Cook Time
7 minutes
Ingredients
Zucchsghetti Noodles
Avocado Alfredo
Servings: people
Instructions
  1. Toss all Avocado Alfredo ingredients into your high powered blender or food processor EXCEPT the Extra Virgin Olive Oil.
  2. Power on and slowly pour in the Extra Virgin Olive Oil. Blend until creamy, and taste as you go (add in more S&P, lemon juice, red chili pepper, whatever floats your boat). Note: I added a tiny bit of water to get the ingredients moving around and blending better.
  3. Cut your zucchini and squashes in half.
  4. Stick each one into your spiralizer and turn until you have a full plate of noodles.
  5. Dump noodles onto a paper towel and put another paper towel on top and blot dry.
  6. Slice onion into thin strips and saute on pan for 5 minutes-ish, until the onions are caramelized and a little browned.
  7. Add in noodles and cook for 2 minutes on low to medium heat.
  8. Turn off heat and spoon HALF of sauce over the noodles in the pan. NOTE: You can add in more if you’d like, but I purposely doubled the Avocado Alfredo recipe so that you can use some for later. It’s always easier to make sauces with more ingredients rather than less so that your blender can “grab” onto all of it.
  9. Plate the noodles, and sprinkle tomatoes on for garnish, along with Salt and Pepper. Serve.
Share this Recipe
Powered byWP Ultimate Recipe
Recipes

Top 4 Bone Broth Benefits + Bone Broth Breakfast Drink Recipe

July 7, 2016


BoneBrothBenefitsDrinking bone broth has major health benefits. Like, crazy, amazing how-have-I-never-tried-this-before health benefits. But I gotta tell you, in the beginning, I really didn't want to hop on the broth bandwagon.

I try very hard to make paleo approachable for myself, and for you, my readers. Because if something is too hard or out of reach, I'm not going to keep doing it, you're not going to keep doing it, and we all lose. My guess is that when you hear bone broth, you think laborious, extreme, and a little odd, right? 

Here were my initial thoughts: SIMMER BONES?! WHA? WHY? THAT WILL TAKE LIKE A MILLION YEARS.

But I'm also one of these people that will try anything. And sometimes, when I try it, I can't get enough of it. Can you guess what happened next?

Well, I'm sitting here writing a blog post about my fantastic experience with it, so you can imagine, it went well.

As always, let’s start with the why.

Why are we drinking bones?
There are a ton of nutrients in bones, marrow, skin, feet, tendons and ligaments that we can’t get by eating the meat. But you CAN simmer the bones and bits in a crock pot for a couple of days to get these babies to release their healing compounds.

What are their healing compounds?
Proline
Glycine
Glutamine
Minerals in forms that your body can easily absorb, i.e. Calcium, Magnesium, Phosphorus, Silicon, Sulphur

Okay, okay. WHAT CAN IT DO FOR ME?

Reduce Joint Pain and Inflammation
It almost makes TOO much sense. Drinking broth from healthy bones will help strengthen your own bones. Duh! All of that cartilage that you’ve lost over the years – either through general wear and tear or from hard-core soccer/basketball/volleyball/insert high-impact-sport-here injuries, can benefit greatly from readily absorbable collagen and gelatin. (Kari Ferguson, you soccer stud – if you are reading this, I am talking to you 🙂 )

Make Your Stomach Happy
Eating “healthy food” can only help you if your body can absorb it properly. Otherwise, you’re not getting near the amount of nutrients from that kale salad or salmon and asparagus dinner that you should be getting. Bone broth is very easy for your body to digest and absorb. Why? Because it has collagen in it. Which plays really nice with your GI tract and your colon. So the more you drink bone broth, the more it heals the digestive tract, and the better it can take in nutrients from other food.

Prettier Skin, Hair and Nails
You’ve heard of collagen before. You know. The stuff that helps reduce wrinkles, decrease puffiness, and helps grow nails and hair. You can buy it in little fancy jars for a lot of money or you can go to a plastic surgeon to get it injected in your face. OR you can drink it in bone broth.

Immune System Booster
Remember up there when I said it was good for your digestion? For that same reason, it’s an awesome supporter of the immune system. When your food isn’t digested properly (happens more often than you think), undigested particles from food leak into the bloodstream where the immune system detects them. It freaks out and starts attacking healthy tissue and inflames the body. Good gut health = good immune system = less colds, flu and overall sicknesses.

That's not it. There is more. Lots more. Because everything listed above affects other areas of the body. Your stomach is connected to your brain is connected to your emotions. You fix one thing, you fix another. But I thought I'd stop there for today so we can get on to the good stuff.

BoneBrothBenefits_Recipe

My Experience with Bone Broth
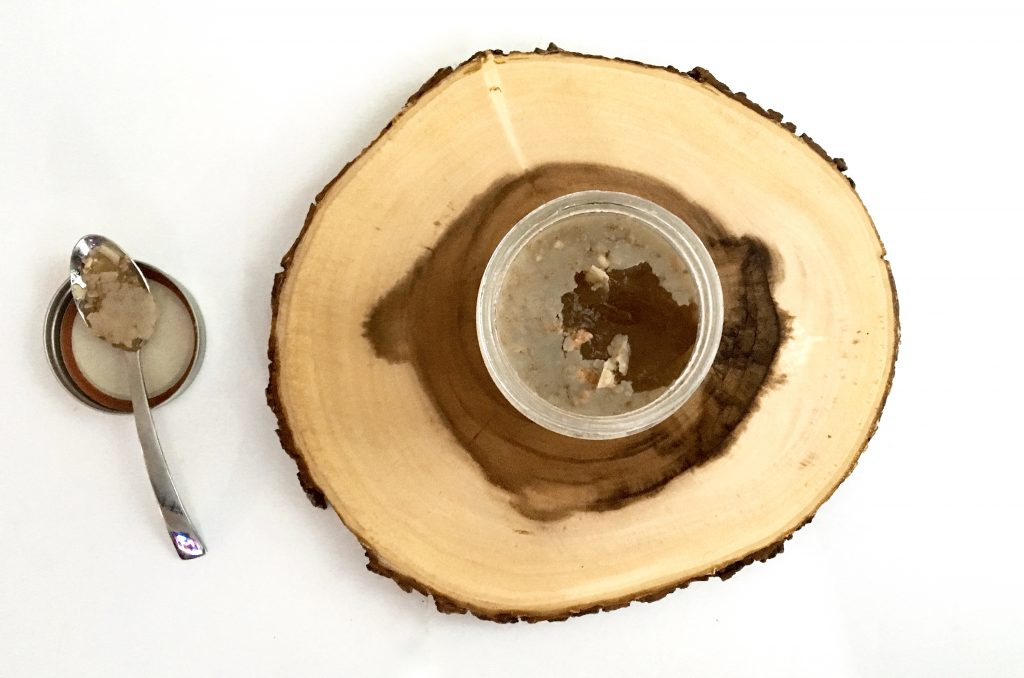
The first time I made it, it was really a result of just cooking a whole chicken and the bones were already in my Crock Pot. So I Googled the heck out of it, obsessed over whether I was doing it right, over-thought it, as usual, but eventually ended up with 4 jars of gelatin-like broth for my freezer. I didn't really know what to do with it yet, so I do what I always do when I'm overwhelmed, I put it in my freezer.

Well, a rainy day came. A dull, hungover, stomach-ache, swollen gland, kind of day. Ya. Ugh. I remembered the broth in the freezer and decided to go for it. Every symptom that it has been shown to help, I had. So down the hatch it went, and the results were pretty amazing.

  • My throat immediately felt soothed for the first time that day.
  • My sinuses finally gave it a rest from their inflamed state.
  • I slept like a baby that night.
  • After day two of broth-drinking, my digestion was finally back to normal and that cold that I thought was coming, never arrived.

*Note: I drank about 5 cups over the two days because I wasn't feeling well. This is more than you'd need on a regular basis.

From that moment on, I used it as my emergency medicine. Only if I was sick was it worth making it.

Low and behold, a few weeks later, I felt like I'd been hit by a truck. This time, not because I was sick, but because my muscles were uber sore from a particularly hard workout that included lots of hand stand push ups and pull ups. Broth is supposed to be good for joint pain and muscle aches, right? YUP.

  • It was like I had put muscle relaxer on all the sore parts, but better.
  • I was better the next day, when usually after a workout like that, my muscles are sore for at least two days.

Now, I've crossed over. I am officially a regular morning broth drinker. I figure, why not be preventive? This stuff is AWESOME. Attack the cold, stomach ache or joint ache before they've even really started. A totally in-tact digestive system. Stronger nails and longer hair. Plus, it's also shown to be one of the foods that are ideal for fertility. And you all know how I love my Fertility Food :). What's not to like? And the best part is, it's not nearly as difficult as everybody makes it out to be.

I've spelled it out for you in 9 steps below and given you my tips and notes along the way. But please do one thing for me? If you decide to make it, do it the simplest way possible just to try it. If you want to get more complicated after that, go for it. But all you really need is bones + water + 24-48 hours. Set it on low on your Crock Pot and walk away. Seriously. It's NOT THAT COMPLICATED.

BoneBrothBenefits

Things I’ve Learned After My 17th Try of Making Broth

  1. Most people will tell you to skim the stuff off as you go. You can do this if you want to, but why skim as I go if I’m just going to strain it all out at the end anyway? Seems like unnecessary work to me.
  2. I made making the broth part of my bi-weekly routine. Every other week, I make a big batch (using the recipe below), so I never have to scramble to make it when I really need it. I keep most of it in the freezer so I don't feel forced to use it immediately, and keep one jar in the refrigerator so it's defrosted and ready to drink.
  3. You DON’T have to cook an animal to get the bones. Just go to the freezer section near produce or your local butcher and ask for leftover bones. They always have bones. And they will always sell them to you for cheap. I do recommend sticking to places like Whole Foods or a butcher you can trust to have healthy, grass-fed, GMO-free animals. Remember, the animal you eat matters. If it was healthy, it’s bones will be healthy.
  4. That said, as you cook, make sure to save your bones as you go! I keep them in a freezer bag and just add to it every time we cook chicken drumsticks or steak.
  5. In order to keep the jars from exploding in the freezer (this happened to me multiple times until my husband kindly explained to me the concept of physics), you don’t want to fill the jars all the way to the top. You also don’t want to close the jar top all the way when you first put it in there (you can go back later and screw it tighter). Because liquid expands as it freezes, it WILL expand the glass until it can’t hold it anymore. Eesh.

Alrighty boys and girls. Now it's time to actually show you how to make this golden tonic. But I'm not just going to leave you with a broth how-to. I'm going to leave you with a recipe for how you can actually enjoy it as your morning drink (AFTER coffee, of course).

You ready for the recipe? Let’s do it.

Like what you read today? See those cute little social shapes underneath this post? They're for sharing! Click one to post to Facebook, Pinterest, Twitter, or comment right here on the blog. I would love to hear from you.

Can't get enough of all this healthy stuff? Then sign up for the newsletter where it says "Enter Your Email" at the top of this page. Too much of a commitment? That's cool. I also have a sweet Facebook page, deep-thoughted Twitter page, food-pornish Instagram handle, and recipe-filled Pinterest page.

Much Love,

HealthyStaceySignature

SOURCES:

Why Broth is Beautiful: Essential Roles for Proline, Glycine and Gelatin


BoneBrothBenefits_Recipe
Bone Broth + Breakfast Broth Recipe
Print Recipe
I invented this Breakfast Broth recipe after realizing that I wanted to incorporate Bone Broth into my morning routine. However, I needed to make the gelatin-like substance a little more appetizing first thing in the morning. So I added some pizazz and came up with this beauty. A little spicy, a little sweet, super satiating, and of course, ridiculously good for you.
Ingredients
  • 2 Pounds Bones Beef, Chicken, Whatever you can get your hands on
  • 2 Tablespoons Apple Cider Vinegar
  • Crock Pot-Full Of Water Enough to cover the bones
Sweet & Spicy Breakfast Broth
Servings:
Instructions
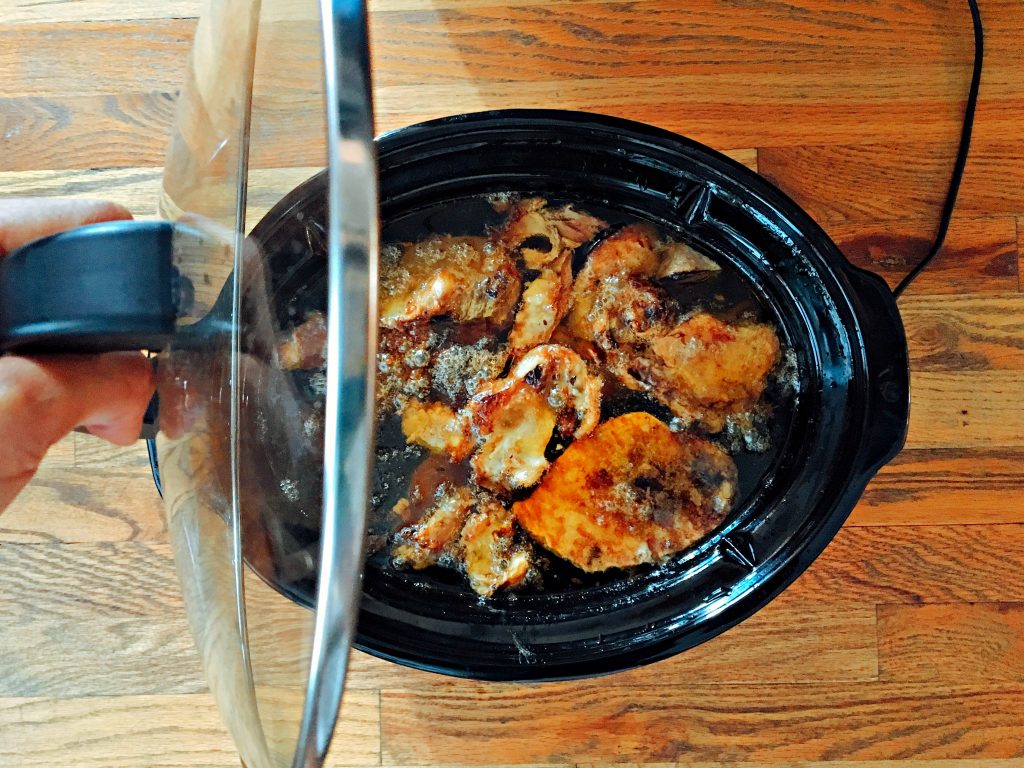
  1. Put bones in your Crock Pot
  2. Pour Apple Cider Vinegar over the bones
  3. Fill up pot with enough water to just cover the bones
  4. Put Crock Pot on low for 48 hours
  5. Strain the broth through a strainer or a funnel
  6. Pour into jars, leaving 1-2 inches of space at the top
  7. Put jars in the refrigerator for a few hours or overnight
  8. Scoop the fat off the top of the jars
  9. Put in freezer until you are ready to use (I keep one jar in my fridge at a time that's defrosted and ready to go)
Breakfast Bone Broth Recipe
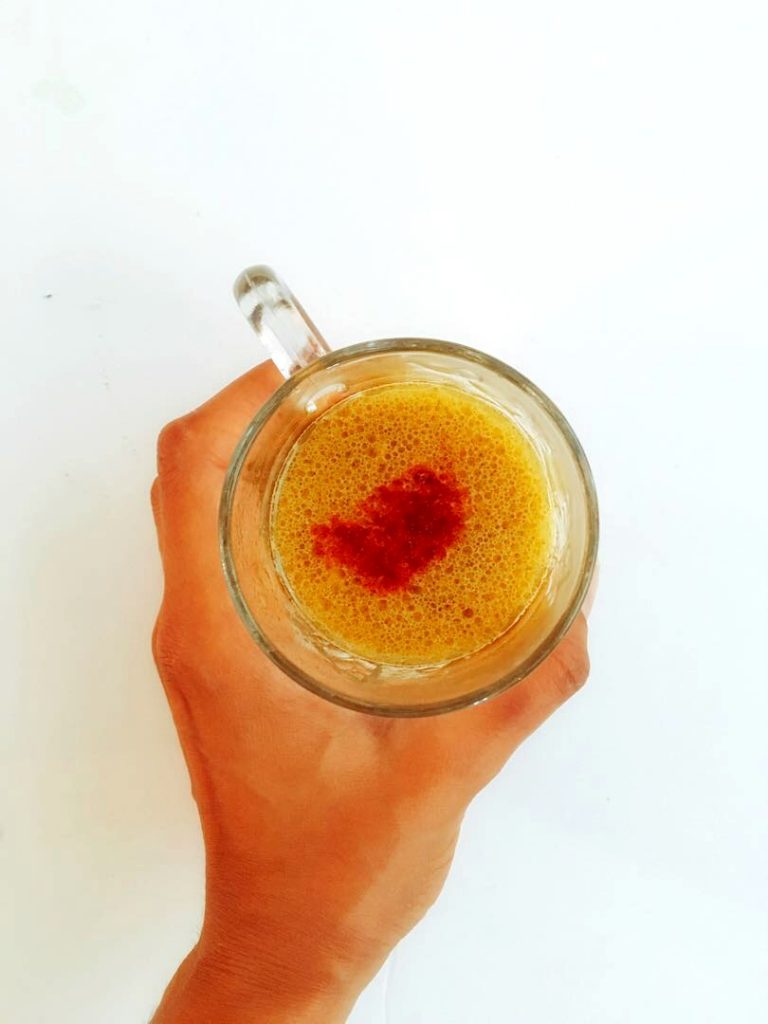
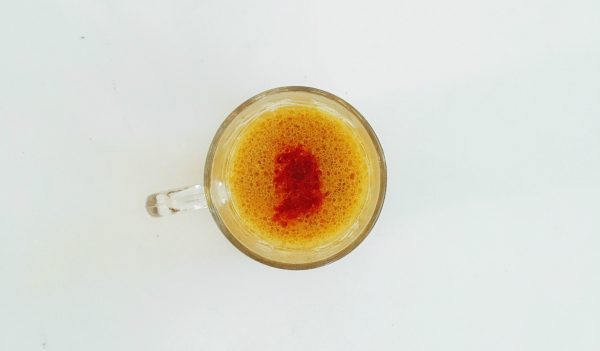
  1. Scoop 1 cup of bone broth into a mug
    BoneBrothBenefits_Recipe
  2. Add a spoonful of coconut oil
  3. Sprinkle in turmeric, cayenne, pepper and sea salt
  4. Heat in microwave for 1 minute and 20 seconds
  5. Add in a tablespoon of Vital Proteins collagen and raw honey
  6. Stir it up and sip it up!
Share this Recipe
Powered byWP Ultimate Recipe