Archives

Eat The Rainbow Paleo Salad

August 17, 2016
Rainbow paleo salad with fork

Rainbow paleo salad with fork

I know what you’re thinking. Are you seriously going to write a recipe for a salad? Yes. I seriously am. Because I take my salads very seriously. And I really do not understand why they are so underrated as a meal. They’re either the obligatory side dish or a necessary evil in dieting hell.

WHY?

I think it’s because people are making them the wrong way.

What are you putting in your salads? Lettuce. Tomatoes. Cucumber. Ranch. Ugh. That is SO 10 years ago. Where's the color? Where's the variety? Where's the WHOLE REASON we eat salads? To give us one big dose of highly nutritious ingredients all at once. Duh!

Salads – done right – can be showstoppers. In one bite, you can have crunchy, creamy, crispy and kale-y goodness. You can bring ingredients together that normally never associate with each other – for one big party in a bowl. Mango and avocado. Kale and pomegranate. Almond butter and charred broccoli.

Saute a few carrot shreds in coconut oil, caramelize some onions in ghee, add some well-seasoned chicken, juicy ground beef or even a tin of tuna on top, and you’ve got yourself one of the best entrées on the menu, my friends. (Note: I do not mean combine all these ingredients together. That's just silly).

Becasue I am concerned for your relationship with this vital meal, today, I share with you…

The BEST salad I ever made.

No joke. Search this entire blog and I’ve never said that before because it’s a bold claim.

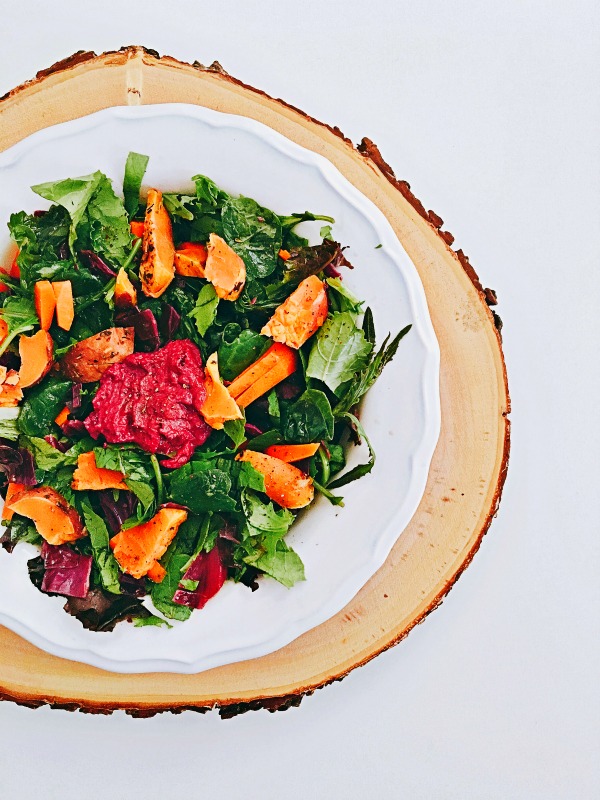
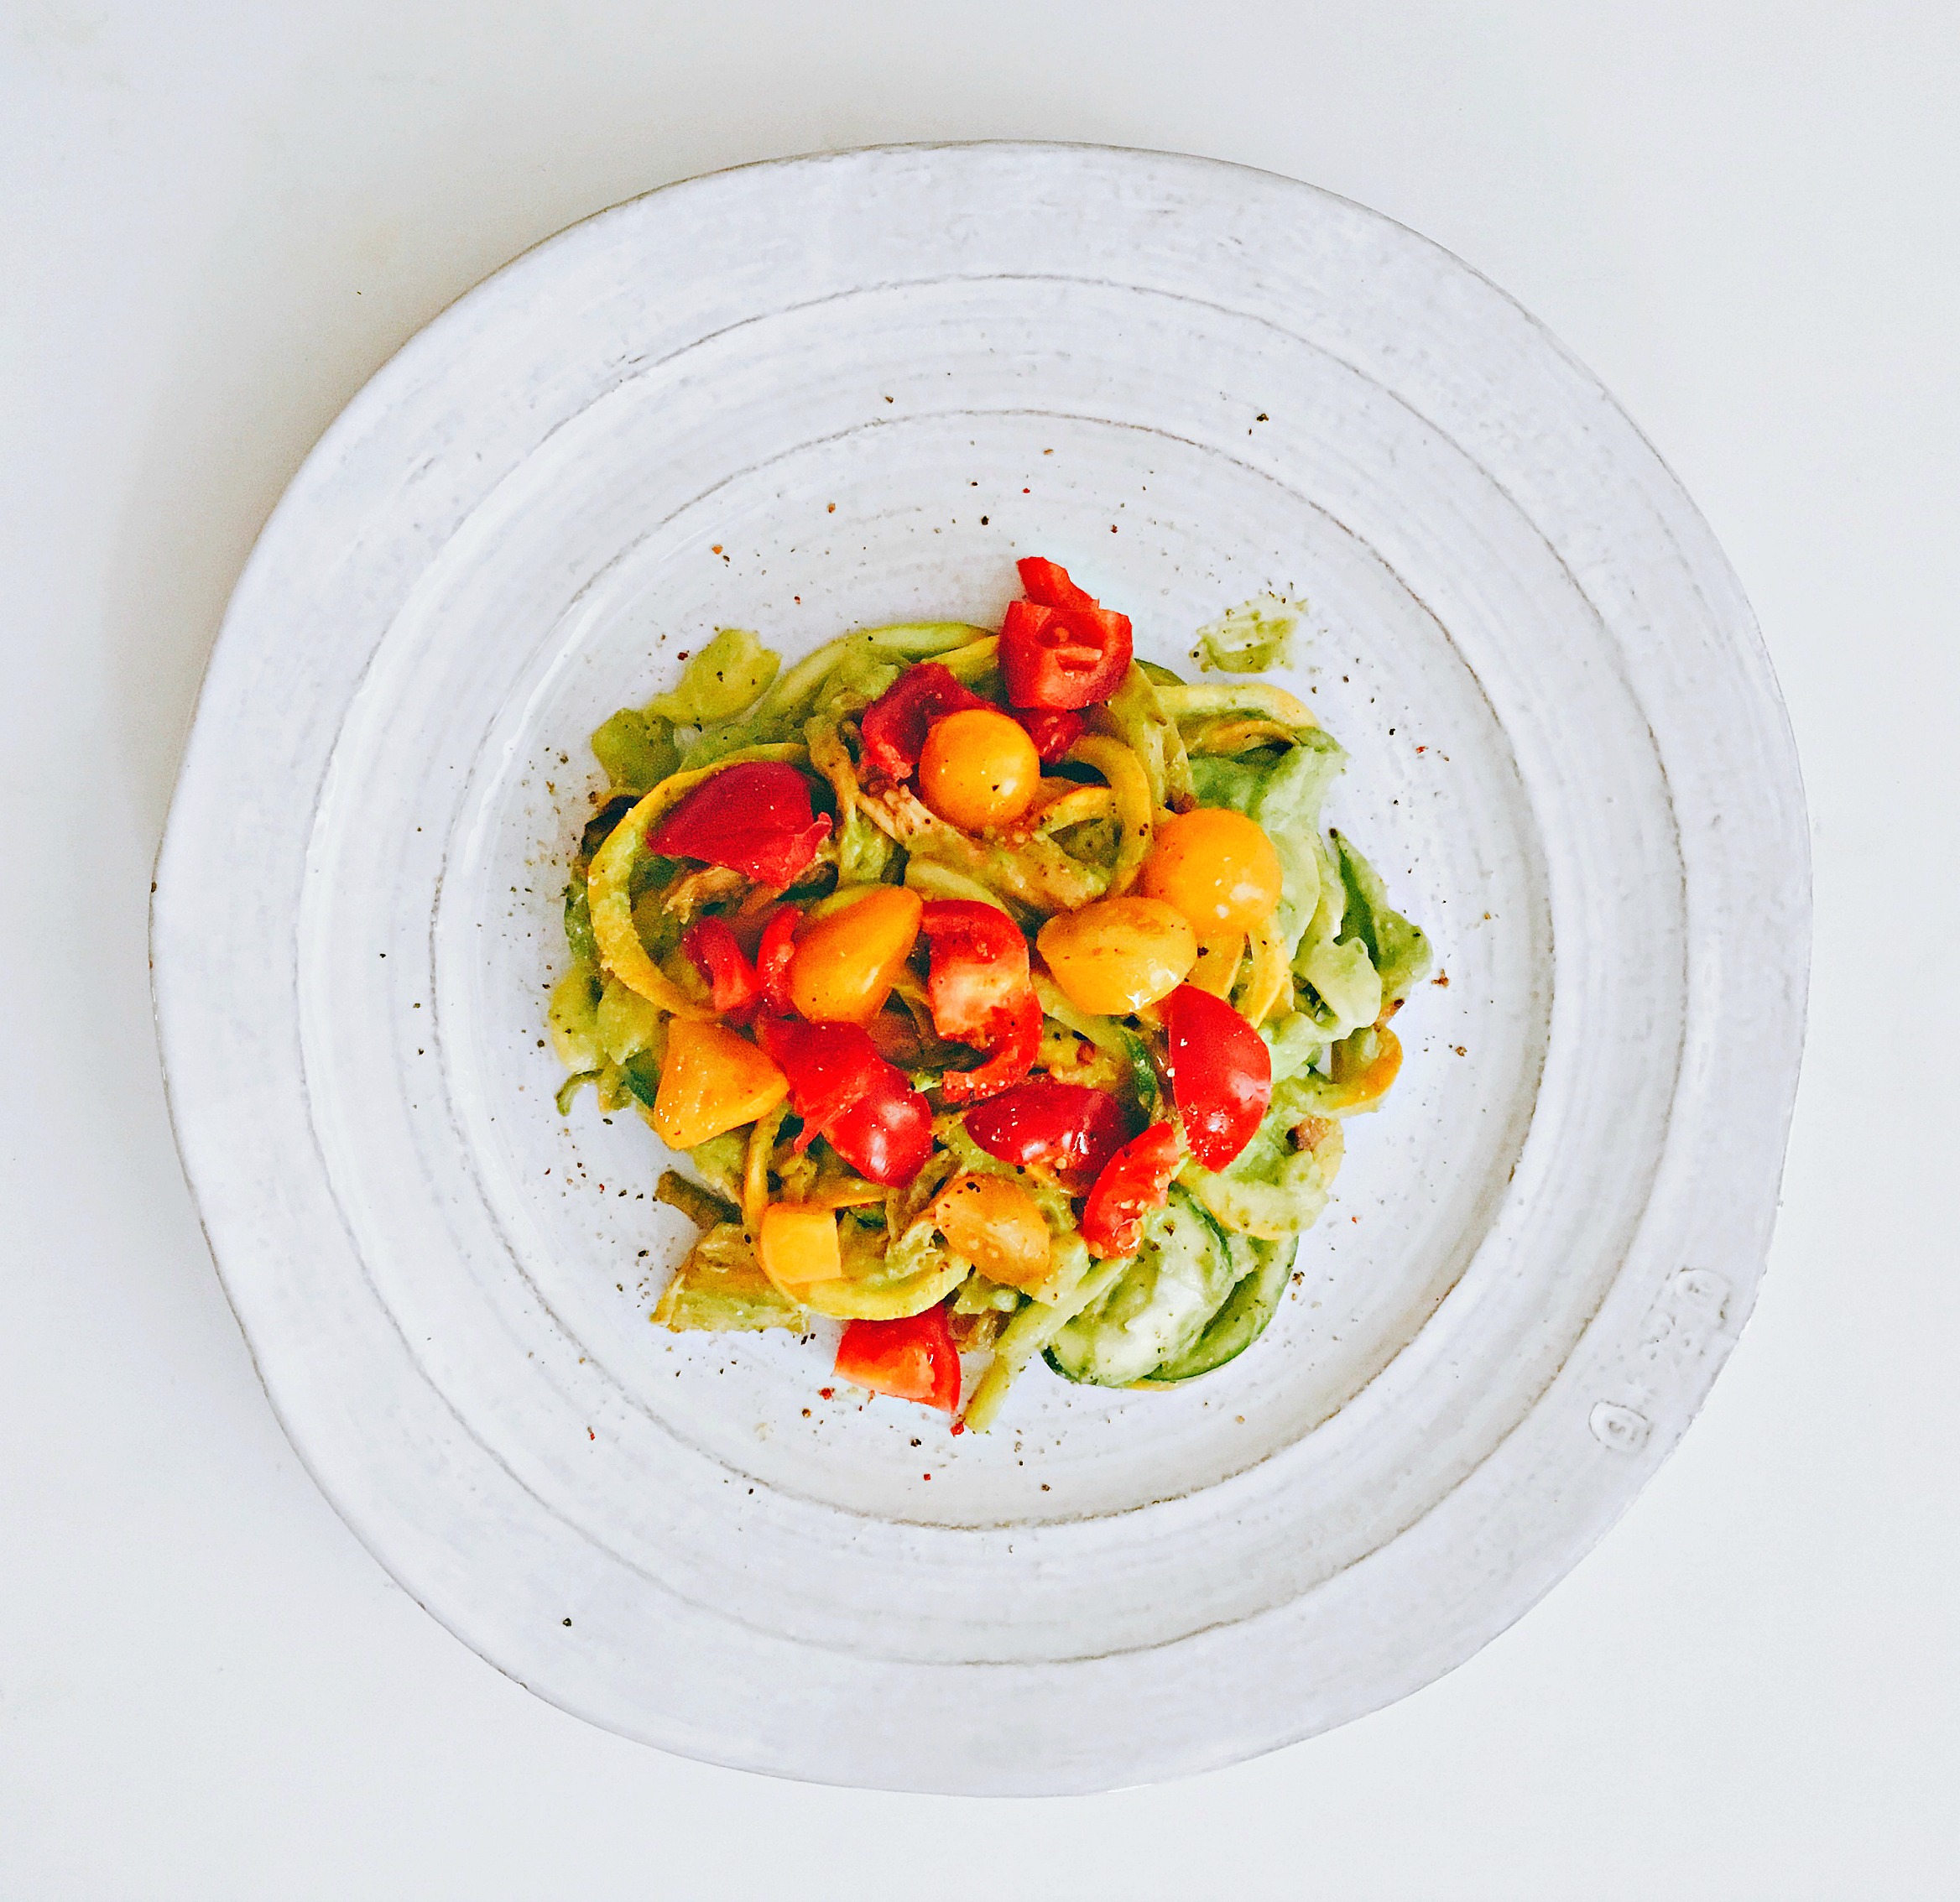
This baby is warm yet cool, crunchy and creamy, melts in your mouth, but with a refreshing finish. And best part, it’s SO full of nutrients. You know how I know why? Because it’s RAINBOW COLORED!

Random flashback moment:

Rainbow Brite flashback.

ANYWAYS.

Where was I? Colors, right. Different nutrients give different colors to the foods they are in. And get this. It's all on purpose. Mother nature planned it that way. GENIUS!

Plants can't get up and walk around, right? So the way they literally spread their seed is by attracting animals and organisms to them with their good looks and vibrant colors. Animal likes what he sees. Animal eats. Animal hops, crawls, runs, or flies away. Animal poops out seeds somewhere else. And tada! A whole new pretty plant. So it's in their favor to stand out and look attractive.

But wait! There's more.

In addition to the pigments looking good, they also can protect the plant from UV damage, enable photosynthesis, and even act as antioxidants for the plants. The better the protection they provide, the longer they live. We humans, in turn, cash in on these benefits when we eat the plants ourselves.

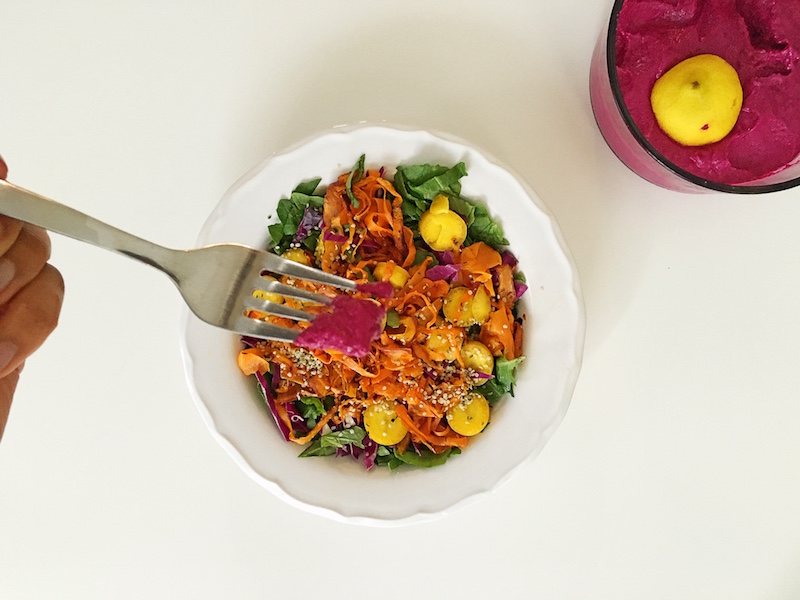
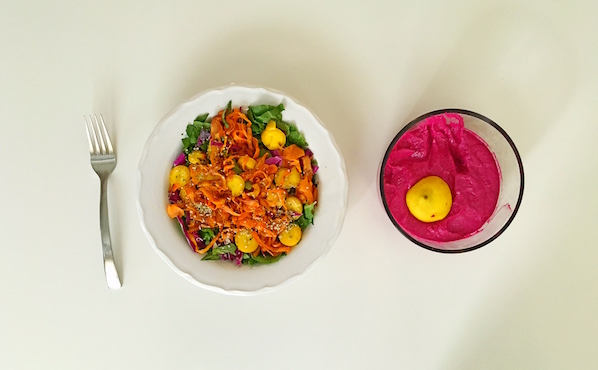
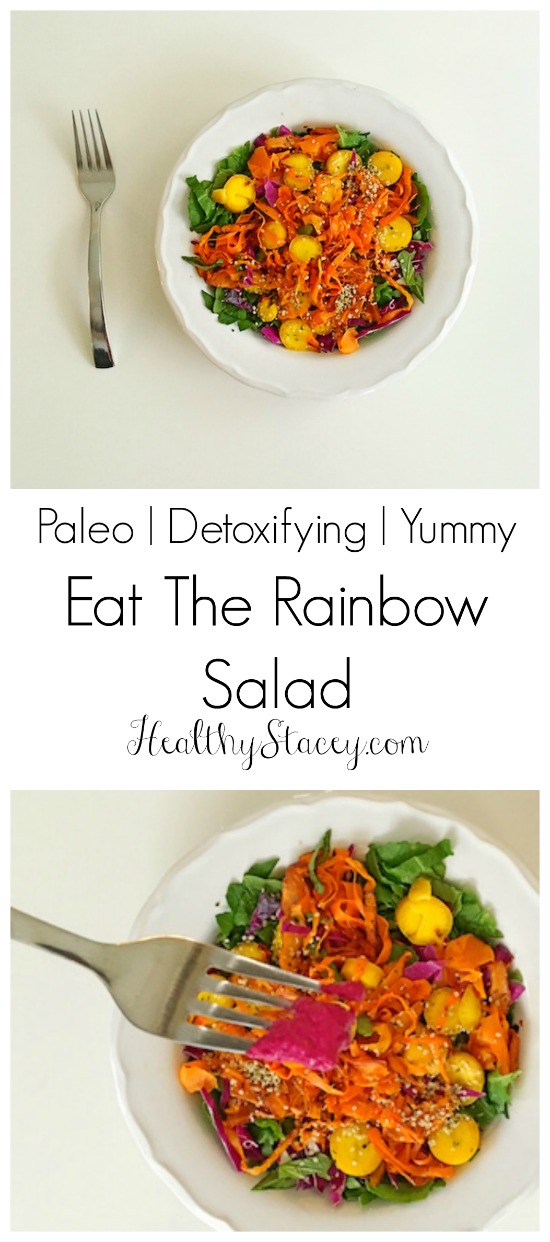
Which brings me back to this beautiful salad. Let's see what we got here…

Red Cabbage
The blue tint in red cabbage (anthocyanins) –> keeps your mind sharp.

Green Kale
The deep green in kale (indoles and isothiocyanates)–> increases the production of enzymes that clear toxins from the body.

Orange Carrots and Sweet Potatoes
The orange in carrots and sweet potatoes (beta carotene) –> keeps your bones strong, your eyes healthy and boosts your immune system.
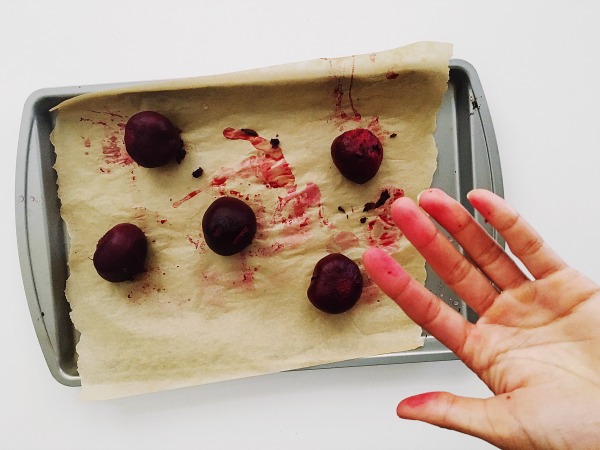
Crimson in Beets
The dark crimson in beets (Betacyanins) –> works in conjunction with vitamin C and manganese to offer benefits for eye health and overall nerve tissue health in addition to functioning as anti-inflammatory compounds.

Boom.

Forget the weird, unpronouncable words. Just eat the colors! Eat all of them. Red, orange, yellow, green blue, purple. Look out for them at the grocery store. Try weird veggies just because they're colorful. ROYGBV it up!

They're not just good for you, they're just plain GOOD.

You ready for this? I thought so.

Rainbow paleo salad

Ingredients:

  • 2 Heirloom Carrots
  • 1 Small Sweet Potato
  • 1-2 Tablespoons Coconut Oil
  • Bowlful of Kale
  • Red Cabbage, chopped
  • Hemp Seeds
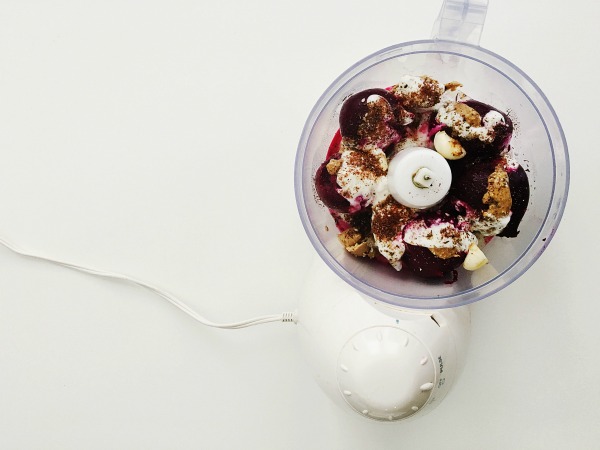
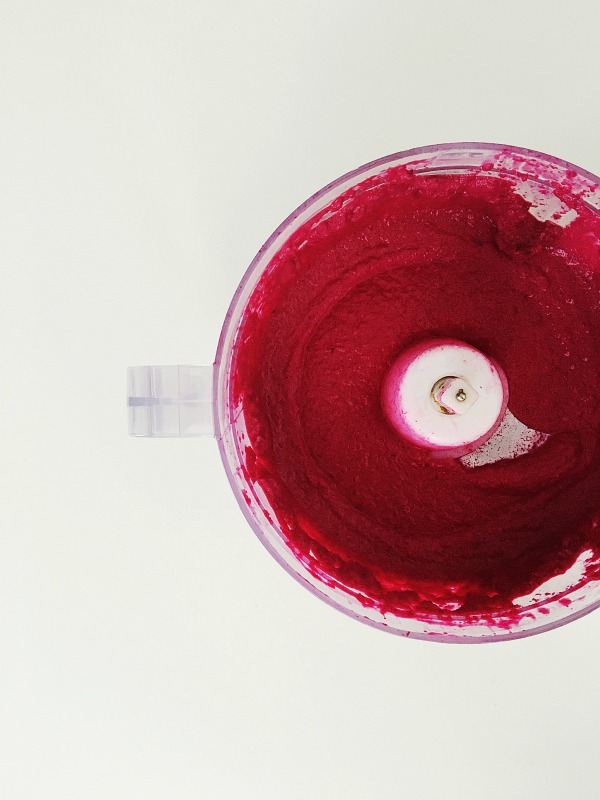
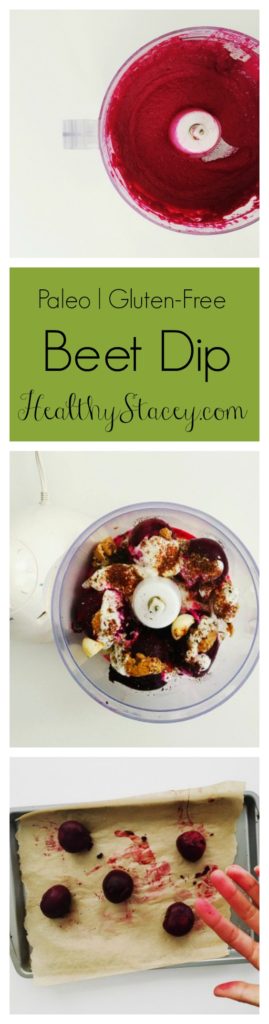
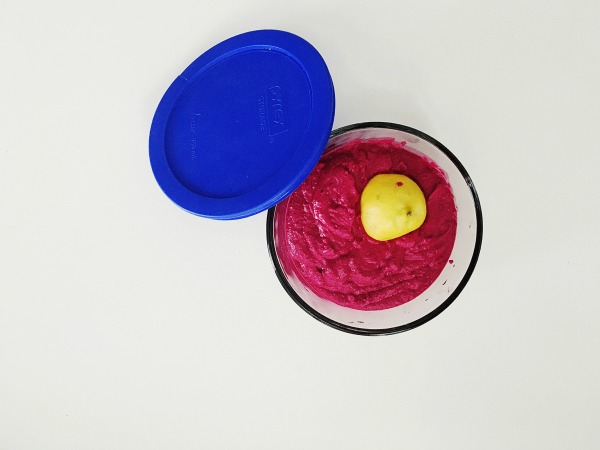
  • 1 Tablespoon Beet Dip – See here for beet dip recipe.

Dressing Ingredients:

  • 2 tablespoons Apple Cider Vinegar
  • 1/4 cup Extra Virgin Olive Oil
  • Salt and Pepper, to taste

Directions:

  1. Shred one carrot; chop the other carrot. Set aside.
  2. Shred the sweet potato using a vegetable peeler. Don't kill yourself trying to shred the whole thing up. Just get as far down as is comfortable and use the rest of the potato to chop up and saute later if you'd like.
  3. Heat coconut oil on pan and toss sweet potato shreds on. Saute until slightly crispy – 5 minutes-ish. Remove from pan to a side plate.
  4. Add more coconut oil to the pan and toss on carrot shreds. Saute until slightly crispy – 3 minutes-ish. Add shreds to sweet potato plate.
  5. Chop up kale so that it’s in nice bite-sized pieces. Put in salad bowl.
  6. Mix in red cabbage and chopped carrots.
  7. Top with sweet potato and carrot shreds.
  8. Scoop beet dip on top. Note, it's not TOTALLY necessary if you don't have the time to make it, but I highly recommend it. It's kind of what sends this salad over the edge. Might I suggest, too, that you just use sliced cooked beets as an addition if you don't want to make the dip.
  9. Sprinkle with hemp seeds.

Paleo Beet Dip with a lemon wedge


Much Love,

http://www.healthystacey.com/wp-content/uploads/2015/07/HealthyStaceySignature.jpg

P.S. Make it easy on yourself and Pin this baby!

 Eat The Rainbow Salad Pin

Rainbow paleo salad
Eat The Rainbow Paleo Salad
Print Recipe
Rainbow paleo salad
Eat The Rainbow Paleo Salad
Print Recipe
Ingredients
ACV Dressing
Servings:
Instructions
  1. Shred one carrot; chop the other carrot.
  2. Shred the sweet potato using a vegetable peeler. Don't kill yourself trying to shred the whole thing up. Just get as far down as is comfortable and use the rest of the potato to chop up and saute later if you'd like.
  3. Heat coconut oil on pan and toss sweet potato shreds on. Saute until slightly crispy – 5 minutes-ish. Remove from pan to a side plate.
  4. Add more coconut oil to the pan and toss on carrot shreds. Saute until slightly crispy – 3 minutes-ish. Add shreds to sweet potato plate.
  5. Chop up kale so that it’s in nice bite-sized pieces. Put in salad bowl.
  6. Mix in red cabbage and chopped carrots.
  7. Top with sweet potato and carrot shreds.
  8. Scoop beet dip on top. Note, it's not TOTALLY necessary if you don't have the time to make it, but I highly recommend it. It's kind of what sends this salad over the edge. Might I suggest, too, that you just use sliced cooked beets as an addition if you don't want to make the dip.
  9. Sprinkle with hemp seeds.
  10. Pour ACV dressing on top and aggressively mix it all together.
Share this Recipe
Powered byWP Ultimate Recipe
Recipes

Paleo-ish Beet Dip Recipe

August 2, 2016

Let's start with what you came for…The Paleo-ish Beet Dip Recipe 🙂

Paleo Beet Dip with a lemon wedge

I created this beautiful Paleo-ish beet dip just for you, my friends. Inspired by a recipe from a fellow Chicago blogger, Emily Paster of West of the Loop, it was originally created to be made in big batches for swapping and sharing at Food Swaps. I made a few tweaks – a smaller serving size for my own personal pleasure, a few more nutty additions, and a couple ingredient replacements to make it more paleo-friendly. And tada! This gem was born. Dip veggies in it, scoop it over salads or just eat it by the spoonful. It's ALL good. Read the post to find out why.

Ingredients:

  • 5 small to medium sized beets
  • 1 cup Siggi’s Strained Whole Milk Yogurt, Plain
  • 1/4 cup almond butter
  • 1/4 cup tahini
  • 2-3 tablespoons lemon juice
  • 1/2 teaspoon za'atar
  • 1/4 cup hemp seeds
  • 1/4 cup walnuts
  • 2 garlic cloves
  • Salt & Pepper to taste

Directions:

  1. Roast beets per the following steps OR just buy them from the store – this brand is great and is available at Whole Foods and Mariano's.
  2. Preheat oven to 400 degrees.
  3. Chop leaves off of beets, but leave the bottoms and the stems as this will preserve some of the juicy juice.
  4. Wash beets thoroughly and DON’T DRY – you’ll want some moisture on them for roasting.
  5. Wrap beets in aluminum foil (I wrapped them individually this time, but I’ve also done them all at once).
  6. Put them on a baking sheet in their aluminum foil for 60 minutes-ish. Check on them about 30 minutes in to turn them over. You may want to splash a bit more water on them if they’re looking dry.
  7. They are done when a fork goes through the middle of them easily and smoothly. If it doesn’t, roast another 10 minutes and check again.
  8. Once complete, let them cool off. Then, cut off their ends. Take a paper towel to them, and gently rub over the skin. It should come off easily. But no matter what, it will be messy. Wear an apron or bathe in beautiful purpley colors. Whatever floats your boat.
  9. Plop your beets into your food processor along with the rest of the ingredients.
  10. Pulverize in your food processor until smooth.
  11. Taste test! Taste test! Taste test! Everybody has different likes and dislikes and I tried my darndest to give you the exact measurements I used, but so much of my process is a little bit more of this and that until it tastes perfect TO ME. I loved the nutty flavor so I added a bit more almond butter and rounded it off with walnuts to really bring it home. But you may prefer it more tart, in which case you might want to up the yogurt and the lemon juice.

Roasting beets for paleo beet dip

I made a new friend last week. It’s name? Beet Dip. And I can’t get enough.

The match maker was Emily Paster of West of the Loop. I got the pleasure of attending an intimate book launching party for her book, Food Swap: Specialty Recipes for Bartering, Sharing & Giving. Not only did she encourage everybody there to try their own Food Swap,  but she demonstrated a few recipes ideal for the homemade community trade.

Enter, the beet dip.

All the ingredients for a Paleo beet dip

This creamy, dreamy, bright Nickelodeon-purple concoction – made with one of the most nutrient-rich vegetables out there. I HAD to have it, tweak it, and make it my own…

Beets? Good. Za'atar? Good. Tahini? Goooood. But what if I added some hemp seeds for an Omega-3 boost? And maybe a dash of almond butter to make it even more decadent. Yes. Uh huh. A little of this. A little of that.

BAM. I had it. Paleo-ish Beet Dip was born.

Paleo Beet Dip in Food Processor

I now call this gem "dish lipstick” because it has been dressing all of my meals up and making them a little more….well, sexy. Yeah, I said it. It's sexy beet dip. Making salads more sensual, crackers more seductive, and chicken breasts more suggestive – one spoonful at a time.

Ahem. Anyways.

As always, when I make a recipe here, it's not just how to make it, but WHY to make it.

Paleo salad with paleo beet dip on top

BEETS:

  • Let's jump right into the fun stuff – beets have been shown to be an aphrodisiac or a sexual booster. This is thanks to the mineral Boron, which has been shown to increase the production of sexual hormones.
  • Because of their high folate content, they are ideal for pregnant women.
  • Eating beet root has been shown to decrease cardiovascular diseases in multiple ways.
  • Betains contained in beet juice stimulate the function of the liver.
  • Researchers have also noticed that oxygen uptake is greatly increased by people who drink beet juice. One study showed that the uptake increased by up to 16% which is extremely impressive – more than a person can achieve by exercise training.
  • Nerve and muscle function, immune-boosting, bone, liver, kidney and pancrease health – the list goes on, but let's leave some room for the other guys, shall we?

Beets wrapped up in aluminum foil

WHOLE MILK YOGURT:

  • Comes from cows who have grazed in pasture year-round vs. eating a processed diet.
  • Grass feeding improves the quality of yogurt and makes it richer in omega-3 fats and CLA, a beneficial fatty acid (you cannot get the same levels from nonfat or lowfat yogurt).
  • Remember, fat is good. When you choose lowfat or nonfat products, they are no longer whole foods. They are half-foods, replaced with sugars or fake sugars to make up for the lack of flavor. And no, whole milk will not make you fat. In fact, it may help you lose weight because whole fat foods digest slowly into the bloodstream, keeping you satisfied longer and feeding your body properly so that it can digest its food.

HEMP SEEDS:

  • In the standard American diet, it can be difficult to get the right amount of Omega-3 in our diets.
  • Omega-6 is easier to come by, and is found in most processed foods.
  • We want to shoot for a ratio of 3:1 of Omega-6 to Omega-3, but the current US diet ranges from 10:1 all the way to 20:1 (!)
  • Guess what? Hemp has the perfect 3:1 ratio! Which contributes to its abiltiy to…
  • Improve digestion
  • Balance hormones
  • and Improve metabolism

WALNUTS:

  • Yet another Omega-3 powerhouse
  • Also very rich in antioxidants including manganese and copper
  • Have been shown to improve reproductive health in males (read: fertility food!)
  • May support brain health because of its neuroprotective compounds including vitamin E, folate, melatonin, Omega-3 and antioxidants.

Paleo Beet Dip with a lemon wedge

Alright kids. That's all she wrote. Question for you…

What is your favorite dip/marinade/butter/sauce to put on EVERYTHING?

Much Love,

HealthyStaceySignature

p.s. Like the Beet Dip? Pin me!

Paleo Beet Dip


SOURCES:

  1. http://articles.mercola.com/sites/articles/archive/2014/01/25/beets-health-benefits.aspx
  2. http://www.whfoods.com/genpage.php?tname=foodspice&dbid=124
  3. http://articles.mercola.com/sites/articles/archive/2014/05/19/7-walnuts-benefits.aspx
Paleo beet dip with sumac and seseame seeds topping
Paleo-ish Beet Dip
Print Recipe
I created this beautiful Paleo-ish beet dip just for you, my friends. Inspired by a recipe from a fellow Chicago blogger, Emily Paster of West of the Loop, it was originally created to be made in big batches for swapping and sharing at Food Swaps. I made a few tweaks – a smaller serving size for my own personal pleasure, a few more nutty additions, and a couple ingredient replacements to make it more paleo-friendly. And tada! This gem was born. Dip veggies in it, scoop it over salads or just eat it by the spoonful. It's ALL good.
Servings Prep Time
4 cups 5 minutes
Cook Time
1 hour
Servings Prep Time
4 cups 5 minutes
Cook Time
1 hour
Ingredients
Servings: cups
Instructions
  1. Roast beets per the following steps OR just buy them from the store – The Love Beets Brand is great and is available at Whole Foods and Mariano's.
  2. Preheat oven to 400 degrees.
  3. Chop leaves off of beets (and save for later - they are VERY GOOD for you), but leave the bottoms and the stems as this will preserve some of the juicy juice.
  4. Wash beets thoroughly and DON’T DRY – you’ll want some moisture on them for roasting.
  5. Wrap beets in aluminum foil (I wrapped them individually this time, but I’ve also done them all at once).
  6. Put them on a baking sheet in their aluminum foil for 60 minutes-ish. Check on them about 30 minutes in to turn them over. You may want to splash a bit more water on them if they’re looking dry.
  7. They are done when a fork goes through the middle of them easily and smoothly. If it doesn’t, roast another 10 minutes and check again.
  8. Once complete, let them cool off. Then, cut off their ends. Take a paper towel to them, and gently rub over the skin. It should come off easily. But no matter what, it will be messy. Wear an apron or bathe in beautiful purpley colors. Whatever floats your boat.
  9. Plop your beets into your food processor along with the rest of the ingredients.
  10. Pulverize in your food processor until smooth. Taste test! Taste test! Taste test! Everybody has different likes and dislikes and I tried my darndest to give you the exact measurements I used, but so much of my process is a little bit more of this and that until it tastes perfect TO ME. I loved the nutty flavor so I added a bit more almond butter and rounded it off with walnuts to really bring it home. But you may prefer it more tart, in which case you might want to up the yogurt and the lemon juice.
Share this Recipe
Powered byWP Ultimate Recipe

How To Spiralize Vegetables + Zucchsghetti with Avocado Alfredo Recipe

July 19, 2016

Zucchsghetti with Avocado Alfredo – Paleo, Vegan, High in Omega-3

Zucchini Noodles dressed with avocado sauce and cherry tomatoes, gluten-free and grain-free for paleo and vegan diets

This recipe is for all of you who out there who don't think you can be decadent on a Paleo diet. Creamy, rich and lick-the-blender satisfying, with this sauce, you won't believe that you're eating an entire bowl of vegetables – including high in omega-3 gems like avocados and hemp seeds. Best part is, it's not even that hard to make! I'd say on a scale of 1 to 10, it's about a Tuesday. Not a Monday where you're still trying to recover from over-eating and over-drinking and you barely have enough energy to order take-out. But a Tuesday. You're getting back in the swing of things, but still aren't looking for anything with a lot of effort.

INGREDIENTS:

  • 1 zucchini
  • 2 yellow squash (or vice versa)
  • 1 cup of cherry tomatoes
  • 1 small onion
  • 1 tablespoon of coconut oil – I love Dr. Bronner's

ALFREDO INGREDIENTS:

Avocado Pasta Sauce Ingredients for a Paleo Pasta

  • 2 Avocados
  • ½ cup of fresh basil
  • ½ cup of spinach
  • 2 cloves of garlic
  • 2 tablespoons freshly squeezed lemon juice
  • 1/3 cup olive oil
  • 1 tablespoon hemp seeds – I use Navitas Natural
  • Salt and Pepper to taste

DIRECTIONS:

  1. Toss all alfredo ingredients into your high powered blender or food processor EXCEPT the Extra Virgin Olive Oil.
  2. Power on and slowly pour in the Extra Virgin Olive Oil. Blend until creamy, and taste as you go (add in more S&P, lemon juice, red chili pepper, whatever floats your boat). Set aside till needed.
    Note: I added a tiny bit of water to get the ingredients moving around and blending better.
  3. Cut your zucchini and squashes in half.
  4. Stick each one into your spiralizer and turn until you have a full plate of noodles.
  5. Dump noodles onto a paper towel and put another paper towel on top and blot dry. Set aside till needed.
  6. Slice onion into thin strips and saute in coconut oil for 5 minutes-ish, until the onions are soft and caramelized.
  7. Add in plate of noodles and cook for 2 minutes on low to medium heat.
  8. Turn off heat and spoon HALF of sauce over noodles in pan.
    You can add in more if you’d like, but I purposely doubled the Avocado Alfredo recipe so that you can use some for later. It’s always easier to make sauces with more ingredients rather than less so that your blender can “grab” onto all of it.
  9. Plate the noodles, and sprinkle tomatoes on for garnish, along with Salt and Pepper. Serve.

Belissimo!


Paderno Spiralizer with yellow squash

I got my spiralizer in March of 2014. The day it arrived, I was like a kid at Christmas. Williams Sonoma basically just told me that I can eat pasta again for the first time since I went gluten-free. Or really what they were sending me was the key to a whole other food group that I never knew existed until it arrived in my hands. The food group? Paleo Pasta. Zucchini, Squash, Sweet Potatoes, Carrots, Parsnips, Kohlrabi – any vegetable large enough to fit into my Paderno was fair game. The pasta-bilities were endless (see what I did there?).

Now with more than two years of experience under my belt, I’d like to think I can teach you a thing or two about using the spiralizer to make vegetable noodles. Per the request of my dear friend Maggie (Hi Mags!), I've created a guide. And per the request of my wonderfully intelligent mum, I put the recipe at the top just in case you had no desire to hear me babble on about my life experiences with my sprializer. But for all of you traditionalists out there, I also nestled it safely at the bottom in a printable and pinnable format.

Five Lessons for an Awesome Spiralized Veggie

Lesson 1: Only use vegetables as large, or larger than, the circumference of your spiralizer’s spiky thing. (Note the technical language)
The vegetable needs to be able to completely carve into the shredder, otherwise it will get caught, or spit out piddly little half moons. This is especially true with carrots since they are skinny. But when you get a good one, carrot-sghetti is one of my favorites. So keep an eye out for carrots with a lot of girth (yeah, I said it).

Zucchini and Squash

Lesson 2: Center your vegetable.
I cut my vegetables in half before I put them to the spirazlier. It allows for more control during the process. Most importantly, I make sure the vegetable is completely centered on the circle blade thingy. This allows for long and beautiful noodles and avoids half moons.

How to spiralize a squash

Lesson 3: Cook your noodles LIGHTLY, if at all.
Reminder: these are not real noodles. They are vegetables largely consisting of water. And, sometimes, when you slice a vegetable really thin, cooking it is just going to make it soggy and watery. Cucumber, in my opinion, should never be cooked because of its high water content. Zucchini and squash could still be just as good raw, just a little crunchier. A carrot, cucumber “pasta salad” dressed with tahini dressing would be awesome – no cooking required.

IF you’d still like your noodles warm, but not cooked, do this:

  1. Cook your meatballs/chicken/ground beef/mushrooms/onions/whatever
  2. Add your sauce and let it simmer
  3. Turn off the heat and add your noodles and toss together in the pan with the meat and the sauce

Essentially you are very lightly cooking the noodles in the warmth of the sauce, but not enough to make it soggy.

When you do cook your noodles, do so gently. There is no need to blast them with heat, cover the pan with a lid, or cook them for long periods of time.

Typical Cooking Times for Vegetable Noodles:

  • Zucchini – 2 minutes on low to medium
  • Squash – 2 minutes on low to medium
  • Carrots – 2 – 3 minutes (higher heat will make them crispier, which isn’t a bad thing in my opinion)
  • Sweet Potato – 5-7 minutes on medium heat

Avocado Sauce Ingredients

Lesson 4: Pat your vegetable noodles dry after spiralizing.
I resisted this one for a while because I tend to be a fast, hungry cooker who doesn’t want to slow the process down for anything that I don’t HAVE to do. But drying off my noodles has made a big difference in my final pasta dish. The less moisture they have, the better they cook and the better they absorb any yummy sauce that you make for them. All you need to do is:

  1. Put a paper towel on a plate and your noodles on top
  2. Put another paper towel on top and blot dry
  3. If they’re REALLY watery (i.e. cucumbers), do a second blotting with new paper towels

Spiralized vegetables dry with paper towel

Lesson 5: The spiralizer isn’t ALWAYS the answer.
If your vegetable is too skinny or your spiralizer isn’t strong enough OR YOU DON'T OWN ONE, never underestimate the power of the vegetable shredder (the old school paleo pasta maker). Take your shredder to a carrot or a sweet potato and you’ll get stick straight veggie noodles. They may not be as noodly looking, but they still taste great. ESPECIALLY when you saute them in coconut oil and spices.

Zucchini Noodles dressed with avocado sauce and cherry tomatoes, gluten-free and grain-free for paleo and vegan diets
Zucchsghetti with Avocado Alfredo
Print Recipe
This recipe is for all of you who out there who don't think you can be decadent on a Paleo diet. Creamy, rich and lick-the-blender satisfying, you won't believe that you're eating an entire bowl of vegetables - including high in omega-3 ingrdients like avocados and hemp seeds. Best part is, it's not even that hard to make! I'd say on a scale of 1 to 10, it's about a Tuesday. Not a Monday where you're still trying to recover from over-eating and over-drinking and you barely have enough energy to order take-out. But a Tuesday. You're getting back in the swing of things, but still aren't looking for anything with a lot of effort.
Servings Prep Time
2 people 20 minutes
Cook Time
7 minutes
Servings Prep Time
2 people 20 minutes
Cook Time
7 minutes
Ingredients
Zucchsghetti Noodles
Avocado Alfredo
Servings: people
Instructions
  1. Toss all Avocado Alfredo ingredients into your high powered blender or food processor EXCEPT the Extra Virgin Olive Oil.
  2. Power on and slowly pour in the Extra Virgin Olive Oil. Blend until creamy, and taste as you go (add in more S&P, lemon juice, red chili pepper, whatever floats your boat). Note: I added a tiny bit of water to get the ingredients moving around and blending better.
  3. Cut your zucchini and squashes in half.
  4. Stick each one into your spiralizer and turn until you have a full plate of noodles.
  5. Dump noodles onto a paper towel and put another paper towel on top and blot dry.
  6. Slice onion into thin strips and saute on pan for 5 minutes-ish, until the onions are caramelized and a little browned.
  7. Add in noodles and cook for 2 minutes on low to medium heat.
  8. Turn off heat and spoon HALF of sauce over the noodles in the pan. NOTE: You can add in more if you’d like, but I purposely doubled the Avocado Alfredo recipe so that you can use some for later. It’s always easier to make sauces with more ingredients rather than less so that your blender can “grab” onto all of it.
  9. Plate the noodles, and sprinkle tomatoes on for garnish, along with Salt and Pepper. Serve.
Share this Recipe
Powered byWP Ultimate Recipe