Healthy Food

Healthy Body

How I Cured A Cold In 5 Days With 5 Food Medicines and No Drugs

August 25, 2016

AppleCiderVinegarforColds

I have something really embarrassing to tell you.

I, Healthy Stacey, got sick.  

I’m talking runny nose, a throat so swollen it hurt to swallow, dead tired but couldn’t sleep because I stayed up all night long hacking up a lung sick.

I know, I know. But you’re so “Healthy.” How did you get sick? (I’m imagining this in the voice of Adam Sandler, followed by “Hoobidy doobidy.”)

Well, I’ve narrowed it down to either the potentially germ-infested blanket I took from the flight attendant on my way to Mexico or the fact that I got stuck in a torrential downpour on my way to the yoga class that I couldn’t miss, and instead stayed sopping wet through every Chaturanga Dandasana.  

That’s neither here nor there. The point is, I got sick, and then I got better WITHOUT taking any drugs.

I’ve never been a big fan of Tylenol Cold & Flu, Robitussin Cough Syrup or any of the other hard-hitting OTC drugs out there. They make me super drowsy and I hate to think what other side effects they’re having on my body. Oh. And as far as I know (correct me if I’m wrong), cough and cold remedies do not shorten or cure illnesses; they just ease the symptoms along the way. But in doing so, they take a lot more processing from my liver than, say, a spoonful of raw honey would.  

So if I can reduce my symptoms in other more natural ways that don’t make me drowsy, don’t tax my liver AND actually make my immune system stronger for the future, then I’m all for it.

If you take them, I get it. No judgment. Promise. I just decided that me being sick would be a perfect opportunity to do a little self-experimenting for you guys.  

The Experiment: Kick this sucker without meds – just immune-boosting food and supplements, and see how long it takes.   

I dug a box of Tylenol Cold & Flu out of the medicince cabinet and put it on the counter. Partly as an "in case of emergency – pull this lever," but also as an extra boost of motivation. Challenge: accepted.

Here’s how it went down.

Day 1.
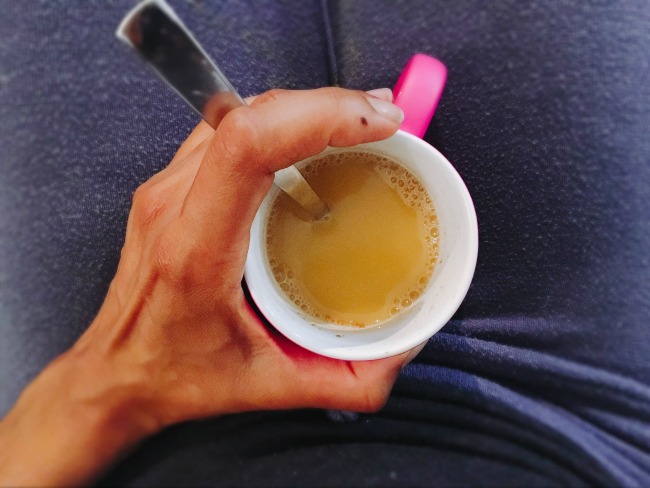
Throat is feeling swollen. I can feel something coming on. But it’s not full-blown quite yet. At this point I didn’t know what it was, but I knew that the first thing I needed to drink was bone broth.

Food Medicine # 1: Bone Broth

Bone Broth for colds

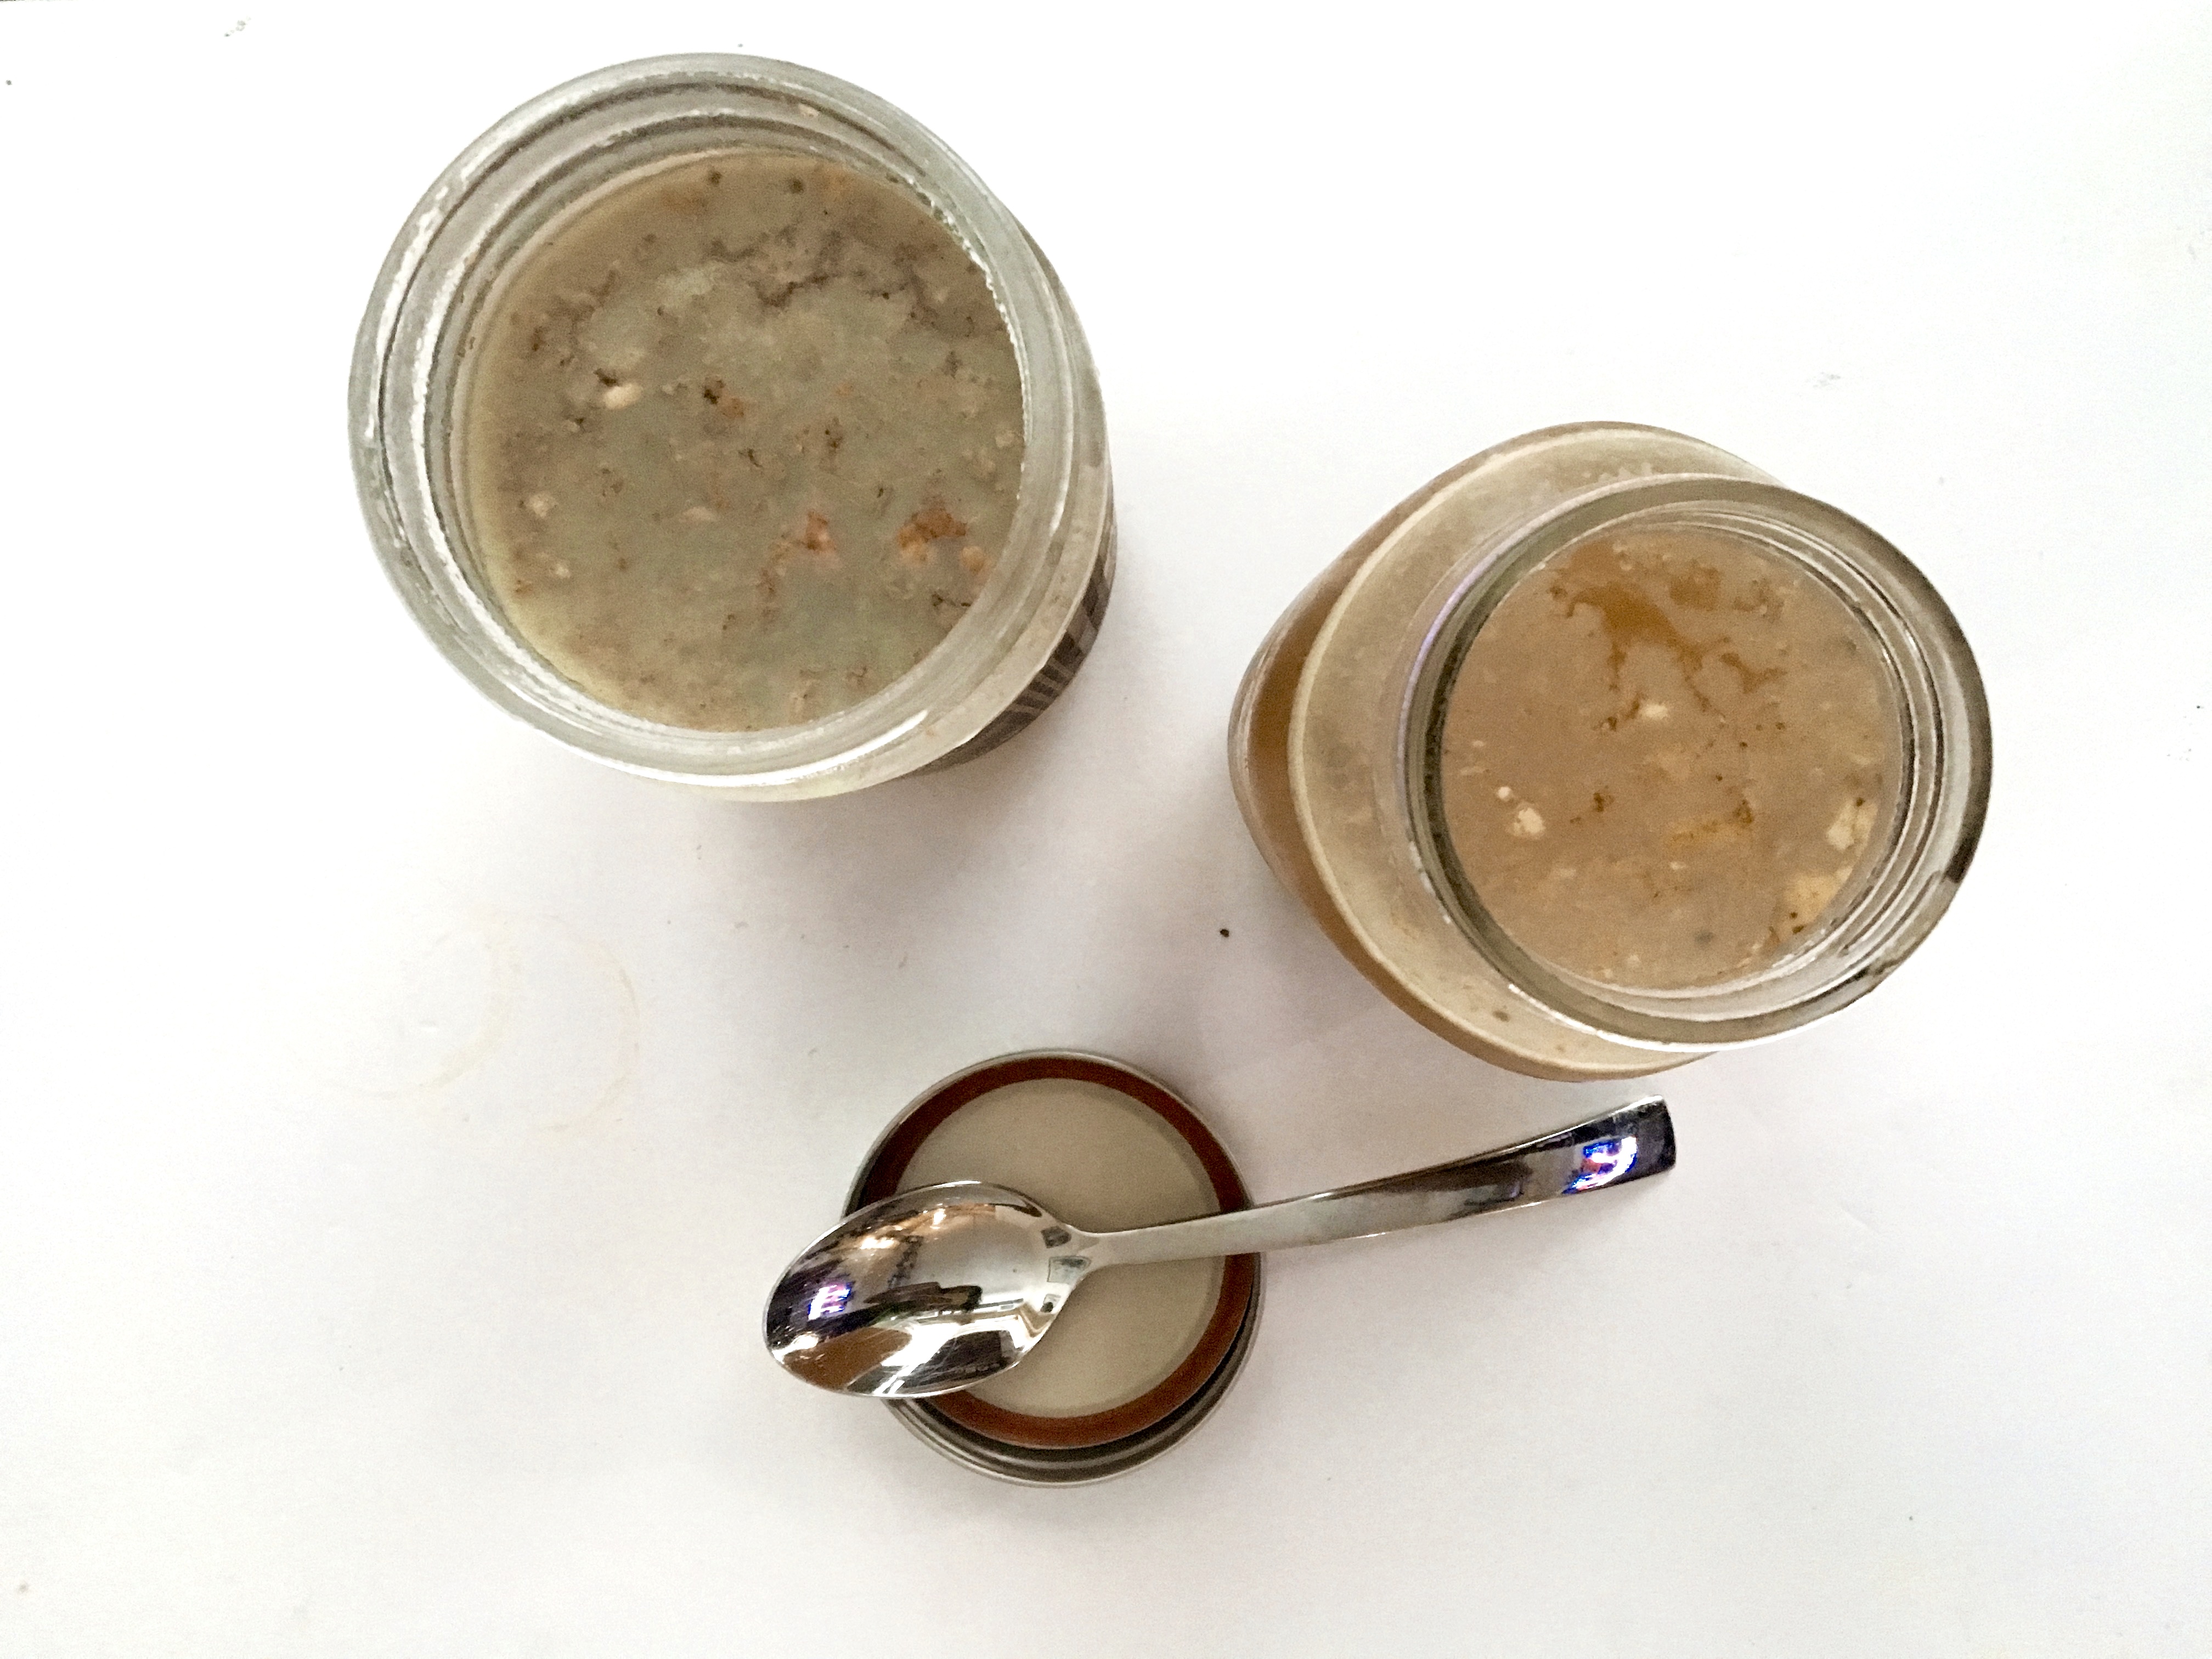
I’ve said it before, and I’ll say it again. Bone broth is a magical elixir. Simmering the bones of healthy animals releases nutrients and healing compounds that you could NOT get just from eating the meat.

Moreover, whatever foods you add to the broth will be better digested and absorbed into your system. So for my special Get Better Bone Broth, I added a few key nutrients also known to help immunity.

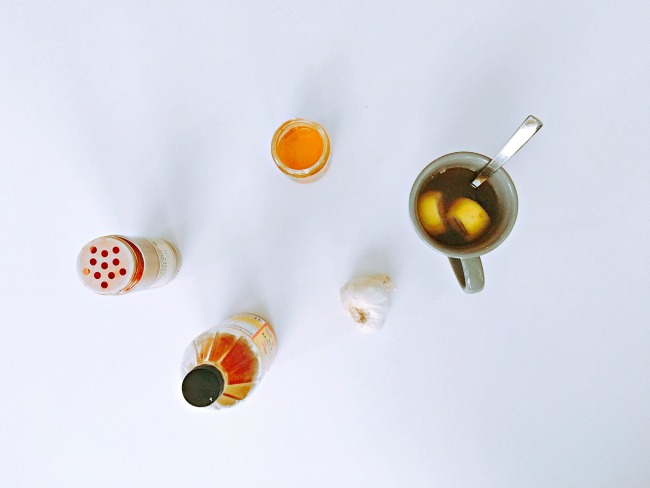
Garlic for its immune-boosting, anti-viral and anti-inflammatory effects. Ginger and cayenne because they are warming to your system and help relieve congestion.

Get Better Bone Broth Recipe:

  • 1 cup of homemade bone broth – see recipe here.
  • 1/2 teaspoon coconut oil
  • 1/2 teaspoon sea salt
  • 1 clove of garlic, chopped
  • ¼ teaspoon cayenne pepper

Directions:

  1. Heat up bone broth and coconut oil (I do 1:30 in the microwave, in a mug)
  2. Mix in your sea salt, garlic and cayenne pepper.
  3. Drink up and repeat every day until you feel better (2 times a day if you’re up for it!)

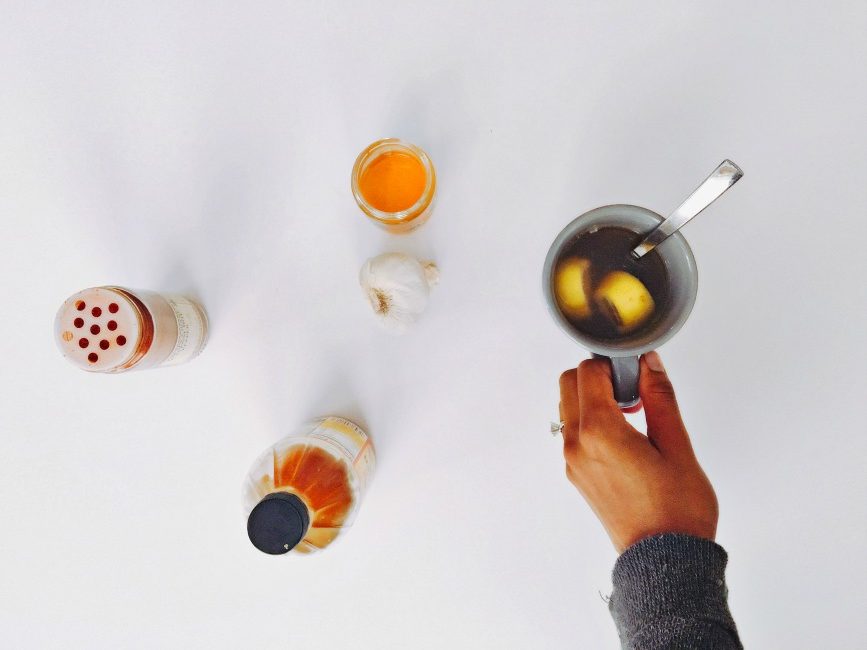
When your throat is hurting, you can’t get enough liquids in your system. Not only does it feel good on the throat, it helps loosen congestion. So on this first day, I was always drinking something – whether it be broth, water or my homemade Kick In the Pants Tea made with my good friend ACV.

Food Medicine #2: Apple Cider Vinegar

Braggs Apple Cider Vinegar

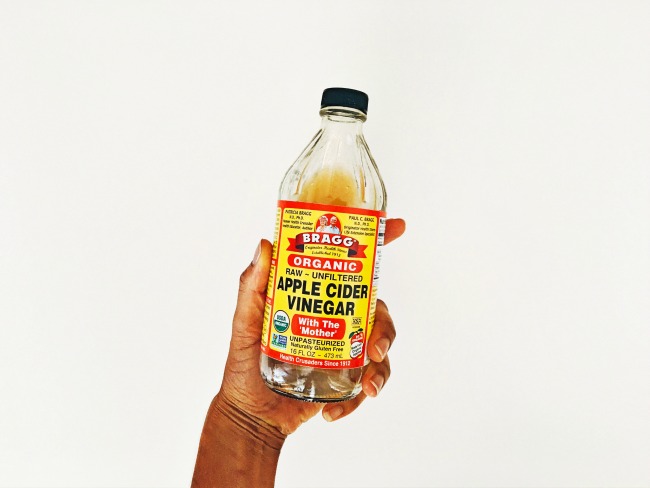
Apple Cider Vinegar. It may be acidic, but it actually helps to alkalize our overly acidic bodies. A body that is more alkaline will be better at fighting off colds.

I started taking this concoction years ago when I first found out about the benefits of ACV and it’s never steered me wrong. You’ll see that I’ve used a lot of the ingredients I used in my Get Better Bone Broth for the same reasons (with the addition of lemon for its anti-viral benefits and raw honey for its antioxidant, antimicrobial, throat-soothing benefits, and because it makes EVERYTHING taste better). But this tonic is a little more accessible for those of you who aren’t quite ready to hop on the bone broth bandwagon.

Kick In The Pants Tea

Apple Cider Vinegar Tea

Ingredients:

  • 1 cup hot water
  • 1 teaspoon Apple Cider Vinegar (I like the Bragg’s brand)
  • 1 clove of garlic, chopped
  • ½ freshly squeezed lemon
  • ¼ teaspoon cayenne pepper
  • ½-1 teaspoon raw honey

Directions:

  1. Boil water in tea kettle
  2. Add all other ingredients into your mug
  3. Pour hot water on top and stir

Day 2.
I get a horrible night’s sleep and my throat feels more swollen the next day. I double up on the bone broth (which feels like heaven on my throat; with just one sip I feel the swelling going down and the sinus pressure easing up).

I supplement my broth drinking with Breathe Easy Tea from Traditional Medicinals. (Another favorite for swollen glands and sore throats is Throat Coat, I just didn’t have any on hand).

That night, I decided I needed something to ensure that I would sleep through the night. Enter saffron.

Food Medicine # 2: Saffron

Saffron to make tea with

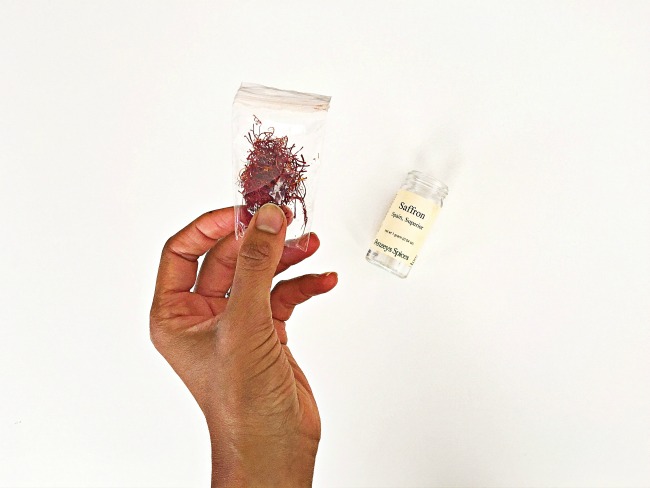
You know that spice that comes with your spice kit that kind of looks like red spider legs? That’s saffron. It’s apparently the most expensive spice in the world. That's why they only give you a little bit in each jar. But the thing is, you don’t need much to get it to work. This stuff is powerful.

Yes, I already had some from a spice kit that was gifted to me so, for me, there was no cost. But I looked it up on The Spice House Chicago website, and saw that you can get it by the gram for $12.08. And a gram is plenty for this purpose.

Saffron spice is produced from the saffron crocus flower (Crocus sativus) and it is actually the insides of the flower that catches the pollen. Among its MANY other benefits (used for asthma, cough, loosening of phlegm, gas, depression, Alzheimer’s, dry skin, PMS symptoms, fertility, and more) it has also been shown to have mild sedative properties. Meaning, when you drink this stuff, and put your head on that fluffy pillow, it hits you. Or at least it did for me. I felt instantly relaxed and lulled to sleep.

After a lot of searching around the internet, I came across about nine different people all claiming that they had “the best” way to make saffron tea. So I threw up my hands and just decided to do my own thing.

Using full fat coconut milk (real milk would be even better because it has tryptophan in it, but I didn’t have that), cinnamon for its anti-inflammatory and anti-oxidant qualities, raw honey for its antioxidant, antimicrobial and throat-soothing benefits and cardamom (I’m sure it has benefits too, but I just thought it would taste good with it), I created “the best” Saffron Sleepy Tea.

Saffron Sleepy Tea

Saffron tea for insomnia

Ingredients:

  • ½ cup of water
  • 1 cup of full-fat coconut milk or whole milk (ideally grass-fed)
  • 7-10 strands of saffron
  • ½ teaspoon cinnamon
  • ¼ teaspoon cardamom
  • ½ teaspoon raw honey

Directions:

  1. Boil ½ cup of water in a pot on the stove
  2. Add saffron and cover pot for 10 minutes
  3. Now add milk, cinnamon and cardamom and turn heat up to medium
  4. Stir until warm
  5. Add in honey
  6. Pour into a mug and sip, repeat and go to sleep.

Day 3.
The snot tap has turned on. The swollen throat has finally released itself and the nose is running like crazy. I have a love-hate relationship with this part. I know that the release of all the fluid means that it’s all coming out and I’m on my way to getting better. But it’s still a disgusting snotty drip.

Quick Defense from Gaia Herbs

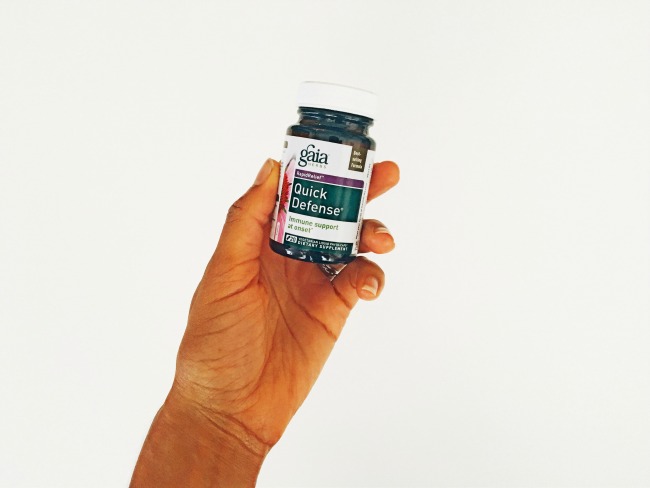
My good friend (and supplement superstar), Monica, recommends to me a product called Quick Defense from Gaia Herbs. She says it works like a charm if you take it at the onset of symptoms. A little too late for that, but I figure, it couldn’t hurt and it offered a lot of immune-boosting benefits.

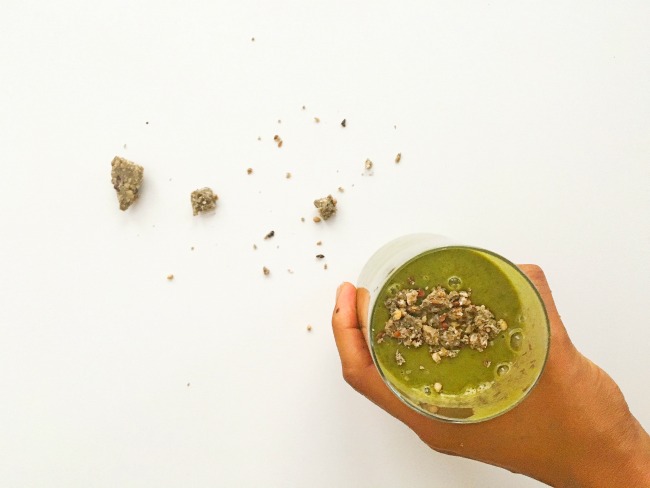
Food Medicine #3: Green Drink

Green Vibrance Powder Mix

Like magic, my Green Vibrance just happened to arrive in the mail that day. I had ordered it a week or so ago as an addition to my Fertility Diet. Again, this came highly recommended to me from my supplement superstar up there. Monica recommends it to everybody she knows because of its high quality ingredients and the marked difference she feels in her energy levels when she takes it in the morning. One of her friends who suffered from a lower immunity started taking it per Monica’s recommendation and found a huge difference. In fact, it’s only when she stops drinking it that she gets sick again.

Hmmm. Fertility food AND immune booster. What is this stuff?

Well, in a really small nutshell, it’s a greens powder. But the makers of this particular product have gone to town with the types (and high concentrations) of nutrients they've packed into each scoop. Organic kale sprouts, organic broccoli sprouts, organic spirulina, chlorella, organic beet juice, organic parsley, organic spinach, organic carrot, green bean, zucchini and Rockweed sea vegetable are just the beginning. It also offers a host of other supplements to support digestion, bone strength, circulation, liver and immunity. It’s kind of like taking a multi-vitamin, a green smoothie and NZT all in one. Just kidding about the NZT (5 Gold Stars to anybody who can name this movie reference in the comments).

What I love about this, is that it takes out a lot of the thought that goes into smoothie making. I personally like to add a lot of extra boosts to my smoothies beyond the greens and the fruits. But not everybody has the money or the patience for that. Especially when sick.

Sicko Smoothie:

Green Smoothie For Colds

Ingredients:

  • 1 scoop of Green Vibrance
  • 1 inch of turmeric root
  • Dash of pepper
  • 1 inch of ginger root
  • 1 teaspoon bee pollen
  • 2 scoops of Vital Proteins Collagen Peptides
  • Frozen pineapple
  • Almond Milk/Coconut Water (I mix the two together)
  • Optional: Superfood toppings becasue it makes it fun to drink (I used my favorite Superfood Crumble from Elemental Superfoods)

Directions:

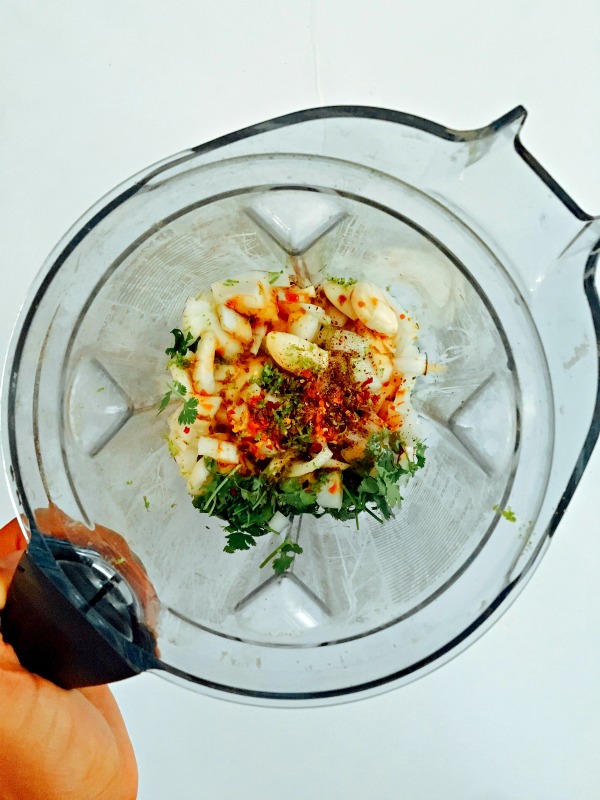
  1. Put almond milk/coconut water in a high speed blender
  2. Add in Collagen Peptides and Green Vibrance
  3. Add in remaining ingredients
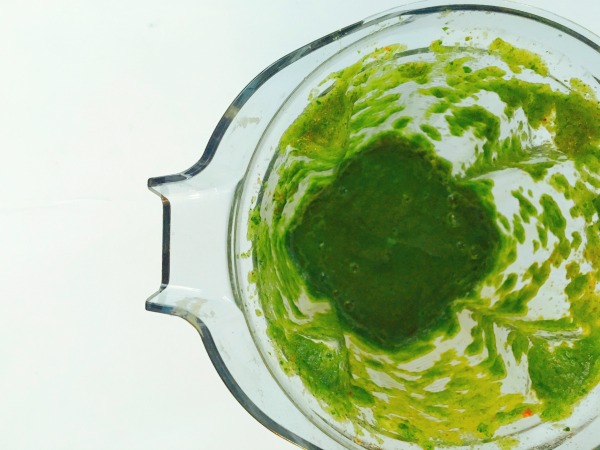
  4. Pulverize until smooth
  5. Add toppings
  6. Drink up, breathe in, breath out, feel better!

Day 4.
Feeling better today. Nose is still running, but the glands in the throat feel back to normal and I can see the end of the rainbow. Last night, I did some extreme self-care. Meaning, I put all my energy into myself – and put everything else on hold.

Food Medicine #4: Homemade Soup (with a side of Self-Care)

Self-care. It's a real thing. Seriously. When you take care of yourself first, everything else falls into place.

I don't do it very often. It usually takes extreme cases like me being sick for it to happen. So I went to town. I canceled plans with friends. I slowly and gently cleaned up things that I no longer needed and replaced batteries to a clock that stopped ticking years ago. I put my favorite men on Spotify (Sinatra and Mayer) and watched girly, cheesy movies without shame. I nestled into my rattiest but softest sweat pants. And, finally, I made myself this very special soup just for me.

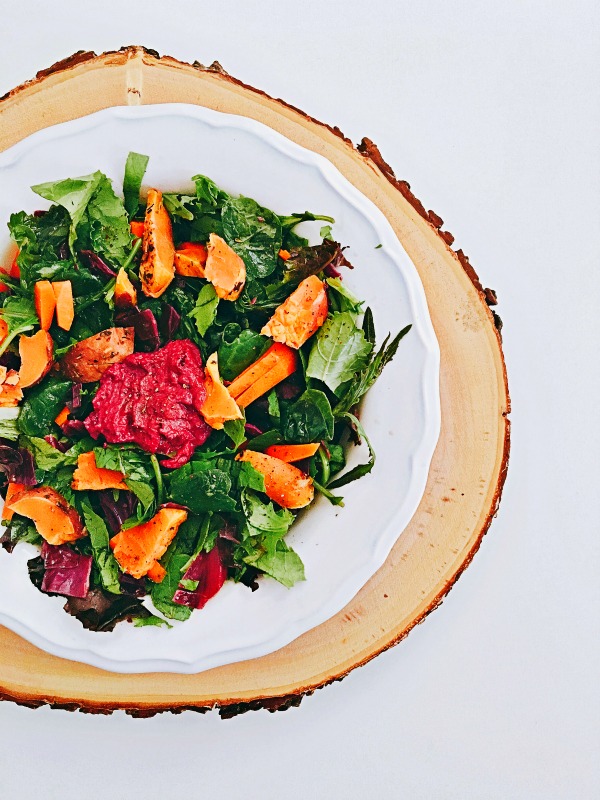
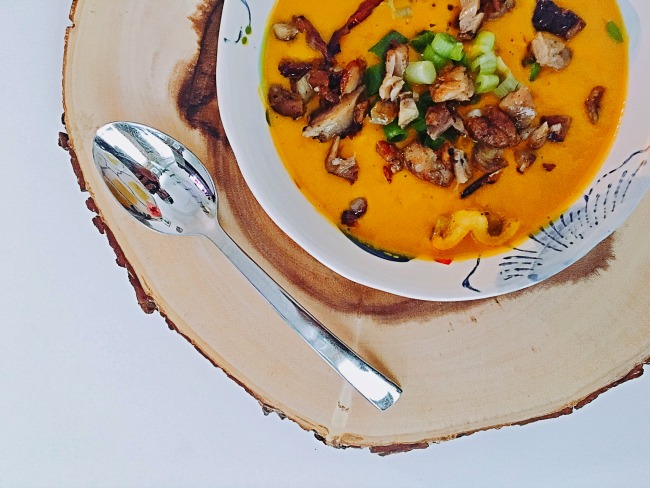
Dreamy Creamy Carrot Soup

Paleo Carrot Broth Soup

Ingredients:

  • 2 carrots
  • 1 teaspoon ghee
  • 1 inch of turmeric root
  • 1 inch of ginger root
  • 2 cloves of garlic
  • 1/3 can of full fat coconut milk
  • 1 cup of homemade bone broth
  • Sea Salt
  • Pepper
  • Optional toppings: Crispy chicken and chopped scallions

Directions:

  1. Peel and chop carrots
  2. Saute in ghee for 5 minutes-ish, until softened and a little browned
  3. Heat bone broth up on stove, bringing to a simmer over medium heat
  4. Stir in remaining ingredients
  5. Pour in high speed blender and pulverize until smooth
  6. Add toppings of your choice (I happened to have leftover chicken that I sautéed in more ghee until it was crispy, plus a dash of chopped scallions to add a bite)

Day 5.
I feel SO much better. I literally woke up, inhaled through my nose, and clapped my hands because I could smell again! My friends, I swear, I felt better than I did before the cold even began.

I still start my day with Gaia Quick Defense and a cup of bone broth for good measure. Then make another Green Vibrance smoothie for breakfast. I stare at the Tylenol Cold & Flu that has been sitting on the counter just in case of an emergency, and stuffed it back in the back of the cabinet where it belonged. Then did a little happy dance because DAMN, I’m good.

Alrighy folks, what do you do when you get sick? Do you feel the same way I do about OTC medicine? Or are you all about it and want to prove me wrong? Bring it on. Comment below.

Much Love,

HealthyStaceySignature

p.s. The links I provied are affiliate links. But because my Amazon Affiliate account lay inactive for too long, they've kicked me out. They may work in the future, so I still feel like I should let y'all know. Hot mess. I know.

p.s.s. Pin this baby! You know you'll need it come Cold & Flu season!

Natural Cold Cures

Recipes

Paleo-ish Beet Dip Recipe

August 2, 2016

Let's start with what you came for…The Paleo-ish Beet Dip Recipe 🙂

Paleo Beet Dip with a lemon wedge

I created this beautiful Paleo-ish beet dip just for you, my friends. Inspired by a recipe from a fellow Chicago blogger, Emily Paster of West of the Loop, it was originally created to be made in big batches for swapping and sharing at Food Swaps. I made a few tweaks – a smaller serving size for my own personal pleasure, a few more nutty additions, and a couple ingredient replacements to make it more paleo-friendly. And tada! This gem was born. Dip veggies in it, scoop it over salads or just eat it by the spoonful. It's ALL good. Read the post to find out why.

Ingredients:

  • 5 small to medium sized beets
  • 1 cup Siggi’s Strained Whole Milk Yogurt, Plain
  • 1/4 cup almond butter
  • 1/4 cup tahini
  • 2-3 tablespoons lemon juice
  • 1/2 teaspoon za'atar
  • 1/4 cup hemp seeds
  • 1/4 cup walnuts
  • 2 garlic cloves
  • Salt & Pepper to taste

Directions:

  1. Roast beets per the following steps OR just buy them from the store – this brand is great and is available at Whole Foods and Mariano's.
  2. Preheat oven to 400 degrees.
  3. Chop leaves off of beets, but leave the bottoms and the stems as this will preserve some of the juicy juice.
  4. Wash beets thoroughly and DON’T DRY – you’ll want some moisture on them for roasting.
  5. Wrap beets in aluminum foil (I wrapped them individually this time, but I’ve also done them all at once).
  6. Put them on a baking sheet in their aluminum foil for 60 minutes-ish. Check on them about 30 minutes in to turn them over. You may want to splash a bit more water on them if they’re looking dry.
  7. They are done when a fork goes through the middle of them easily and smoothly. If it doesn’t, roast another 10 minutes and check again.
  8. Once complete, let them cool off. Then, cut off their ends. Take a paper towel to them, and gently rub over the skin. It should come off easily. But no matter what, it will be messy. Wear an apron or bathe in beautiful purpley colors. Whatever floats your boat.
  9. Plop your beets into your food processor along with the rest of the ingredients.
  10. Pulverize in your food processor until smooth.
  11. Taste test! Taste test! Taste test! Everybody has different likes and dislikes and I tried my darndest to give you the exact measurements I used, but so much of my process is a little bit more of this and that until it tastes perfect TO ME. I loved the nutty flavor so I added a bit more almond butter and rounded it off with walnuts to really bring it home. But you may prefer it more tart, in which case you might want to up the yogurt and the lemon juice.

Roasting beets for paleo beet dip

I made a new friend last week. It’s name? Beet Dip. And I can’t get enough.

The match maker was Emily Paster of West of the Loop. I got the pleasure of attending an intimate book launching party for her book, Food Swap: Specialty Recipes for Bartering, Sharing & Giving. Not only did she encourage everybody there to try their own Food Swap,  but she demonstrated a few recipes ideal for the homemade community trade.

Enter, the beet dip.

All the ingredients for a Paleo beet dip

This creamy, dreamy, bright Nickelodeon-purple concoction – made with one of the most nutrient-rich vegetables out there. I HAD to have it, tweak it, and make it my own…

Beets? Good. Za'atar? Good. Tahini? Goooood. But what if I added some hemp seeds for an Omega-3 boost? And maybe a dash of almond butter to make it even more decadent. Yes. Uh huh. A little of this. A little of that.

BAM. I had it. Paleo-ish Beet Dip was born.

Paleo Beet Dip in Food Processor

I now call this gem "dish lipstick” because it has been dressing all of my meals up and making them a little more….well, sexy. Yeah, I said it. It's sexy beet dip. Making salads more sensual, crackers more seductive, and chicken breasts more suggestive – one spoonful at a time.

Ahem. Anyways.

As always, when I make a recipe here, it's not just how to make it, but WHY to make it.

Paleo salad with paleo beet dip on top

BEETS:

  • Let's jump right into the fun stuff – beets have been shown to be an aphrodisiac or a sexual booster. This is thanks to the mineral Boron, which has been shown to increase the production of sexual hormones.
  • Because of their high folate content, they are ideal for pregnant women.
  • Eating beet root has been shown to decrease cardiovascular diseases in multiple ways.
  • Betains contained in beet juice stimulate the function of the liver.
  • Researchers have also noticed that oxygen uptake is greatly increased by people who drink beet juice. One study showed that the uptake increased by up to 16% which is extremely impressive – more than a person can achieve by exercise training.
  • Nerve and muscle function, immune-boosting, bone, liver, kidney and pancrease health – the list goes on, but let's leave some room for the other guys, shall we?

Beets wrapped up in aluminum foil

WHOLE MILK YOGURT:

  • Comes from cows who have grazed in pasture year-round vs. eating a processed diet.
  • Grass feeding improves the quality of yogurt and makes it richer in omega-3 fats and CLA, a beneficial fatty acid (you cannot get the same levels from nonfat or lowfat yogurt).
  • Remember, fat is good. When you choose lowfat or nonfat products, they are no longer whole foods. They are half-foods, replaced with sugars or fake sugars to make up for the lack of flavor. And no, whole milk will not make you fat. In fact, it may help you lose weight because whole fat foods digest slowly into the bloodstream, keeping you satisfied longer and feeding your body properly so that it can digest its food.

HEMP SEEDS:

  • In the standard American diet, it can be difficult to get the right amount of Omega-3 in our diets.
  • Omega-6 is easier to come by, and is found in most processed foods.
  • We want to shoot for a ratio of 3:1 of Omega-6 to Omega-3, but the current US diet ranges from 10:1 all the way to 20:1 (!)
  • Guess what? Hemp has the perfect 3:1 ratio! Which contributes to its abiltiy to…
  • Improve digestion
  • Balance hormones
  • and Improve metabolism

WALNUTS:

  • Yet another Omega-3 powerhouse
  • Also very rich in antioxidants including manganese and copper
  • Have been shown to improve reproductive health in males (read: fertility food!)
  • May support brain health because of its neuroprotective compounds including vitamin E, folate, melatonin, Omega-3 and antioxidants.

Paleo Beet Dip with a lemon wedge

Alright kids. That's all she wrote. Question for you…

What is your favorite dip/marinade/butter/sauce to put on EVERYTHING?

Much Love,

HealthyStaceySignature

p.s. Like the Beet Dip? Pin me!

Paleo Beet Dip


SOURCES:

  1. http://articles.mercola.com/sites/articles/archive/2014/01/25/beets-health-benefits.aspx
  2. http://www.whfoods.com/genpage.php?tname=foodspice&dbid=124
  3. http://articles.mercola.com/sites/articles/archive/2014/05/19/7-walnuts-benefits.aspx
Paleo beet dip with sumac and seseame seeds topping
Paleo-ish Beet Dip
Print Recipe
I created this beautiful Paleo-ish beet dip just for you, my friends. Inspired by a recipe from a fellow Chicago blogger, Emily Paster of West of the Loop, it was originally created to be made in big batches for swapping and sharing at Food Swaps. I made a few tweaks – a smaller serving size for my own personal pleasure, a few more nutty additions, and a couple ingredient replacements to make it more paleo-friendly. And tada! This gem was born. Dip veggies in it, scoop it over salads or just eat it by the spoonful. It's ALL good.
Servings Prep Time
4 cups 5 minutes
Cook Time
1 hour
Servings Prep Time
4 cups 5 minutes
Cook Time
1 hour
Ingredients
Servings: cups
Instructions
  1. Roast beets per the following steps OR just buy them from the store – The Love Beets Brand is great and is available at Whole Foods and Mariano's.
  2. Preheat oven to 400 degrees.
  3. Chop leaves off of beets (and save for later - they are VERY GOOD for you), but leave the bottoms and the stems as this will preserve some of the juicy juice.
  4. Wash beets thoroughly and DON’T DRY – you’ll want some moisture on them for roasting.
  5. Wrap beets in aluminum foil (I wrapped them individually this time, but I’ve also done them all at once).
  6. Put them on a baking sheet in their aluminum foil for 60 minutes-ish. Check on them about 30 minutes in to turn them over. You may want to splash a bit more water on them if they’re looking dry.
  7. They are done when a fork goes through the middle of them easily and smoothly. If it doesn’t, roast another 10 minutes and check again.
  8. Once complete, let them cool off. Then, cut off their ends. Take a paper towel to them, and gently rub over the skin. It should come off easily. But no matter what, it will be messy. Wear an apron or bathe in beautiful purpley colors. Whatever floats your boat.
  9. Plop your beets into your food processor along with the rest of the ingredients.
  10. Pulverize in your food processor until smooth. Taste test! Taste test! Taste test! Everybody has different likes and dislikes and I tried my darndest to give you the exact measurements I used, but so much of my process is a little bit more of this and that until it tastes perfect TO ME. I loved the nutty flavor so I added a bit more almond butter and rounded it off with walnuts to really bring it home. But you may prefer it more tart, in which case you might want to up the yogurt and the lemon juice.
Share this Recipe
Powered byWP Ultimate Recipe

Dinner Rut + Parchment Pocket Salmon Recipe

July 27, 2016

Salmon in Parchment Paper with Green Sauce

Dinner Rut Parchment Pocket Salmon

Inspired by Nom Nom Paleo's Fiona's Phenomenal Fish Packet

This recipe was the solution to my dinner rut. I had cooked the same salmon and asparagus nearly every Sunday night for the past 137 weeks (or something like that) and I needed a change. Thank God for the genius of Nom Nom Paleo (Michelle Tam). She opened me up to the idea of cooking in a pocket. It's what the French call, "en Papillote." Not just with salmon, but pretty much anything that you would bake in the oven. Chicken, tuna, Brussels sprouts. It IS the perfect solution to all of your tired recipes. You like where I'm going with this? Good. Read the rest of the blog post after you finished drooling over this Salmon. Thank you, Michelle Tam. You are truly the queen of the Paleo recipe.

Sauce Ingredients:
*Makes enough for four servings so save some for later!

  • 1 medium sweet onion, chopped
  • 1¼ cups packed basil leaves
  • 1 cup packed parsley leaves
  • ¼ cup packed mint leaves
  • ¼ cup worcestershire sauce
  • 3 peeled garlic cloves
  • ¼ teaspoon freshly ground black pepper
  • 1 teaspoon red pepper flakes
  • 1 teaspoon coconut nectar

Pocket Ingredients:

  • 2 medium carrots, peeled and ends trimmed
  • 2 medium zucchini, ends trimmed
  • Back of the Yards seasoning OR Salt & Pepper
  • 2 salmon filets
  • ¼ cup green marinade (see above)
  • 2 limes
  • 1 tablespoon coconut oil, melted
  • Freshly ground black pepper
  • 12 cherry tomatoes, halved 

Directions:

  1. Preheat the oven to 450°F and put your rack in the middle.
  2. Spiralize your zucchini and carrot (or if you don't have a spiralizer, shred them or simply slice them into disks). Put them aside in a bowl.
  3. Blend all ingredients in a high speed blender until smooth and bright green. Reserve a 1/4 cup for this recipe and put the rest in your refrigerator for later in the week when you want to use the same marinade for chicken.
  4. Rip off 2 pieces of parchment paper and fold each piece in half. Draw half a heart on each piece of paper, so that when you cut them, they look like full hearts! We're going back to Elementary School here, people.
  5. Open up the parchment heart and lay it flat.
  6. Split your veggies between the two pieces of parchment paper, putting a small pile on one side of the heart.
  7. Place your salmon filet, skin side down, on top of the veggies.
  8. Spread about a tablespoon of the sauce on the filet.
  9. Squeeze half a lime on the fish. Drizzle with 1/2 tablespoon of melted ghee or coconut oil.
  10. Repeat with other parchment heart and filet.
  11. Fold the other half of each parchment heart on top of the fish and tightly crimp the edges together, starting at the top center of the heart and working your way down. You want to tightly crimp the edges by turning them under. This is actually a lot easier than it sounds. You'll see when you try it.
  12. Place the packets on a rimmed baking sheet.
  13. Cook in the oven for 7 minutes, then pull out to check the temperature with a thermometer so you don't have to cut into your beautiful little pocket. Fish should be about 135 degrees if you like it flaky. Put it back in if it needs more time.
  14. Cut open the packet with scissors as soon as they're done cooking and toss on cute toppings like cherry tomatoes or an herb garnish.
  15. Serve it up to a very impressed crowd.

The Dinnner Rut

I asked you all on Facebook what your "Dinner Rut" Dish is. And this is what you said:

  • Chicken, Rice and Broccoli
  • Chicken with Lawry’s Sauce and a bag of steamed veggies
  • Tuna steak w. brussels sprouts or asparagus
  • Salmon + asparagus or veggie egg omelet + sweet potato hash + bacon
  • Frozen pizza
  • Quinoa and grilled chicken garbage salad! Whatever veggies we have in the fridge
  • Quinoa, broccoli and a piece of fish. Over and over and over again.
  • Good old spaghetti Bolognese. You can’t beat it. Or Shepard pie.
  • Roasted Brussels sprouts + grilled chicken + brown rice
  • Spicy Veggie hodgepodge stir fry with long grain brown rice
  • Tacos!
  • Alfredo ziti bake with shrimp and spinach
  • Ribeye topped w/goat cheese, parsley, and balsamic glaze, side of asparagus
  • Turkey burgers and sweet potato fries… or tacos!
  • Stuffed peppers!
  • Grilled Chicken w/ rice and green beans.
  • Grilled chicken, steamed broccoli, roasted potatoes
  • Whole wheat pasta + parm + lots of garlic + red pep flakes + canned tuna packed in oil + spinach
  • Omelet and multi-grain toast

I am shocked. I mean. I’m not even mad. I’m IMPRESSED.

I don’t know if I have particularly healthy friends, or you all were just trying to impress me when you responded because most of these dishes sound FANTASTIC.

Roasted Brussels sprouts? Stuffed peppers? Ribeye with goat cheese? Why am I even food blogging to you people?? These are your RUT dishes? You obviously are seasoned cooks. Well, except maybe Frozen Pizza guy. Just kidding, Bob. Totally kidding.

Funny thing is, we (home cookers) still roll our eyes at our “regulars” (as my Mother in Law calls them) because we’ve made them a million times. But to other people, our regulars sound new and exciting and mouthwatering.

Why do we get so fed up with them then? (Fed up. Ha. See what I did there?) Because we THINK we need to whip up something extraordinary. You know, after we got up early, went to the gym, trekked to work, ate over our keyboards, trekked back home (with take home work in tow), threw a load in the laundry in the washing machine and unloaded the dishwasher. Oh. And I’m not even addressing all the added tasks for those of you who have kiddos.

So here’s what I think. I think you give yourself a big pat on the back for being awesome. You made dinner you crazy over-achiever you!!!

Heck yes. You are some kind of wonderful.

But this IS a food blog. So I guess I have to give you actual advice on how to cook things, huh. Here’s what I got.

Green Sauce ingredients for Salmon in Parchment Paper

Four Ways to Switch Up Dinner

ONE. I just gave you a whole LIST of new ideas. They may be other people’s rut dishes, but they’re brand new to you. Got recipe questions? (What's in those stuffed peppers??) Just comment below so we can all do a little recipe rut swapping. You know what they say. One man's trash is another man's dinner. Oh. That came out weird. Nevermind.

Paleo green sauce

TWO. Find a new seasoning mix or marinade. You could cook the exact same chicken every night, but when you dash it with a GOOD seasoning mix or marinate it in a really flavorful sauce, it can taste completely different. You're in luck because the recipe above (and below) just happens to have an awesome marinade included. And it's set to make you four times more than you'll need for this recipe. You know what that means? You can use this marinade in OTHER recipes throughout the week or freeze it in ice cube trays for later. I used the same Green Sauce just a few days later as a chicken marinade.

My go-to seasoning is from The Spice House Chicago called Back of the Yards Seasoning. It's got peppers, garlic, shallots. And it tastes good on EVERYTHING. I'm not joking.

But if you're feeling adventurous and would like to make your own seasoning mix, this particular mix is one of my absolute favorites. Especially for your oh-so-popular grilled chicken dishes.

Jim Carrey Smokin' Seasoning:

  • 1 tablespoon chipotle powder
  • 1 tablespoon smoked paprika
  • 1 tablespoon onion powder
  • 1/2 tablespoon cinnamon
  • 1 tablespoon sea salt
  • 1/2 tablespoon black pepper

THREE. Try a new vegetable. You guys love your Brussels sprouts and broccoli because you’re comfortable with it. But have you ever considered trying one of those ugly looking vegetables in the produce section? You know. The ones with twigs and roots protruding out of them? In my experience, the uglier they are, the tastier they are. Especially when you roast them in the oven, drizzled in coconut oil and generously seasoned with Salt and Pepper.

Here are three ugly vegetable recipes that I know and love:

The Rutabaga Roast Recipe

Parsnippity and Sunchoky Fries Recipe

Kohlrabi Fries Recipe (this one is only on my Instagram for now, but I have big plans for it here on the blog)

FOUR. Switch up your cooking methods. Always steam your veggies? Try roasting or stir-frying. Do you think the only way to make chicken is baking it in the oven? It’s not. There’s braising it, broiling it, deep-frying it, grilling it, pan-frying it, roasting it, stewing it. And did you know that there are other parts to the chicken besides the breast?? (Okay, that came off condescending. I'll slow my roll.) There's the leg quarters and thighs, the drumsticks, the wings, split breast, and the whole chicken.

In today's recipe, that's exactly what I did. I highly encourage you to try "En Papillote" cooking. It's accessible. It's versatile (salmon, tuna, chicken, veggies, whatever!). And it's delicious.  Confused? It’s all in the recipe.  

Preparing salmon in a packet


Paleo in Parchment Paper on the balcony
Parchment Packet Salmon Recipe
Print Recipe
This recipe was the solution to my dinner rut. I had cooked the same salmon and asparagus nearly every Sunday night for the past 137 weeks (or something like that) and I needed a change. Thank God for the genius of Nom Nom Paleo (Michelle Tam). She opened me up to the idea of cooking in a pocket. It's what the French call, "en Papillote." Not just with salmon, but pretty much anything that you would bake in the oven. Chicken, tuna, Brussels sprouts. It IS the perfect solution to all of your tired recipes. You like where I'm going with this? Good. Read the rest of the blog post after you finished drooling over this Salmon. Thank you, Michelle Tam. You are truly the queen of the Paleo recipe.
Servings Prep Time
2 people 15 minutes
Cook Time
7-10 minutes
Servings Prep Time
2 people 15 minutes
Cook Time
7-10 minutes
Ingredients
Sauce Ingredients
Food Ingredients
Servings: people
Instructions
  1. Preheat the oven to 450°F and put your rack in the middle.
  2. Spiralize your veggies or simply slice them into disks. Put them aside in a bowl. Season them with Back of the Yards Seasoning, or just salt, pepper and garlic powder if you don't have BOY.
  3. Blend all ingredients in a high speed blender until smooth and bright green. Reserve a 1/4 cup for this recipe and put the rest in your refrigerator for later in the week when you want to use the same marinade for chicken.
  4. Rip off 2 pieces of parchment paper and fold each piece in half. Draw half a heart on each piece of paper, so that when you cut them, they look like full hearts! We're going back to Elementary School here, people.
  5. Open up the parchment heart and lay it flat.
  6. Split your veggies between the two pieces of parchment paper, putting a small pile on one of the crease of the heart.
  7. Place your salmon filet, skin side down, on top of the veggies.
  8. Spread about a tablespoon of the sauce on the filet.
  9. Squeeze half a lime on the fish. Drizzle with 1/2 tablespoon of melted ghee or coconut oil. Repeat with other parchment heart and filet.
  10. Fold the other half of each parchment heart on top of the fish and tightly crimp the edges together, starting at the top center of the heart and working your way down. You want to tightly crimp the edges by turning them under. I know it sounds hard. But really, it's pretty intuitive once you start doing it.
  11. Place the packets on a rimmed baking sheet.
  12. Cook in the oven for 7 minutes, then pull out to check the temperature. Fish should be about 135 degrees if you like it perfectly flaky.
  13. Cut open the packet with scissors as soon as they're done cooking and toss on cute toppings like cherry tomatoes or an herb garnish.
  14. Serve it up to a very impressed crowd.
Share this Recipe
Powered byWP Ultimate Recipe

The Paleo-Ish Challenge

July 22, 2016

Paleo-Ish Challenge with Healthy Stacey

I love being Paleo. Not in a Crossfit, drink-the-Kool-Aid kind of way. More like a this-feels-SO-much-better kind of way.

Since going Paleo…

  • I went from chronic indigestion/bloating/constipation, to a fully functioning digestive system. I very rarely get stomachaches or feel bloated after I eat.
  • I have lost weight and inches, and have a flatter stomach (probably due to eliminating the bloat). In 2014, I was a size 8/10. By 2015, I was full on Paleo and got down to a size 4. I have loosened the reigns a little (thus the –ish) and am now a very happy size 6. It wasn’t a drastic all-at-once weight loss; it was gradual as I kept making more changes to my diet. I’m okay with not being a size 4 if that means I can eat ice cream, cheese and chips every once in a while. For the first time in my life, I am not trying to lose weight. I just want to feel good. The losing weight just happened to coincide with all the good feels.
  • My hair is the longest and healthiest it has EVER been. Since I was a kid, I’ve always wanted hair so long and shiny that it sways when you walk. You know, like Jasmine. After less than 2 years of whole, unprocessed ingredients like collagen peptides in my smoothies and collagen-rich bone broth, I am proud to report that I have a totally sway-worthy ponytail.
  • My nails are the longest and strongest they’ve ever been. You know when they paint that white line on the tips of your fingers for a French Manicure? Au natural for me. Again, collagen baby.
  • My allergy symptoms are near non-existent. Funny thing is, I never knew HOW much they bothered me until they stopped bothering me. Post-nasal drips and swollen glands were an everyday occurrence. Especially first thing in the morning. Now I wake up and feel nothing. And it’s blissful.

See what I mean? Paleo just made me feel better. And this is just the tip of the iceberg. Many people try Paleo with much bigger health concerns than I had (namely autoimmune diseases), and see amazing, life-changing results from it.

I think it's important to note, however, that I didn’t jump into it all at once. I came into it slowly. Starting with gluten-free, and then adding (and eliminating) a few things at a time. Even today, I still like to call myself Paleo-ISH becasue I would go crazy if I tried to follow ALL the rules ALL the time. That's not living.

So I had a thought.

What if going Paleo didn't mean jumping in all at once? But rather gradually. Just dipping your toe in the coconut water? (See what I did there?)

WHAT IF you just tried it? Not for life. Not for 30 days. Not even all day.

I’m talking go Paleo for breakfast and lunch for FIVE days. That’s it.

Go Paleo-ish.

I DOUBLE DOG dare you.

Yeah. I said it.

Here's the non-mean part. I'm going to make it really easy on you by creating a step-by-step guide with recipes, grocery shopping lists and arm-pumping motivation from the side lines. Here's the deal, I propose to you all:

Paleo-ish Challenge

Here's how it will work:

  1. You will excitedly sign up below.
  2. On Saturday, August 6th, you will get your first challenge email from me to get you prepped for the week ahead.
  3. On Sunday, you will receive your invite to the Paleo-ish Facebook group.
  4. Come Monday, you will receive your Paleo-ish guide for that day all the way till Friday.
  5. Throughout the week, I’ll be cheering you on at the Facebook Group, along with others who are doing it with you. We will share our food pics – bad office lighting and all, talk about our missteps, and give virtual high fives on Friday when we’re done. It will be awesome!

BONUS: For the person who posts the most pictures of their meals, there IS a prize waiting at the end. Because what’s a challenge without a PRIZE?

What’s the risk?
The Challenge week arrives, you try a few recipes, like them, but come Friday, order Pizza, and realize you have no interest in keeping this up. Nice try, Stacey. But I’m over it.

What’s the benefit? 
You try the recipes, love them, and realize how easy it is to make small changes to your diet that make a difference. By the end of the week, you feel really good. You have less indigestion, you’re really satiated after your meals, you’re not snacking as much, and your stomach feels less bloated and maybe even looks flatter. You decide to try it again next week because…why wouldn’t you? Thanks, Stacey! You’re the coolest.  

Does any of that sound good to you? Yes?? Then I’m upping the ante.

I TRIPLE DOG DARE YOU to go Paleo-ish with me.

Subscribe to our mailing list

* indicates required

p.s. Not interested yourself, but think a friend would benefit? Awesome. Just share this link with them in an email or sign them up yourself (ASK THEM FIRST).