Big Magic Cooking + Fig & Bacon Pizza Recipe

September 21, 2016

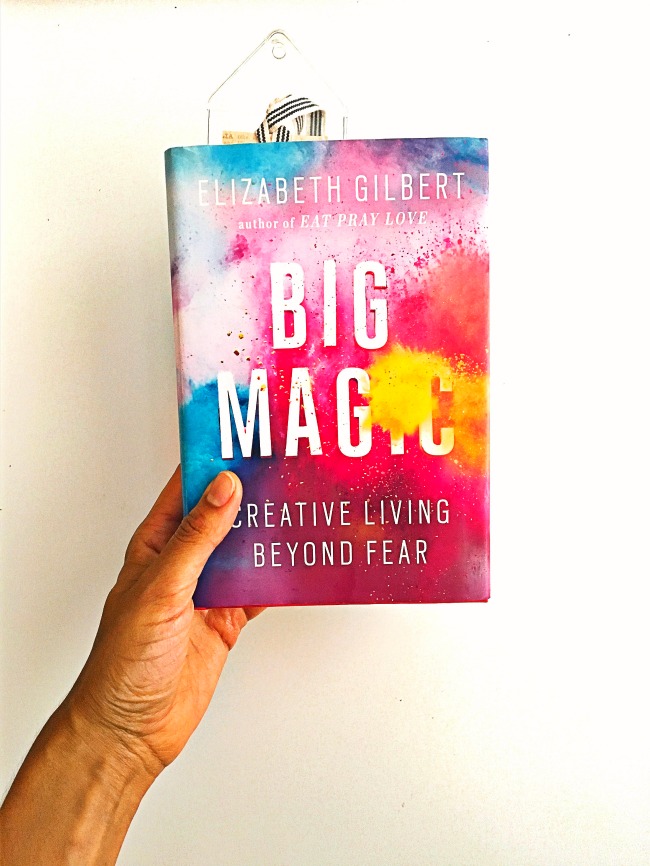
Big Magic Elizabeth Gilbert

No time to chit chat? Skip straight to the recipe here.

I have a slight infatuation with motivational books. Whenever I am down, or in a funk, want to learn something new, or create a new habit, my knee jerk reaction is to get a book on it. Inevitably, it will always make me feel better, clearer and more in control – like I have a plan.

Oh. You’re judging me. I can feel it. But that’s okay. I figure, there are worse addictions to have. Don’t worry. I have no plans of self-motivating you guys. So just bear with me.

PaleoPizzaCrustDoughMix

Currently, I’m on my second go round of “Big Magic,” by "Eat, Pray, Love" superstar Elizabeth Gilbert. It’s composed of little mini lessons on how to live a creative life. One of my favorite excerpts reads:

Creativity is sacred, and it is not sacred.
What we make matters enormously, and it doesn’t matter at all.
We toil alone, and we are accompanied by spirits.
We are terrified, and we are brave.
Art is a crushing chore and a wonderful privilege.
Only when we are at our most playful can divinity finally get serious with us.
Make space for all these paradoxes to be equally true inside your soul, and I promise – you can make anything.

Deep, right?

Actually, the first time I read it I didn’t think so. I thought it was a little too fluffy for me. And honestly, at that point, I thought I didn’t have time for a creative life. And if I did, I wasn’t really creative enough to consider myself an “artist.”

Paleo Pizza Crust Dough Big Magic Cooking

My art, after all, isn’t poetry or oil paintings, lettering or instruments. My art is healthy food. Cooking it, researching it, eating it, sharing it, and seeing how good it makes me feel – inside and out.

Here’s the irony. The WHOLE book is all about squashing this kind of assumption. The thought that we all have to be crazy, amazing, volatile “artists” to be creative. When really, human beings, by nature, are creative beings.

Some of us just choose to express it more than others. And those who don’t, have a million excuses why. Each chapter of “Big Magic” is dedicated to combatting those excuses.

Paleo PIzza Crust Big Magic Cooking

If you are a type A, perfectionist like me, you need to read this book. It's like your permission slip to mess up, go crazy, be irresponsible and ugly and gramatically incorrect.

Reading it made me worry less about being the first, the best, and the original. And focus more on just being unapologetically myself. It made me giddy and excited to spend time with my art. Or as Gilbert calls it, “have an affair with your art.” But of all the lessons, there is one that really stuck with me.

It’s the lesson she called “Motives.” In it, she states,

“You are not required to save the world with your creativity. Your art not only doesn’t have to be original…it also doesn’t have to be important.”

I love this.

So Gilbert. You’re telling me that, when I cook, I don’t have to cure diseases? Heal guts? Get all of America to stop eating processed food?

Paleo Pizza Fig and Bacon

Wow. Freeing.

In her opinion, people don’t want to be “helped” or “saved” by your art. That’s not what art is for. It’s a personal expression of yourself.

As soon as I finished the book, I was immediately inspired to create.

Handcuffs are off. Nobody is watching. This is just for me. Do your thing, Stacey.
(Okay. I realized that by talking to myself I inched at least one dot past motivational book-reader. Sorry. Won’t happen again).

So I made something totally and completely indulgent, unnecessary and unhelpful with the most extravagant ingredients I could think of – just for the hell of it.

Here it is. My art.

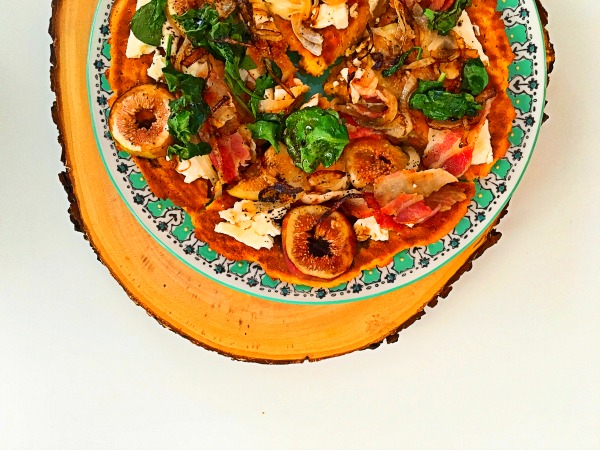
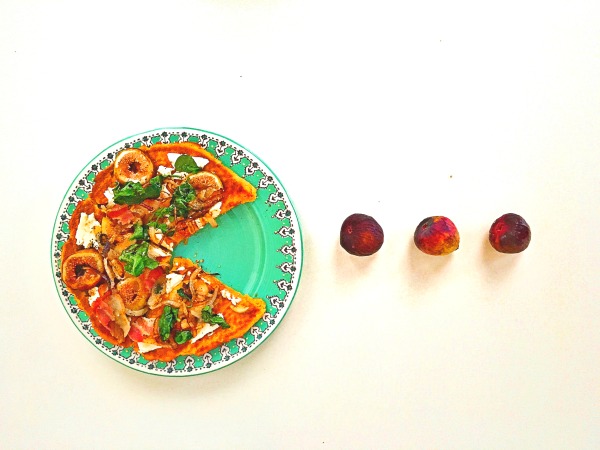
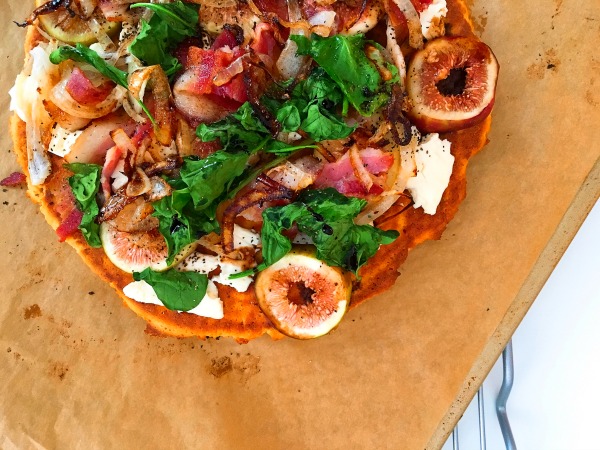
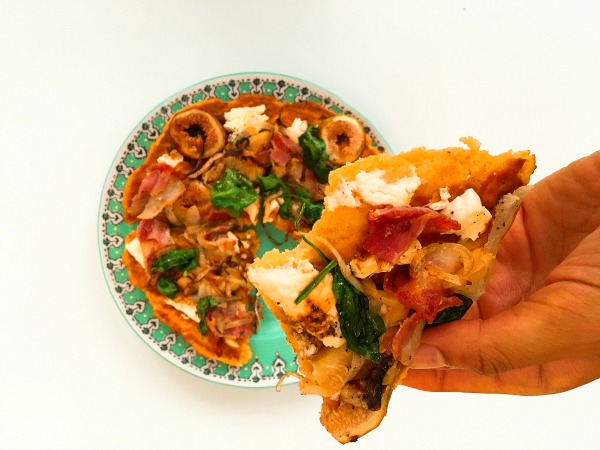
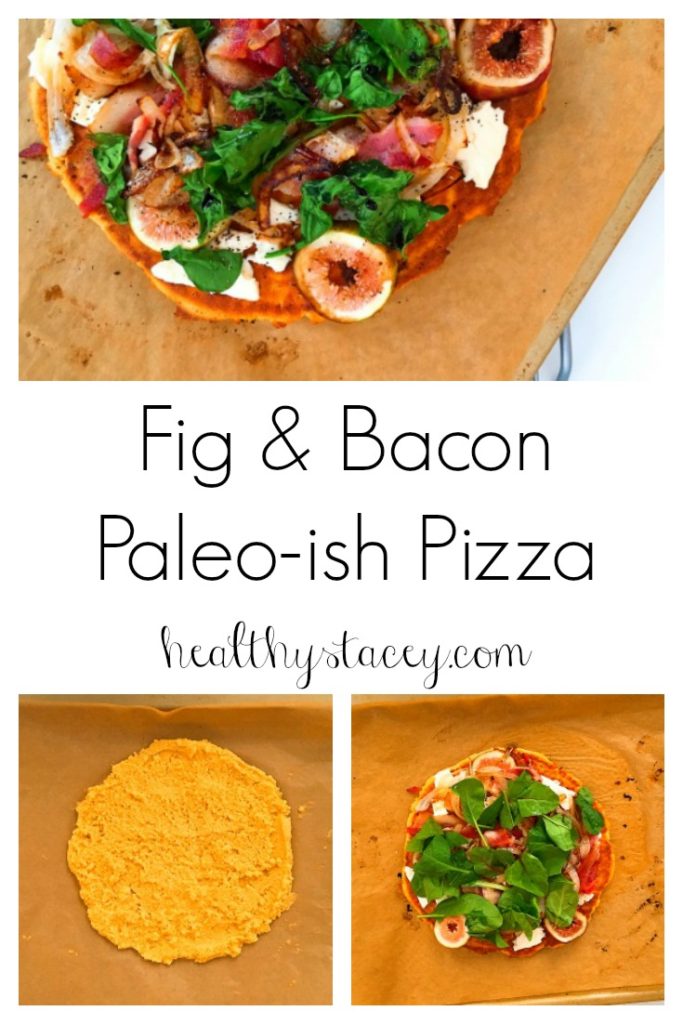
Paleo-ish Fig and Bacon Pizza.

Paleo Pizza Fig and Bacon Big Magic Cooking

Paleo Pizza Fig and Bacon Big Magic Cooking

Paleo Big Magic Pizza

It's full of umami and rich fruit flavor, with a caramelly base, an herby touch and a crispy finish. It's made from gluten and grain-free ingredients (coconut and arrowroot flour crust), and topped with indulgent organic toppings. I broke the "Paleo rules" and used feta because I felt like living on the dangerous side. I probably overcooked my bacon and under-melted my cheese, but none of that mattered. It was damn delicious and absolutely beautiful in my eyes. And that's all that matters, right?

Much Love,

HealthyStaceySignature

Fig and Bacon Pizza Recipe

Paleo Pizza Fig and Bacon Big Magic Cooking

Pizza crust recipe adopted from the book, “Everyday Paleo Around the World: Italian Cuisine” by Sarah Frogoso

Yeast Mixture:

  • ¼ cup warm water
  • 2 teaspoons raw honey
  • 2 teaspoons active dry yeast

Dry ingredients:

  • ¾ cup almond flour
  • 3 tablespoons coconut flour
  • 2/3 cup arrowroot flour
  • pinch of sea salt

Wet Ingredients:

  • 1 egg
  • 2 teaspoons extra virgin olive oil
  • 1 teaspoon raw apple cider vinegar

Toppings:

  • 4 strips of pasture-raised bacon
  • ½ onion, thinly sliced
  • 4-5 figs, sliced to about ¼ inch thick
  • Handful of organic Arugula, chopped up
  • Grass-fed feta cheese, thinly sliced
  • Optional: Balsamic vinegar

Pizza Crust Directions:

  1. Preheat oven to 425
  2. Put the yeast ingredients into a bowl and mix together. Let them sit for about 5 minutes to activate and foam a bit.
  3. Place the dry ingredients in a second bowl and whisk to combine.
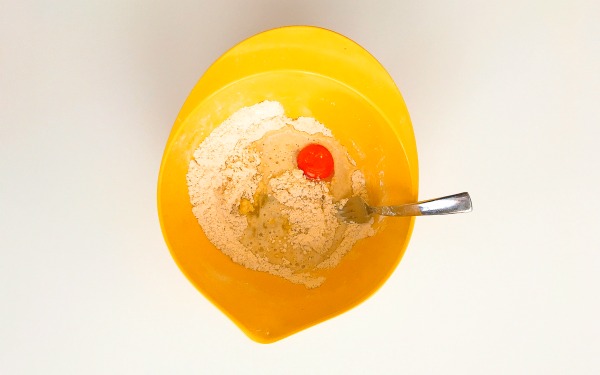
  4. Add the yeast mixture and the wet ingredients into the dry ingredients. Mix well with an electronic hand mixer.
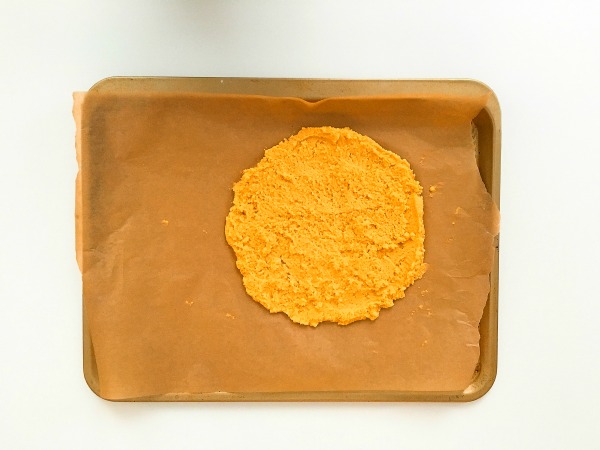
  5. Scoop the mixture onto a pan lined with parchment paper.
  6. Use a rubber spatula to spread into an even circle.
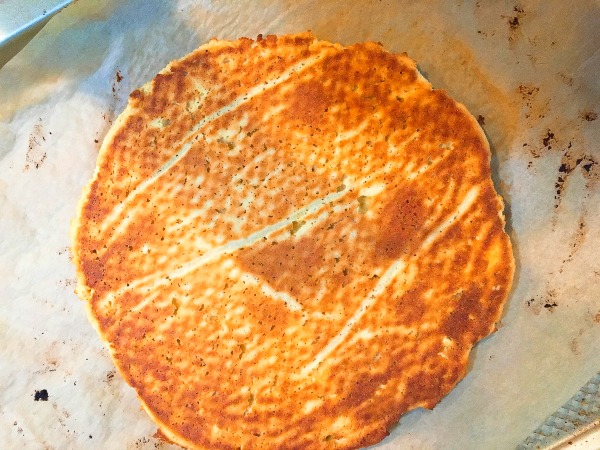
  7. Stick your pizza crust in the oven and bake for 9-10 minutes.

Topping Directions:

  1. Turn a skillet to medium high heat and lay your bacon on the skillet. Don’t cook until crispy or burnt. As you are also going to put this back in the oven on the pizza. 5 minutes-ish should be good.
  2. Place the bacon on a paper-towel lined plate, reserving the fat.
  3. Use the fat to cook your thinly sliced onions. Again, don’t overdo it as you will be putting these back in the oven with the crust.
  4. Slice your figs and chop up your arugula.

Putting it all together Directions:

  1. Remove crust from the oven and flip over with a spatula.
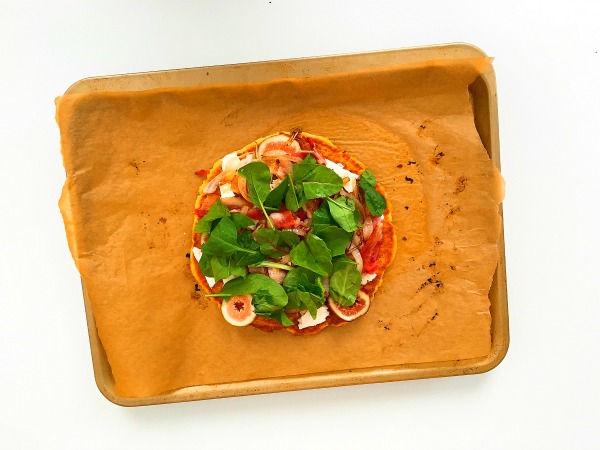
  2. Add your toppings like so: 1) Lay feta in one layer across crust (note: I did not add enough feta myself so I am telling you to make a layer so you do not repeat my mistake), 2) Lay strips of bacon over feta, 3) Lay slices of figs over bacon, 4) Sprinkle chopped arugula evenly across the top
  3. Put back in oven and cook for another 5-10 minutes.
  4. Take out, drizzle a little balsamic vinegar across the top and totally and completely indulge.
  5. Now. Go make your own art.

Paleo Pizza Fig and Bacon


p.s. Save this baby for later and pin it. Oh! And while you're there, I would really really appreciate the follow.

Paleo fig and bacon pizza pin

Paleo Pizza Fig and Bacon Big Magic Cooking
Paleo-ish Fig and Bacon Pizza
Print Recipe
Servings Prep Time
2 people 20 minutes
Cook Time
15 minutes
Servings Prep Time
2 people 20 minutes
Cook Time
15 minutes
Paleo Pizza Fig and Bacon Big Magic Cooking
Paleo-ish Fig and Bacon Pizza
Print Recipe
Servings Prep Time
2 people 20 minutes
Cook Time
15 minutes
Servings Prep Time
2 people 20 minutes
Cook Time
15 minutes
Ingredients
Servings: people
Instructions
  1. Preheat oven to 425
  2. Put the yeast ingredients into a bowl and mix together. Let them sit for about 5 minutes to activate and foam a bit.
  3. Place the dry ingredients in a second bowl and whisk to combine.
  4. Add the yeast mixture and the wet ingredients into the dry ingredients. Mix well with an electronic hand mixer.
  5. Scoop the mixture onto a pan lined with parchment paper.
  6. Use a rubber spatula to spread into an even circle.
  7. Stick your pizza crust in the oven and bake for 9-10 minutes.
  8. Turn a skillet to medium high heat and lay your bacon on the skillet. Don’t cook until crispy or burnt. As you are also going to put this back in the oven on the pizza. 5 minutes-ish should be good.
  9. Place the bacon on a paper-towel lined plate, reserving the fat.
  10. Use the fat to cook your thinly sliced onions. Again, don’t overdo it as you will be putting these back in the oven with the crust.
  11. Slice your figs and chop up your arugula.
  12. Remove crust from the oven and flip over with a spatula.
  13. Add your toppings like so: 1) Lay feta in one layer across crust (note: I did not add enough feta myself so I am telling you to make a layer so you do not repeat my mistake), 2) Lay strips of bacon over feta, 3) Lay slices of figs over bacon, 4) Sprinkle chopped arugula evenly across the top
  14. Put back in oven and cook for another 5-10 minutes.
  15. Take out, drizzle a little balsamic vinegar across the top and totally and completely indulge.
Share this Recipe
Powered byWP Ultimate Recipe
Healthy Mind

I Quit My Job To Follow My Dreams and Here’s What Happened

September 1, 2016

StaceyHutsonSelfie

I wake up at 5:30 AM. Look at my alarm clock, desperate for just a little more sleep, and zero desire to roll over and go to work. But then I remember. I do desire to go to work. I desire to go to work very much. Because, for the first time in my life, my work is my bliss. Every little piece of it.

I haven’t told you much about what’s been going on in my life lately. Mostly because this isn’t that kind of blog. You’re here to learn about healthy food, pick up a recipe or two, and be on your merry way. No need to know about my love life, my doctor’s appointment, or my cat’s latest sleeping spot (I don’t have a cat, but if I did, please kill me if I ever found that to be important enough to tell you about it).

But there are certain things that I just have to get off my chest because they're SO COOL and I’m pretty darned proud of them.

You see, in the last few months, I have made some pretty drastic changes. I mean really big, I-don’t-even-recognize-my-life changes. So we’re not here for 72 more paragraphs, I’m going to put it in a nice little nutshell for you. Here goes. In the last three months, I…

  • Got married to my best friend
  • Became a freelance writer
  • Quit my stable, fulltime job as an advertising copywriter
  • Met an incredibly impressive entrepreneur who has my dream job…
  • then started working under her as her Wellness Chef Apprentice
  • Got hired as a Class Assistant at one of the busiest cooking schools in the country (the Chopping Block!)
  • Graduated from the Institute for Transformational Nutrition and became a CTNC (this one just happened yesterday – cue Vitamin C's Graduation Song here)

Whew! I know, right?

I still have to pinch myself. It doesn’t seem real.

HealthyStaceyApron

When I tell this to my friends and family (or curious bystanders), they are sometimes shocked, but mostly proud of this ballsy endeavor. As if they, too, have plans to do the same someday. But then they ask the question, “What exactly do you plan to do?"

This is the part where I get a little squirmy. I've never been great with elevator pitches, but this new "job" of mine is particularly hard to describe because it's not one answer. It's more like 11 pursuits, plus a few side jobs to pay the bills.

A freelance content creator, a food writer, a cookbook author, a recipe creator, a food photographer, a health coach, a holistic nutritionist, a private paleo chef, a cooking class instructor, a professional dinner party host, and the Food Network’s first holistic chef star. And somewhere in between all that, a mom.

After years of dreaming these dreams and setting goals for myself to achieve them, I was doing myself a disservice by continuing to stay on my old career path. If I wanted to get closer, I needed to jump into the fire. The healthy, holistic, foodie fire.

Once I quit my day job, I had no other choice. I had to find the opportunities, the people and the organizations that would help me get closer to my dreams. Which is exactly what I did and continue to do. And because of these actions, every day, the path that I had previously searched so desperately for, becomes more clear.

Don’t get me wrong. It’s not all rainbows and butterflies and unicorns. Because it’s life. And your crazy dreams never turn out as picture-perfect as you think they will.

I spend much more of my time confused and scared out of my mind. And yes, there are moments where I think – Are you CRAZY? You aren’t cut out to be an entrepreneur! You have NO IDEA what you're doing. Please. Just go back to the real world, get a respectable desk job, and hopefully nobody will notice your I-want-to-live-my-dreams hiatus.

But then I snap myself out of it. Because really, I’ve already done the hard part. The leap-out-of-a plane undertaking that everybody is so deathly afraid to do. From here, it’s just about navigating my new territory. And recognizing that my mind isn’t used to working outside of its safe Groundhog Day routine.

Get up. Go to work. Collect paycheck. Go home. Count the days left till the weekend.

Now. Every day is a new day. With HUGE opportunities to learn something new, meet somebody new or create something that I didn't know I was capable of. And at the end of that day, I’ve never felt more alive.

No. Regardless of what my inner critic says, I have no plans to get back in that plane.

Much Love,

HealthyStaceySignature

p.s. Know somebody else who wants to follow their dreams? Share my story through this pin with all your dreamer friends–>

I Quit My Job To Follow My Dreams

Healthy Body

How I Cured A Cold In 5 Days With 5 Food Medicines and No Drugs

August 25, 2016

AppleCiderVinegarforColds

I have something really embarrassing to tell you.

I, Healthy Stacey, got sick.  

I’m talking runny nose, a throat so swollen it hurt to swallow, dead tired but couldn’t sleep because I stayed up all night long hacking up a lung sick.

I know, I know. But you’re so “Healthy.” How did you get sick? (I’m imagining this in the voice of Adam Sandler, followed by “Hoobidy doobidy.”)

Well, I’ve narrowed it down to either the potentially germ-infested blanket I took from the flight attendant on my way to Mexico or the fact that I got stuck in a torrential downpour on my way to the yoga class that I couldn’t miss, and instead stayed sopping wet through every Chaturanga Dandasana.  

That’s neither here nor there. The point is, I got sick, and then I got better WITHOUT taking any drugs.

I’ve never been a big fan of Tylenol Cold & Flu, Robitussin Cough Syrup or any of the other hard-hitting OTC drugs out there. They make me super drowsy and I hate to think what other side effects they’re having on my body. Oh. And as far as I know (correct me if I’m wrong), cough and cold remedies do not shorten or cure illnesses; they just ease the symptoms along the way. But in doing so, they take a lot more processing from my liver than, say, a spoonful of raw honey would.  

So if I can reduce my symptoms in other more natural ways that don’t make me drowsy, don’t tax my liver AND actually make my immune system stronger for the future, then I’m all for it.

If you take them, I get it. No judgment. Promise. I just decided that me being sick would be a perfect opportunity to do a little self-experimenting for you guys.  

The Experiment: Kick this sucker without meds – just immune-boosting food and supplements, and see how long it takes.   

I dug a box of Tylenol Cold & Flu out of the medicince cabinet and put it on the counter. Partly as an "in case of emergency – pull this lever," but also as an extra boost of motivation. Challenge: accepted.

Here’s how it went down.

Day 1.
Throat is feeling swollen. I can feel something coming on. But it’s not full-blown quite yet. At this point I didn’t know what it was, but I knew that the first thing I needed to drink was bone broth.

Food Medicine # 1: Bone Broth

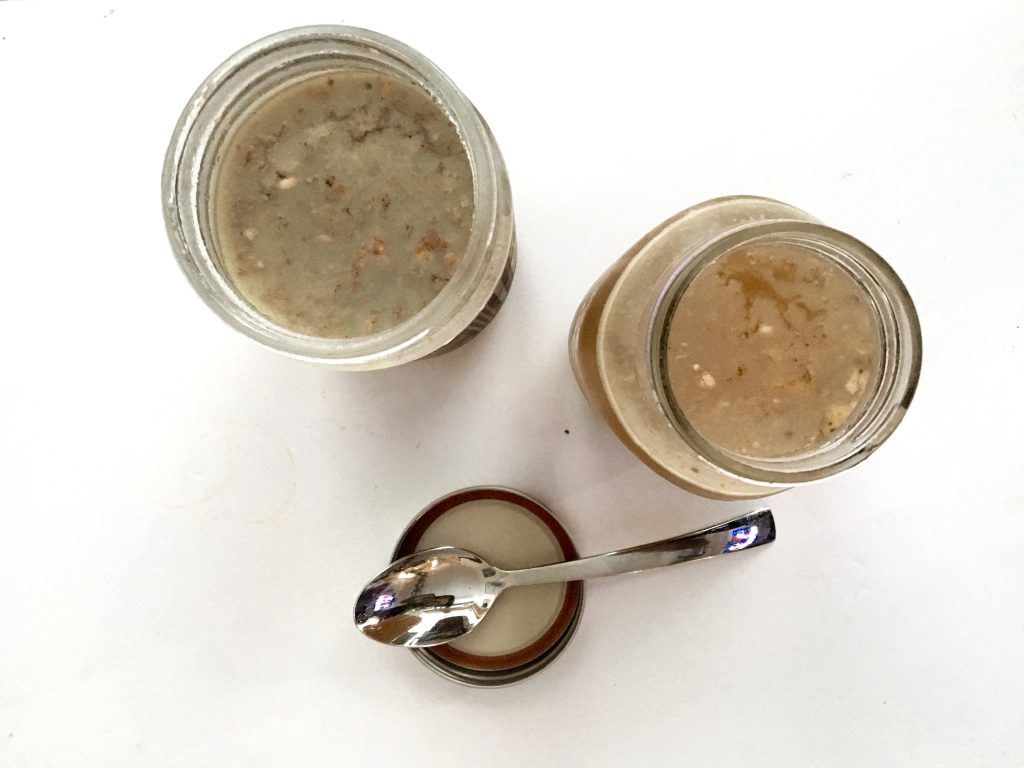
Bone Broth for colds

I’ve said it before, and I’ll say it again. Bone broth is a magical elixir. Simmering the bones of healthy animals releases nutrients and healing compounds that you could NOT get just from eating the meat.

Moreover, whatever foods you add to the broth will be better digested and absorbed into your system. So for my special Get Better Bone Broth, I added a few key nutrients also known to help immunity.

Garlic for its immune-boosting, anti-viral and anti-inflammatory effects. Ginger and cayenne because they are warming to your system and help relieve congestion.

Get Better Bone Broth Recipe:

  • 1 cup of homemade bone broth – see recipe here.
  • 1/2 teaspoon coconut oil
  • 1/2 teaspoon sea salt
  • 1 clove of garlic, chopped
  • ¼ teaspoon cayenne pepper

Directions:

  1. Heat up bone broth and coconut oil (I do 1:30 in the microwave, in a mug)
  2. Mix in your sea salt, garlic and cayenne pepper.
  3. Drink up and repeat every day until you feel better (2 times a day if you’re up for it!)

When your throat is hurting, you can’t get enough liquids in your system. Not only does it feel good on the throat, it helps loosen congestion. So on this first day, I was always drinking something – whether it be broth, water or my homemade Kick In the Pants Tea made with my good friend ACV.

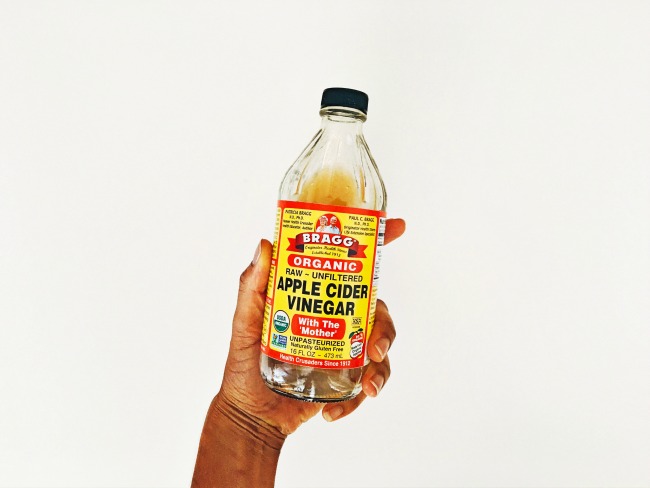
Food Medicine #2: Apple Cider Vinegar

Braggs Apple Cider Vinegar

Apple Cider Vinegar. It may be acidic, but it actually helps to alkalize our overly acidic bodies. A body that is more alkaline will be better at fighting off colds.

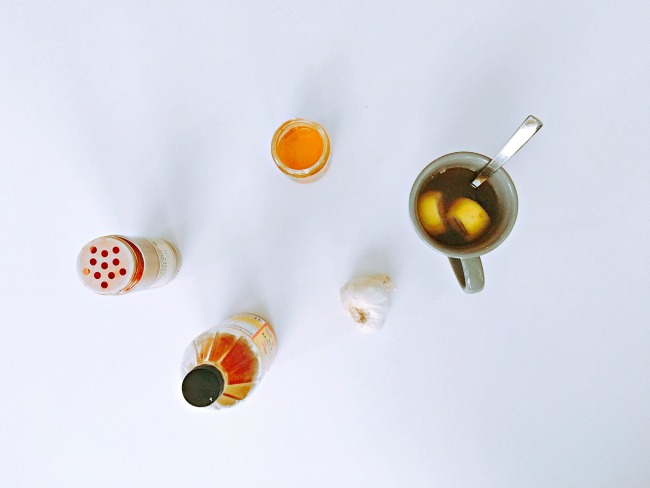
I started taking this concoction years ago when I first found out about the benefits of ACV and it’s never steered me wrong. You’ll see that I’ve used a lot of the ingredients I used in my Get Better Bone Broth for the same reasons (with the addition of lemon for its anti-viral benefits and raw honey for its antioxidant, antimicrobial, throat-soothing benefits, and because it makes EVERYTHING taste better). But this tonic is a little more accessible for those of you who aren’t quite ready to hop on the bone broth bandwagon.

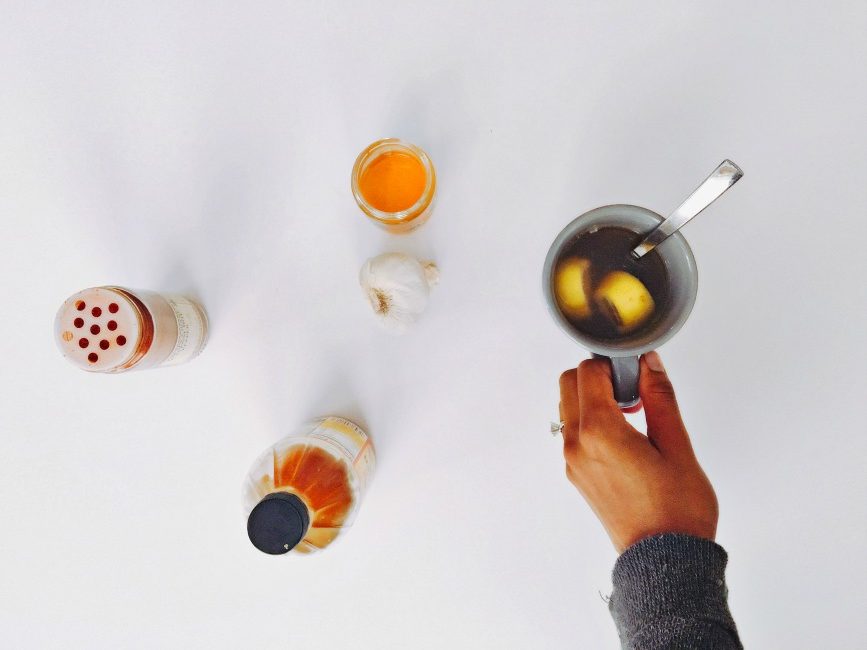
Kick In The Pants Tea

Apple Cider Vinegar Tea

Ingredients:

  • 1 cup hot water
  • 1 teaspoon Apple Cider Vinegar (I like the Bragg’s brand)
  • 1 clove of garlic, chopped
  • ½ freshly squeezed lemon
  • ¼ teaspoon cayenne pepper
  • ½-1 teaspoon raw honey

Directions:

  1. Boil water in tea kettle
  2. Add all other ingredients into your mug
  3. Pour hot water on top and stir

Day 2.
I get a horrible night’s sleep and my throat feels more swollen the next day. I double up on the bone broth (which feels like heaven on my throat; with just one sip I feel the swelling going down and the sinus pressure easing up).

I supplement my broth drinking with Breathe Easy Tea from Traditional Medicinals. (Another favorite for swollen glands and sore throats is Throat Coat, I just didn’t have any on hand).

That night, I decided I needed something to ensure that I would sleep through the night. Enter saffron.

Food Medicine # 2: Saffron

Saffron to make tea with

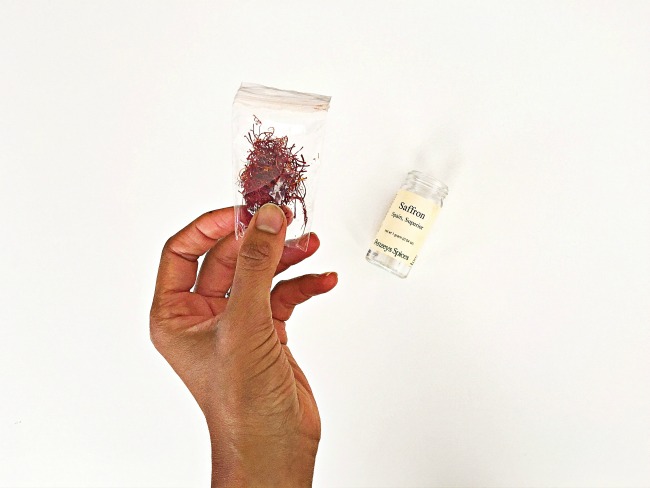
You know that spice that comes with your spice kit that kind of looks like red spider legs? That’s saffron. It’s apparently the most expensive spice in the world. That's why they only give you a little bit in each jar. But the thing is, you don’t need much to get it to work. This stuff is powerful.

Yes, I already had some from a spice kit that was gifted to me so, for me, there was no cost. But I looked it up on The Spice House Chicago website, and saw that you can get it by the gram for $12.08. And a gram is plenty for this purpose.

Saffron spice is produced from the saffron crocus flower (Crocus sativus) and it is actually the insides of the flower that catches the pollen. Among its MANY other benefits (used for asthma, cough, loosening of phlegm, gas, depression, Alzheimer’s, dry skin, PMS symptoms, fertility, and more) it has also been shown to have mild sedative properties. Meaning, when you drink this stuff, and put your head on that fluffy pillow, it hits you. Or at least it did for me. I felt instantly relaxed and lulled to sleep.

After a lot of searching around the internet, I came across about nine different people all claiming that they had “the best” way to make saffron tea. So I threw up my hands and just decided to do my own thing.

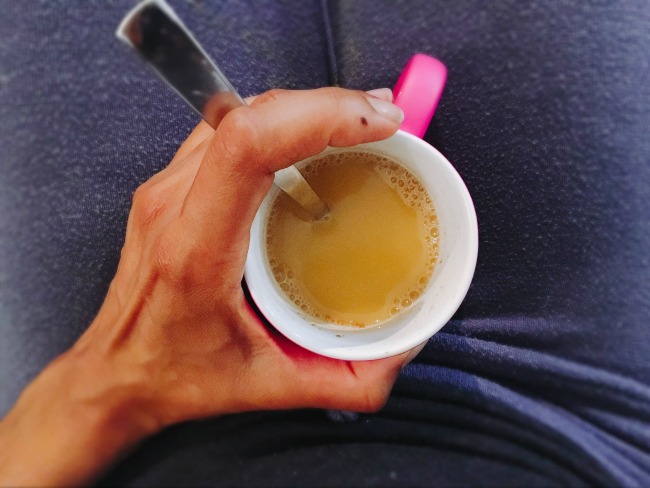
Using full fat coconut milk (real milk would be even better because it has tryptophan in it, but I didn’t have that), cinnamon for its anti-inflammatory and anti-oxidant qualities, raw honey for its antioxidant, antimicrobial and throat-soothing benefits and cardamom (I’m sure it has benefits too, but I just thought it would taste good with it), I created “the best” Saffron Sleepy Tea.

Saffron Sleepy Tea

Saffron tea for insomnia

Ingredients:

  • ½ cup of water
  • 1 cup of full-fat coconut milk or whole milk (ideally grass-fed)
  • 7-10 strands of saffron
  • ½ teaspoon cinnamon
  • ¼ teaspoon cardamom
  • ½ teaspoon raw honey

Directions:

  1. Boil ½ cup of water in a pot on the stove
  2. Add saffron and cover pot for 10 minutes
  3. Now add milk, cinnamon and cardamom and turn heat up to medium
  4. Stir until warm
  5. Add in honey
  6. Pour into a mug and sip, repeat and go to sleep.

Day 3.
The snot tap has turned on. The swollen throat has finally released itself and the nose is running like crazy. I have a love-hate relationship with this part. I know that the release of all the fluid means that it’s all coming out and I’m on my way to getting better. But it’s still a disgusting snotty drip.

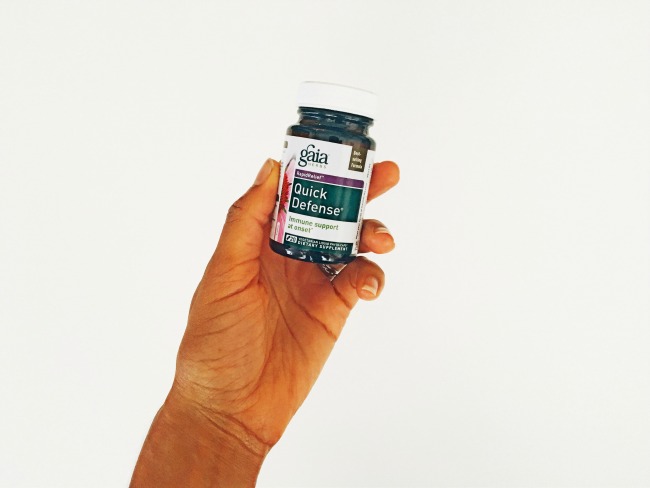
Quick Defense from Gaia Herbs

My good friend (and supplement superstar), Monica, recommends to me a product called Quick Defense from Gaia Herbs. She says it works like a charm if you take it at the onset of symptoms. A little too late for that, but I figure, it couldn’t hurt and it offered a lot of immune-boosting benefits.

Food Medicine #3: Green Drink

Green Vibrance Powder Mix

Like magic, my Green Vibrance just happened to arrive in the mail that day. I had ordered it a week or so ago as an addition to my Fertility Diet. Again, this came highly recommended to me from my supplement superstar up there. Monica recommends it to everybody she knows because of its high quality ingredients and the marked difference she feels in her energy levels when she takes it in the morning. One of her friends who suffered from a lower immunity started taking it per Monica’s recommendation and found a huge difference. In fact, it’s only when she stops drinking it that she gets sick again.

Hmmm. Fertility food AND immune booster. What is this stuff?

Well, in a really small nutshell, it’s a greens powder. But the makers of this particular product have gone to town with the types (and high concentrations) of nutrients they've packed into each scoop. Organic kale sprouts, organic broccoli sprouts, organic spirulina, chlorella, organic beet juice, organic parsley, organic spinach, organic carrot, green bean, zucchini and Rockweed sea vegetable are just the beginning. It also offers a host of other supplements to support digestion, bone strength, circulation, liver and immunity. It’s kind of like taking a multi-vitamin, a green smoothie and NZT all in one. Just kidding about the NZT (5 Gold Stars to anybody who can name this movie reference in the comments).

What I love about this, is that it takes out a lot of the thought that goes into smoothie making. I personally like to add a lot of extra boosts to my smoothies beyond the greens and the fruits. But not everybody has the money or the patience for that. Especially when sick.

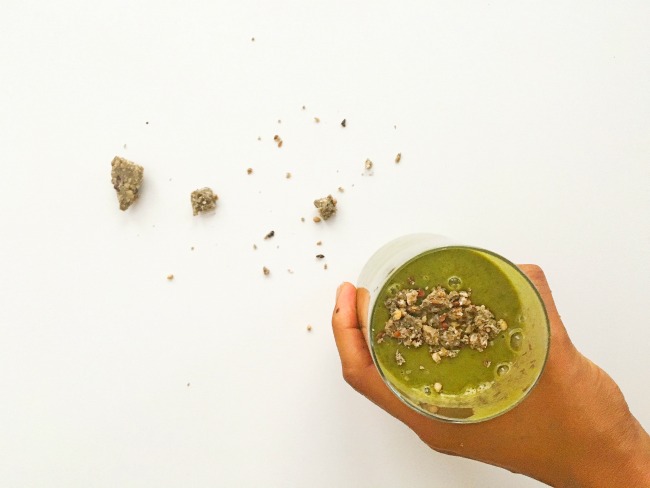
Sicko Smoothie:

Green Smoothie For Colds

Ingredients:

  • 1 scoop of Green Vibrance
  • 1 inch of turmeric root
  • Dash of pepper
  • 1 inch of ginger root
  • 1 teaspoon bee pollen
  • 2 scoops of Vital Proteins Collagen Peptides
  • Frozen pineapple
  • Almond Milk/Coconut Water (I mix the two together)
  • Optional: Superfood toppings becasue it makes it fun to drink (I used my favorite Superfood Crumble from Elemental Superfoods)

Directions:

  1. Put almond milk/coconut water in a high speed blender
  2. Add in Collagen Peptides and Green Vibrance
  3. Add in remaining ingredients
  4. Pulverize until smooth
  5. Add toppings
  6. Drink up, breathe in, breath out, feel better!

Day 4.
Feeling better today. Nose is still running, but the glands in the throat feel back to normal and I can see the end of the rainbow. Last night, I did some extreme self-care. Meaning, I put all my energy into myself – and put everything else on hold.

Food Medicine #4: Homemade Soup (with a side of Self-Care)

Self-care. It's a real thing. Seriously. When you take care of yourself first, everything else falls into place.

I don't do it very often. It usually takes extreme cases like me being sick for it to happen. So I went to town. I canceled plans with friends. I slowly and gently cleaned up things that I no longer needed and replaced batteries to a clock that stopped ticking years ago. I put my favorite men on Spotify (Sinatra and Mayer) and watched girly, cheesy movies without shame. I nestled into my rattiest but softest sweat pants. And, finally, I made myself this very special soup just for me.

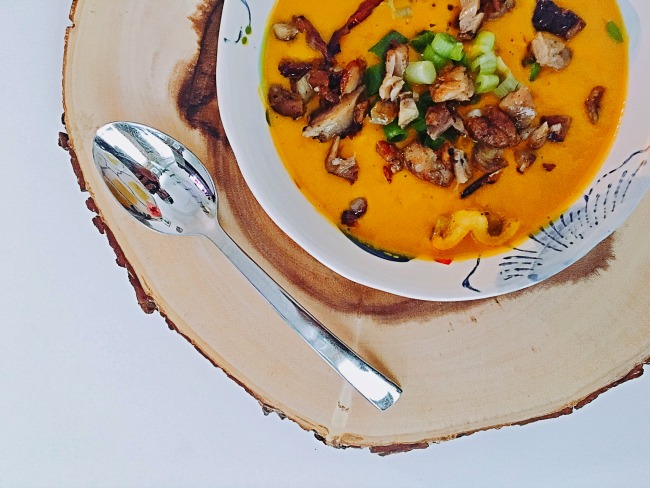
Dreamy Creamy Carrot Soup

Paleo Carrot Broth Soup

Ingredients:

  • 2 carrots
  • 1 teaspoon ghee
  • 1 inch of turmeric root
  • 1 inch of ginger root
  • 2 cloves of garlic
  • 1/3 can of full fat coconut milk
  • 1 cup of homemade bone broth
  • Sea Salt
  • Pepper
  • Optional toppings: Crispy chicken and chopped scallions

Directions:

  1. Peel and chop carrots
  2. Saute in ghee for 5 minutes-ish, until softened and a little browned
  3. Heat bone broth up on stove, bringing to a simmer over medium heat
  4. Stir in remaining ingredients
  5. Pour in high speed blender and pulverize until smooth
  6. Add toppings of your choice (I happened to have leftover chicken that I sautéed in more ghee until it was crispy, plus a dash of chopped scallions to add a bite)

Day 5.
I feel SO much better. I literally woke up, inhaled through my nose, and clapped my hands because I could smell again! My friends, I swear, I felt better than I did before the cold even began.

I still start my day with Gaia Quick Defense and a cup of bone broth for good measure. Then make another Green Vibrance smoothie for breakfast. I stare at the Tylenol Cold & Flu that has been sitting on the counter just in case of an emergency, and stuffed it back in the back of the cabinet where it belonged. Then did a little happy dance because DAMN, I’m good.

Alrighy folks, what do you do when you get sick? Do you feel the same way I do about OTC medicine? Or are you all about it and want to prove me wrong? Bring it on. Comment below.

Much Love,

HealthyStaceySignature

p.s. The links I provied are affiliate links. But because my Amazon Affiliate account lay inactive for too long, they've kicked me out. They may work in the future, so I still feel like I should let y'all know. Hot mess. I know.

p.s.s. Pin this baby! You know you'll need it come Cold & Flu season!

Natural Cold Cures

Eat The Rainbow Paleo Salad

August 17, 2016
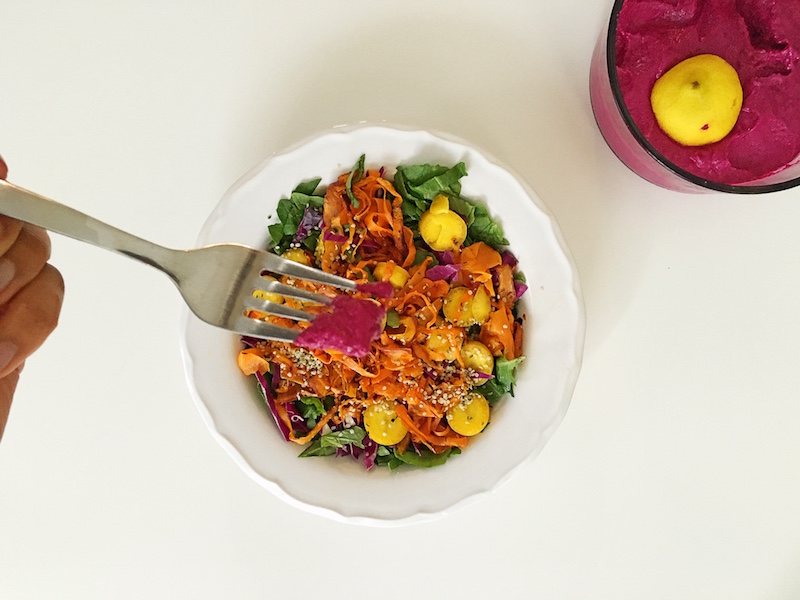
Rainbow paleo salad with fork

Rainbow paleo salad with fork

I know what you’re thinking. Are you seriously going to write a recipe for a salad? Yes. I seriously am. Because I take my salads very seriously. And I really do not understand why they are so underrated as a meal. They’re either the obligatory side dish or a necessary evil in dieting hell.

WHY?

I think it’s because people are making them the wrong way.

What are you putting in your salads? Lettuce. Tomatoes. Cucumber. Ranch. Ugh. That is SO 10 years ago. Where's the color? Where's the variety? Where's the WHOLE REASON we eat salads? To give us one big dose of highly nutritious ingredients all at once. Duh!

Salads – done right – can be showstoppers. In one bite, you can have crunchy, creamy, crispy and kale-y goodness. You can bring ingredients together that normally never associate with each other – for one big party in a bowl. Mango and avocado. Kale and pomegranate. Almond butter and charred broccoli.

Saute a few carrot shreds in coconut oil, caramelize some onions in ghee, add some well-seasoned chicken, juicy ground beef or even a tin of tuna on top, and you’ve got yourself one of the best entrées on the menu, my friends. (Note: I do not mean combine all these ingredients together. That's just silly).

Becasue I am concerned for your relationship with this vital meal, today, I share with you…

The BEST salad I ever made.

No joke. Search this entire blog and I’ve never said that before because it’s a bold claim.

This baby is warm yet cool, crunchy and creamy, melts in your mouth, but with a refreshing finish. And best part, it’s SO full of nutrients. You know how I know why? Because it’s RAINBOW COLORED!

Random flashback moment:

Rainbow Brite flashback.

ANYWAYS.

Where was I? Colors, right. Different nutrients give different colors to the foods they are in. And get this. It's all on purpose. Mother nature planned it that way. GENIUS!

Plants can't get up and walk around, right? So the way they literally spread their seed is by attracting animals and organisms to them with their good looks and vibrant colors. Animal likes what he sees. Animal eats. Animal hops, crawls, runs, or flies away. Animal poops out seeds somewhere else. And tada! A whole new pretty plant. So it's in their favor to stand out and look attractive.

But wait! There's more.

In addition to the pigments looking good, they also can protect the plant from UV damage, enable photosynthesis, and even act as antioxidants for the plants. The better the protection they provide, the longer they live. We humans, in turn, cash in on these benefits when we eat the plants ourselves.

Which brings me back to this beautiful salad. Let's see what we got here…

Red Cabbage
The blue tint in red cabbage (anthocyanins) –> keeps your mind sharp.

Green Kale
The deep green in kale (indoles and isothiocyanates)–> increases the production of enzymes that clear toxins from the body.

Orange Carrots and Sweet Potatoes
The orange in carrots and sweet potatoes (beta carotene) –> keeps your bones strong, your eyes healthy and boosts your immune system.

Crimson in Beets
The dark crimson in beets (Betacyanins) –> works in conjunction with vitamin C and manganese to offer benefits for eye health and overall nerve tissue health in addition to functioning as anti-inflammatory compounds.

Boom.

Forget the weird, unpronouncable words. Just eat the colors! Eat all of them. Red, orange, yellow, green blue, purple. Look out for them at the grocery store. Try weird veggies just because they're colorful. ROYGBV it up!

They're not just good for you, they're just plain GOOD.

You ready for this? I thought so.

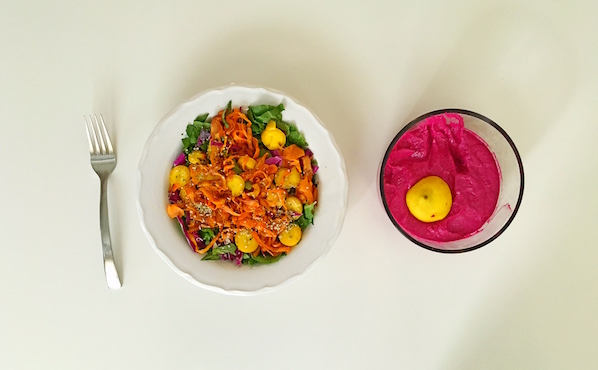
Rainbow paleo salad

Ingredients:

  • 2 Heirloom Carrots
  • 1 Small Sweet Potato
  • 1-2 Tablespoons Coconut Oil
  • Bowlful of Kale
  • Red Cabbage, chopped
  • Hemp Seeds
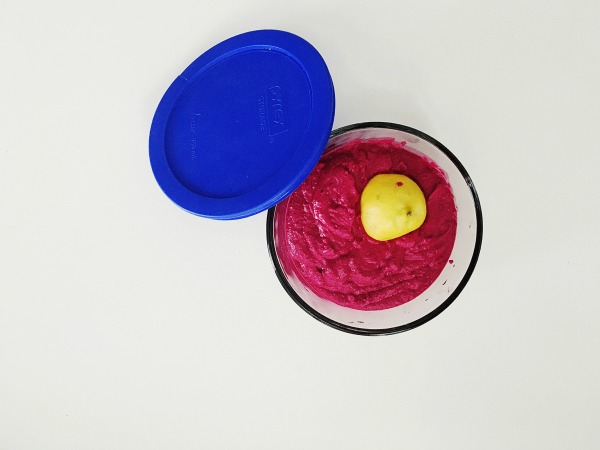
  • 1 Tablespoon Beet Dip – See here for beet dip recipe.

Dressing Ingredients:

  • 2 tablespoons Apple Cider Vinegar
  • 1/4 cup Extra Virgin Olive Oil
  • Salt and Pepper, to taste

Directions:

  1. Shred one carrot; chop the other carrot. Set aside.
  2. Shred the sweet potato using a vegetable peeler. Don't kill yourself trying to shred the whole thing up. Just get as far down as is comfortable and use the rest of the potato to chop up and saute later if you'd like.
  3. Heat coconut oil on pan and toss sweet potato shreds on. Saute until slightly crispy – 5 minutes-ish. Remove from pan to a side plate.
  4. Add more coconut oil to the pan and toss on carrot shreds. Saute until slightly crispy – 3 minutes-ish. Add shreds to sweet potato plate.
  5. Chop up kale so that it’s in nice bite-sized pieces. Put in salad bowl.
  6. Mix in red cabbage and chopped carrots.
  7. Top with sweet potato and carrot shreds.
  8. Scoop beet dip on top. Note, it's not TOTALLY necessary if you don't have the time to make it, but I highly recommend it. It's kind of what sends this salad over the edge. Might I suggest, too, that you just use sliced cooked beets as an addition if you don't want to make the dip.
  9. Sprinkle with hemp seeds.

Paleo Beet Dip with a lemon wedge


Much Love,

http://www.healthystacey.com/wp-content/uploads/2015/07/HealthyStaceySignature.jpg

P.S. Make it easy on yourself and Pin this baby!

 Eat The Rainbow Salad Pin

Rainbow paleo salad
Eat The Rainbow Paleo Salad
Print Recipe
Rainbow paleo salad
Eat The Rainbow Paleo Salad
Print Recipe
Ingredients
ACV Dressing
Servings:
Instructions
  1. Shred one carrot; chop the other carrot.
  2. Shred the sweet potato using a vegetable peeler. Don't kill yourself trying to shred the whole thing up. Just get as far down as is comfortable and use the rest of the potato to chop up and saute later if you'd like.
  3. Heat coconut oil on pan and toss sweet potato shreds on. Saute until slightly crispy – 5 minutes-ish. Remove from pan to a side plate.
  4. Add more coconut oil to the pan and toss on carrot shreds. Saute until slightly crispy – 3 minutes-ish. Add shreds to sweet potato plate.
  5. Chop up kale so that it’s in nice bite-sized pieces. Put in salad bowl.
  6. Mix in red cabbage and chopped carrots.
  7. Top with sweet potato and carrot shreds.
  8. Scoop beet dip on top. Note, it's not TOTALLY necessary if you don't have the time to make it, but I highly recommend it. It's kind of what sends this salad over the edge. Might I suggest, too, that you just use sliced cooked beets as an addition if you don't want to make the dip.
  9. Sprinkle with hemp seeds.
  10. Pour ACV dressing on top and aggressively mix it all together.
Share this Recipe
Powered byWP Ultimate Recipe